

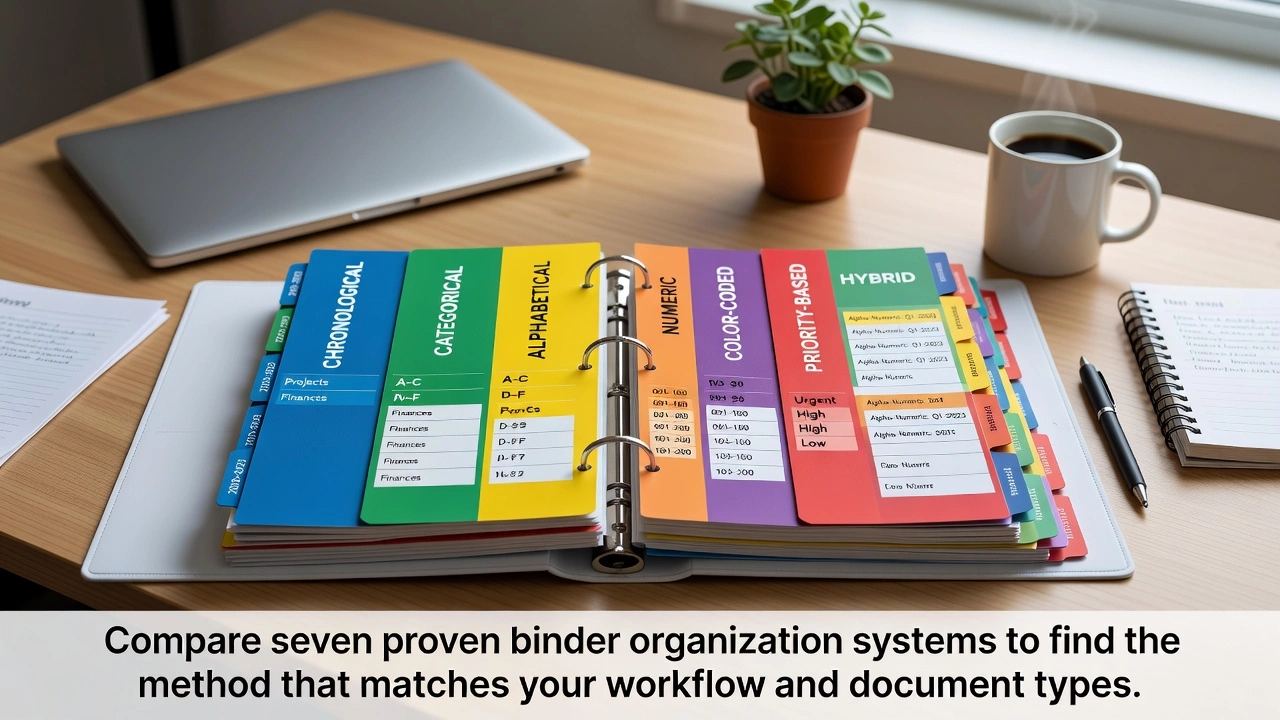
Staring at a bulging binder full of crumpled papers, unable to find that one critical document—this frustration costs professionals hours each week and students valuable study time. The problem is not the binder itself, but the lack of a consistent binder organization system.
This guide compares seven proven binder organization systems, revealing their strengths, weaknesses, and ideal use cases. You’ll discover which method matches your natural thinking patterns, learn step-by-step implementation, and gain decision frameworks that eliminate guesswork. Whether organizing work projects, school subjects, or household documents, one of these systems will transform your binder from cluttered chaos into an efficient tool.
Understanding Binder Organization Systems
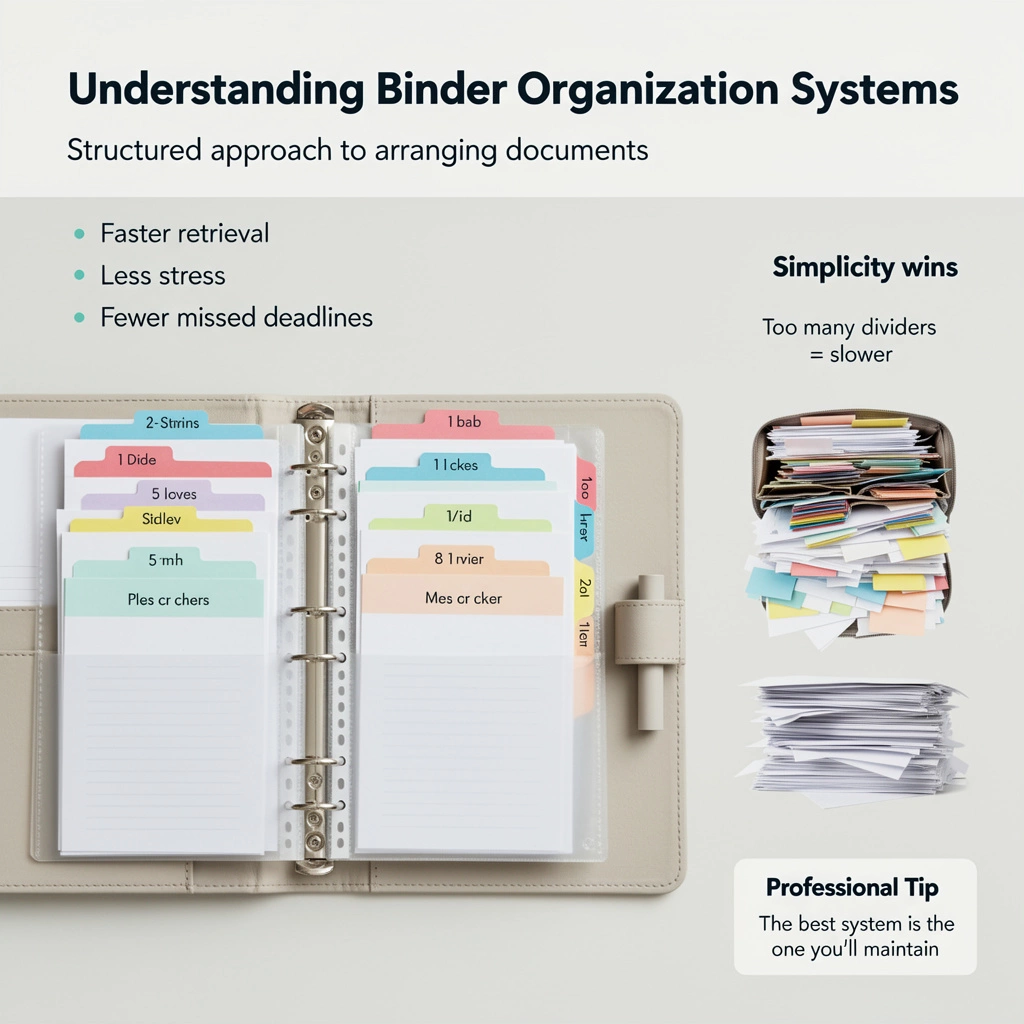
A binder organization system is a structured approach to arranging documents within a three-ring binder. Unlike random filing, these systems follow consistent logic that makes retrieval predictable and fast.
Why Organization Systems Matter:
Every time you open your binder, your brain performs a search operation. Effective systems reduce search time from minutes to seconds by aligning organization with how you think about your documents.
Disorganized binders create three costly problems:
- Time waste: Searching for documents interrupts workflow and breaks concentration
- Missed deadlines: Important papers get buried under less urgent materials
- Stress accumulation: Visual clutter creates mental burden and reduces confidence
Professional Tip: The best binder organization system is the one you’ll actually maintain. Simplicity beats complexity every time.
Common Misconception: More dividers equal better organization. False. Too many divisions fragment information and slow retrieval. Most effective systems use 5-12 main sections maximum.
The 7 Main Binder Organization Systems
Chronological System
The chronological system organizes documents by date, placing newest materials at the front or back depending on preference.
How It Works:
Documents are filed in date order—either newest-to-oldest (reverse chronological) or oldest-to-newest (traditional chronological). Dividers typically mark months, quarters, or project phases.
Example Setup:
text- Current Week (no divider needed—front of binder)
- January
- February
- March
- Archive (older than 90 days)
Benefits:
- Natural for time-sensitive workflows (project management, meeting notes)
- Shows progression and history clearly
- Easy to purge old materials on schedule
- Matches how we remember events (“that was in March”)
Limitations:
- Difficult to find documents by topic without dates
- Requires date stamping all materials
- Not ideal for reference materials used repeatedly
- Can become cluttered if not regularly purged
Common Mistakes:
Mixing dated and undated materials creates confusion. Always add dates to undated documents before filing.
Keeping everything forever defeats the purpose. Set retention schedules (example: keep monthly materials for one year, quarterly summaries for three years).
Best For:
- Project timelines and status reports
- Meeting notes and action items
- Financial records and receipts
- Correspondence and communications
- Progress tracking and journals
Professional Tip: Use reverse chronological (newest first) for active projects where recent information matters most. Use traditional chronological (oldest first) for historical records and archives.
Quick Summary: Choose chronological systems when timing is your primary search criterion.
Categorical System
The categorical system groups documents by subject, topic, or content type, creating logical divisions based on what papers represent rather than when they were created.
How It Works:
Materials are separated into major categories with clearly labeled dividers. Within each category, documents can be arranged chronologically, alphabetically, or by subcategory.
Example Setup (Student):
text- Math
- Science
- History
- English
- Electives
- School Administration
Example Setup (Professional):
text- Client Work
- Internal Projects
- Administrative
- Professional Development
- Reference Materials
Benefits:
- Matches how we think about content (“where’s my science homework?”)
- Excellent for multiple-topic binders
- Flexible category creation
- Easy to explain to others using the binder
Limitations:
- Documents fitting multiple categories create confusion
- Requires upfront category planning
- Categories can become unbalanced (one huge, others empty)
- Harder to identify outdated materials for purging
Common Mistakes:
Creating too many narrow categories fragments information. Start with 5-7 broad categories, add subcategories only when a section exceeds 30 pages.
Using vague category names like “Miscellaneous” or “Other” leads to dumping grounds. Every category should have a clear definition of what belongs.
Best For:
- Student binders covering multiple subjects
- Reference material collections
- Training and instruction manuals
- Multi-project workloads
- Recipe and hobby collections
Professional Tip: Place your most-used category at the front of the binder, regardless of alphabetical or logical order. Efficiency beats perfection.
Test category logic with the “5-second rule”: If you can’t decide where a document belongs within 5 seconds, your categories are too similar or too numerous.
Quick Summary: Choose categorical systems when documents naturally group by topic or subject.
Alphabetical System
The alphabetical system arranges documents by names, titles, or labeled categories in A-Z order.
How It Works:
Primary sorting follows alphabetical sequence. This might be client names, document titles, vendor names, or alphabetized categories.
Example Setup (Client Files):
text- A-C
- D-F
- G-J
- K-M
- N-R
- S-T
- U-Z
Example Setup (Reference Materials):
text- Benefits Information
- Company Policies
- Emergency Procedures
- Equipment Manuals
- Safety Guidelines
- Training Materials
Benefits:
- Universal understanding—everyone knows the alphabet
- Fast filing and retrieval when you know names
- Scales well as collections grow
- Professional appearance for shared binders
Limitations:
- Requires knowing exact names/titles to retrieve documents
- Unbalanced sections (many S-names, few X-names)
- Doesn’t show relationships between related documents
- Poor for unnamed or untitled materials
Common Mistakes:
Inconsistent naming creates filing chaos. Decide filing rules upfront: “McDonald’s” vs. “McDonalds,” “The Williams Group” vs. “Williams Group,” “123 Company” vs. “One Two Three Company.”
Alphabetizing by first name instead of last name for people. Use “Smith, John” not “John Smith” for professional consistency.
Best For:
- Client or customer files
- Vendor and supplier documentation
- Contact information and directories
- Policy and procedure manuals
- Alphabetized resource collections
Professional Tip: For large alphabetical systems (100+ items), use two-letter dividers (AA-AM, AN-AZ, BA-BL, etc.) to reduce search time.
Create an index page at the front listing all filed items with page references. Update monthly.
Quick Summary: Choose alphabetical systems when you search by names or titles.
Numeric System
The numeric system assigns sequential numbers to documents or categories, organizing materials by these reference numbers.
How It Works:
Each document receives a unique number. An index or table of contents connects numbers to content descriptions. Filing follows numerical sequence.
Example Setup:
text- 000-099: Project Initiation
- 100-199: Planning Phase
- 200-299: Execution
- 300-399: Monitoring
- 400-499: Closure
- 500+: Archive
Benefits:
- Unlimited expansion capacity—always add higher numbers
- Prevents misfiling in wrong categories
- Professional structure for complex systems
- Works well with indexed systems
- Supports cross-referencing
Limitations:
- Requires index maintenance
- Meaningless without reference key
- Higher learning curve for new users
- Number assignment adds filing step
Common Mistakes:
Skipping the index creation. Without an index, numeric systems become useless puzzles.
Using numbers inconsistently. Establish whether to file newest-to-oldest or oldest-to-newest and maintain that pattern.
Best For:
- Legal documents and case files
- Technical documentation
- Standard operating procedures (SOPs)
- Quality management systems
- Government and regulatory compliance
- Medical records and patient files
Professional Tip: Use leading zeros (001, 002, 010, 100) to maintain proper numerical order and allow expansion. “10” files before “2” without leading zeros.
Combine with color-coding by category (blue = 100s, green = 200s) to add visual navigation.
Quick Summary: Choose numeric systems for formal documentation requiring precise referencing.
Color-Coded System
The color-coded system assigns specific colors to categories, using colored dividers, tabs, or page flags to create visual organization cues.
How It Works:
Each category receives a designated color. Colored dividers separate sections, and sometimes colored paper, stickers, or tabs mark individual documents within categories.
Example Setup (Student):
text- Red divider: Math
- Blue divider: Science
- Green divider: History
- Yellow divider: English
- Orange divider: Electives
Example Setup (Office):
text- Purple: Urgent/Action Required
- Blue: Current Projects
- Green: Completed Projects
- Yellow: Reference/Resources
- Red: Administrative
Benefits:
- Fastest visual scanning—brain processes color before text
- Reduces reading time searching for sections
- Excellent for visual learners
- Makes binder sharing easier
- Adds organizational appeal
Limitations:
- Requires consistent color supply
- Color meanings must be memorized
- Difficult for colorblind users
- More expensive than plain dividers
- Can become chaotic with too many colors
Common Mistakes:
Using too many colors creates rainbow confusion. Limit to 5-7 colors maximum. More colors reduce the brain’s ability to quickly differentiate.
Changing color assignments. Once “red means urgent,” maintain that meaning across all binders for consistency.
Best For:
- Visual learners and visual professions
- Shared binders used by multiple people
- High-speed environments requiring quick access
- Children’s organization systems
- Teaching materials
- Medical settings with color-coded alerts
Professional Tip: Combine color-coding with another system (categorical, alphabetical, or priority) rather than using color alone. Color should enhance, not replace, logical organization.
Use color consistently across all your organizational systems. If blue means “financial” in one binder, maintain that meaning in all binders.
Quick Summary: Choose color-coding to enhance another system with visual speed.
Priority-Based System
The priority-based system organizes documents by importance, urgency, or status—placing most critical items in the most accessible position.
How It Works:
Documents are filed based on action status or importance level rather than content type or date. Active/urgent materials stay at front; completed/archived items move to back.
Example Setup:
text- Action Required (Front)
- In Progress
- Pending Review
- Reference (use as needed)
- Completed/Archive (Back)
Example Setup (Importance):
text- Critical/Daily Use
- Important/Weekly Use
- Useful/Monthly Use
- Archive/Rare Use
Benefits:
- Most important items always accessible
- Matches workflow and task management
- Natural paper flow from new to archived
- Reduces time searching for current work
- Encourages regular document review
Limitations:
- Requires frequent reorganization as priorities change
- Document priority can be subjective
- Doesn’t work well for reference materials
- Can neglect archived items that still have value
Common Mistakes:
Leaving completed items in “action” sections. Move finished work immediately to maintain system integrity.
Creating too many priority levels. Three to five levels work best—more creates decision paralysis during filing.
Best For:
- Task and project management
- Sales pipelines and prospect tracking
- Customer service workflows
- Action-oriented work environments
- GTD (Getting Things Done) implementations
- Executive briefing books
Professional Tip: Schedule weekly “priority review” sessions. Move completed items to archive, reassess current priorities, and ensure action items haven’t been forgotten.
Use page flags or sticky notes to mark specific priority items within sections for even faster access.
Quick Summary: Choose priority-based systems when urgency and action status drive your work.
Hybrid System
The hybrid system combines two or more organization methods to handle complex documentation needs that single systems can’t address.
How It Works:
A primary organizational method provides the main structure, while secondary methods organize within categories.
Example Setup (Categorical + Chronological):
text[Primary: Categories]
  - Client A
    [Secondary: Reverse Chronological]
    - March  documents
    - Februar documents
    - January  documents
  - Client B
    [Secondary: Reverse Chronological]
    - March   documents
    - February   documents
Example Setup (Priority + Categorical):
text[Primary: Priority]
  - Action Required
    [Secondary: Categories]
    - Finance items needing action
    - HR items needing action
    - Operations items needing action
  - Reference
    [Secondary: Alphabetical]
    - Alphabetized reference materials
Benefits:
- Handles complex, multi-dimensional information
- Balances different retrieval needs
- More flexible than single-method systems
- Adapts to changing requirements
- Solves “doesn’t fit anywhere” problems
Limitations:
- More complex to maintain
- Higher learning curve for new users
- Risk of over-complicating simple needs
- Requires clear documentation of system logic
Common Mistakes:
Combining incompatible methods. Alphabetical + numeric makes sense; chronological + alphabetical usually creates confusion.
Adding complexity unnecessarily. Start with the simplest system that works. Add hybrid elements only when clear problems emerge.
Best For:
- Complex multi-client work
- Long-term projects with multiple workstreams
- Academic research across multiple topics
- Business operations spanning departments
- Comprehensive household management
- Professional portfolios and credentials
Professional Tip: Document your hybrid system logic on the inside cover or first page. Example: “Organized by client (alphabetical), then by project phase (chronological within each client).”
Limit to two organizational methods maximum. Combining three or more methods creates unusable complexity.
Quick Summary: Choose hybrid systems when multiple organization needs require different approaches.
System Comparison Table
| System | Primary Logic | Search Method | Best Document Types | Maintenance | Difficulty | Speed |
|---|---|---|---|---|---|---|
| Chronological | Date/Time | “When was this?” | Time-sensitive, dated materials | Monthly purge | Easy | Fast |
| Categorical | Topic/Subject | “What topic?” | Multi-subject, reference | Quarterly review | Easy | Medium |
| Alphabetical | Names/Titles | “What’s it called?” | Named items, clients | Low—add as needed | Easy | Fast |
| Numeric | Sequential numbers | Reference index | Technical docs, SOPs | Index updates | Medium | Medium |
| Color-Coded | Visual categories | Visual scan | High-volume, shared binders | Color supply check | Easy | Very Fast |
| Priority-Based | Importance/Status | “How urgent?” | Task-driven, action items | Weekly reorganization | Medium | Very Fast |
| Hybrid | Combined methods | Multi-step | Complex, multi-dimensional | Variable | Medium-Hard | Variable |
How to Choose Your System
Step 1: Identify Your Primary Search Question
When you need a document, what’s the first thing you think?
- “When did I create this?” → Chronological
- “What topic is this?” → Categorical
- “Who is this about?” → Alphabetical
- “What’s the reference number?” → Numeric
- “Which color section?” → Color-Coded
- “Is this urgent?” → Priority-Based
- “It depends on the situation” → Hybrid
Step 2: Assess Document Types
Match your content to system strengths:
- Dated materials (receipts, meeting notes, correspondence): Chronological
- Multiple subjects (school, multi-project work): Categorical
- Named files (clients, vendors, contacts): Alphabetical
- Sequential processes (procedures, regulations): Numeric
- Quick-access needs (shared binders, visual work): Color-Coded
- Workflow-driven (tasks, active projects): Priority-Based
Step 3: Consider Your Work Style
- Visual thinker: Color-Coded or Categorical
- Task-focused: Priority-Based
- Detail-oriented: Numeric or Alphabetical
- Timeline-focused: Chronological
- Flexible/adaptive: Categorical or Hybrid
Step 4: Evaluate Sharing Needs
- Solo use: Any system works—choose what matches your thinking
- Team use: Alphabetical, Numeric, or Color-Coded (clearest to others)
- Occasional sharing: Categorical with clear labels
Step 5: Test Your Choice
Implement your selected system for 30 days. Track:
- How often you find documents within 30 seconds
- How often you hesitate about where to file
- Whether maintenance feels sustainable
If success rate falls below 80%, reassess using the decision framework.
Implementation Steps
Phase 1: Preparation (30-60 minutes)
Step 1: Gather all materials currently in the binder and any loose papers that belong.
Step 2: Collect supplies:
- Dividers with tabs (quantity depends on system)
- Labels or label maker
- Hole punch and reinforcement tabs
- Pen for labeling
- Recycling bin for purge
Step 3: Review documents and make purge decisions:
Keep if:
- Currently relevant
- Legally required
- Referenced regularly
- Irreplaceable
Discard if:
- Duplicates
- Outdated information
- Available digitally elsewhere
- Past retention period
Step 4: Choose and document your system. Write it down.
Phase 2: Setup (45-90 minutes)
Step 5: Create and label dividers according to your chosen system.
Label clearly and specifically:
- ✓ “Client Communications “
- ✗ “Misc”
Step 6: Sort documents into piles matching your divider categories.
Step 7: Within each category, arrange papers according to secondary organization (if using hybrid) or simple chronological order.
Step 8: Insert dividers and load documents into binder.
Step 9: Create index or table of contents on first page listing:
- Divider labels
- Date of organization
- System type
- Page ranges (if applicable)
Phase 3: Testing (Week 1)
Step 10: Use the binder normally but track:
- Papers you can’t find quickly
- Items that don’t fit the system
- Sections that overflow
Step 11: Make minor adjustments:
- Add dividers for overflow sections
- Relabel unclear categories
- Create “pending filing” pocket for items needing processing
Step 12: Establish daily routine:
- File new papers immediately or in a daily batch
- Remove completed items
- Flag action items
Common Mistakes to Avoid
Mistake 1: Over-Organizing
Problem: Creating 20+ divider sections for 50 pages of content.
Solution: Start with 5-7 main sections. Add divisions only when a section exceeds 30-40 pages.
Why It Matters: Too many divisions fragment information and slow retrieval. Your brain processes 5-7 categories efficiently; beyond that, decision time increases.
Mistake 2: No Maintenance Schedule
Problem: The binder stays organized for two weeks, then degrades into chaos.
Solution: Schedule recurring maintenance:
- Daily: File loose papers (5 minutes)
- Weekly: Remove completed items (10 minutes)
- Monthly: Full review and purge (30 minutes)
- Annually: System evaluation and overhaul (2 hours)
Why It Matters: All organization systems require maintenance. No schedule means guaranteed failure.
Mistake 3: Mixing Systems Randomly
Problem: Using chronological for some sections, categorical for others, with no clear logic.
Solution: Choose one primary system. If mixing (hybrid), document the logic clearly and maintain it consistently.
Why It Matters: Random mixing creates confusion about where to file and retrieve documents.
Mistake 4: Keeping Everything Forever
Problem: The binder becomes a 4-inch overstuffed brick that’s impossible to use.
Solution: Establish retention guidelines:
- Active documents: Keep in main binder
- Completed/referenced occasionally: Move to archive binder
- Outdated/replaced: Discard or digitize
Why It Matters: Useful organization means having what you need accessible. Buried in clutter equals lost.
Mistake 5: Vague Labeling
Problem: Divider labels like “Stuff,” “Random,” “Misc,” or “Important.”
Solution: Use specific, descriptive labels that answer “what belongs here?”
Examples:
- ✓ “Vendor Invoices “
- ✓ “Biology Class Notes”
- ✓ “Active Client Projects”
- ✗ “Papers”
- ✗ “Things to keep”
Why It Matters: Vague labels lead to dumping grounds where documents go to die.
Mistake 6: No Index for Complex Systems
Problem: Using numeric or extensive alphabetical systems without creating a reference index.
Solution: Maintain an updated index on the first page or inside cover listing what’s where.
Why It Matters: Complex systems become unusable puzzles without finding aids.
Mistake 7: Wrong System for Document Type
Problem: Using priority-based organization for reference materials that have no urgency.
Solution: Match system to document characteristics using the decision framework above.
Why It Matters: Fighting your natural retrieval process creates friction and abandoned systems.
Maintenance Strategies
Daily Maintenance (5 minutes)
Immediate filing: File papers the same day they enter your world. Designate a “to file” pocket if you can’t file immediately.
Quick scan: Glance through current sections for obviously outdated items (yesterday’s meeting agenda for completed meetings).
Action flagging: Mark urgent items with removable flags or sticky notes for instant visibility.
Weekly Maintenance (10-15 minutes)
Archive completed items: Move finished project documents to archive sections or separate binders.
Category balance check: Scan for sections that have grown disproportionately large—may need subdivision.
Supply check: Verify you have labels, dividers, and reinforcements for next week’s needs.
Monthly Maintenance (30 minutes)
Full purge review:
- Remove outdated materials
- Recycle duplicates
- Digitize and discard bulky items
- Check retention policies
System adjustment:
- Add needed dividers
- Consolidate underused sections
- Update index or table of contents
Physical binder care:
- Replace damaged sheet protectors
- Add hole reinforcements to torn pages
- Replace worn dividers
Quarterly Maintenance (1 hour)
Deep organization review:
- Assess whether current system still serves needs
- Identify patterns in hard-to-file documents
- Consider system adjustments
Archive migration:
- Move older materials to archive binders
- Label archive binders clearly with date ranges
- Store in designated location
Binder inventory:
- Create list of all binders and their contents
- Note location of archived binders
- Update retention schedule
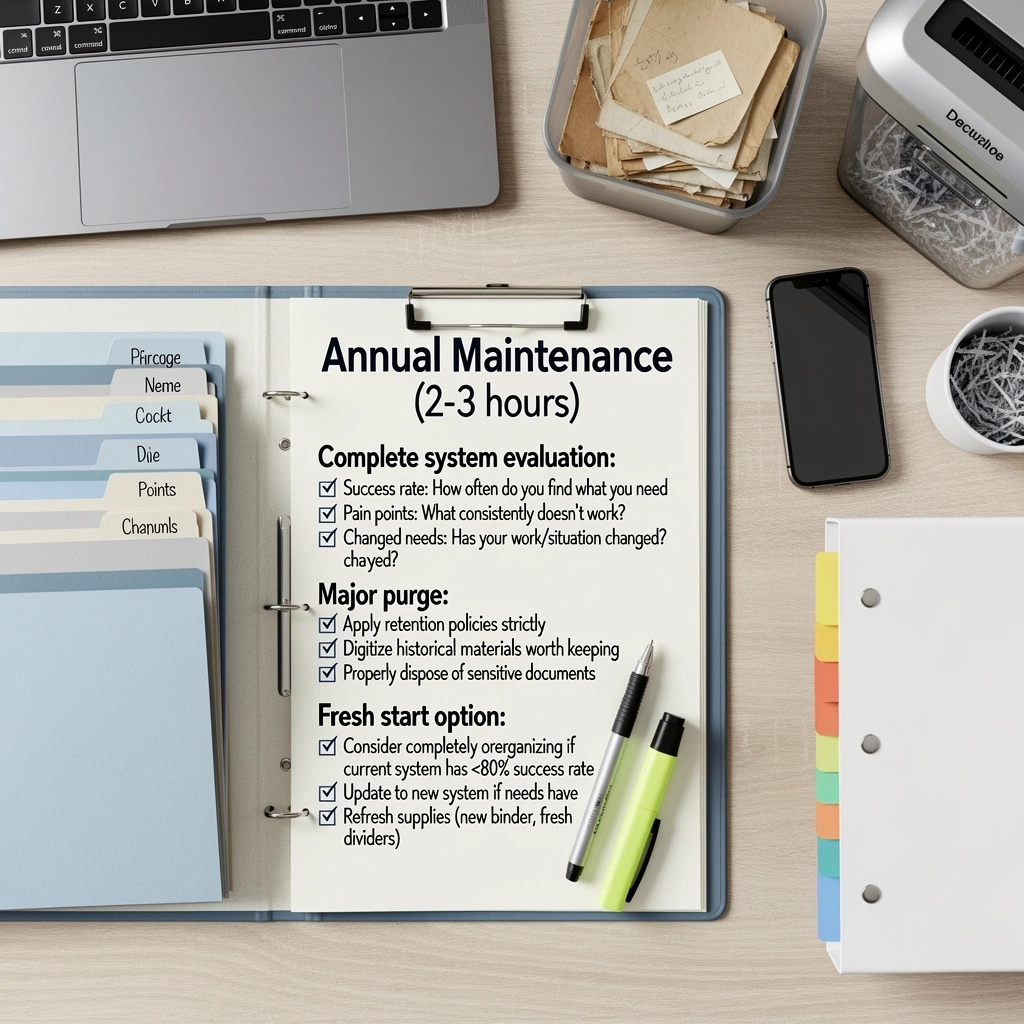
Annual Maintenance (2-3 hours)
Complete system evaluation:
- Success rate: How often do you find what you need quickly?
- Pain points: What consistently doesn’t work?
- Changed needs: Has your work/situation changed?
Major purge:
- Apply retention policies strictly
- Digitize historical materials worth keeping
- Properly dispose of sensitive documents
Fresh start option:
- Consider completely reorganizing if current system has <80% success rate
- Update to new system if needs have fundamentally changed
- Refresh supplies (new binder, fresh dividers)
Use Case Recommendations
For Students (High School/College)
Recommended System: Categorical (by subject) + Chronological (within each subject)
Setup:
- One divider per class/subject
- Within each subject: current materials at front, older materials behind
- Separate “graded work” section for returned assignments
Supplies:
- 1.5″ or 2″ binder (for full semester)
- 6-8 dividers with pockets
- Hole punch for handouts
- Small pencil pouch for supplies
Maintenance: Weekly purge of returned/graded work not needed for finals.
For Office Professionals (Client Work)
Recommended System: Alphabetical (by client) + Priority (within each client)
Setup:
- Primary divisions by client name (alphabetical)
- Within each client: active projects front, reference materials back
- Shared “administrative” section for general office materials
Supplies:
- 2″ or 3″ binder for active clients
- Archive binder for completed client work
- Color-coded dividers (one color per client for quick visual reference)
- Index page listing all clients
Maintenance: Monthly migration of completed client work to archive binder.
For Home Management
Recommended System: Categorical + Priority for active household areas
Setup:
text- Medical (current year records)
- Financial (tax-deductible receipts, statements)
- Home Maintenance (warranties, manuals, service records)
- School/Children (current year only)
- Insurance/Legal
- Reference (frequently needed info)
Supplies:
- 2″ binder for current year
- Annual archive binders labeled by year
- Sheet protectors for frequently referenced documents
Maintenance: Quarterly review; annual migration to archive binder at tax time.
For Teachers/Educators
Recommended System: Categorical (by unit/topic) + Chronological (by semester/year)
Setup:
- Dividers by curriculum unit or teaching topic
- Within units: current semester materials front, previous years archived
- Separate “administrative” section
Supplies:
- One binder per course/subject
- Color-coded dividers by unit
- Sheet protectors for master copies of worksheets
Maintenance: End-of-semester purge and reorganization.
For Project Management
Recommended System: Priority-Based + Categorical for complex projects
Setup:
text- Action Required (immediate next steps)
- In Progress (active workstreams)
- Pending (waiting on others)
- Reference (project documents, specs)
- Completed (archived project phases)
Supplies:
- 3″ binder for active projects
- Separate archive binder per completed project
- Tabbed dividers with pockets
- Project index on inside cover
Maintenance: Weekly review and priority updates; monthly completion archiving.
Supplies and Tools
Essential Supplies
Three-Ring Binders:
- 1″ binder: Up to 175 sheets (light use, single subject)
- 1.5″ binder: Up to 300 sheets (standard student/office use)
- 2″ binder: Up to 400 sheets (comprehensive projects)
- 3″ binder: Up to 600 sheets (extensive reference, multi-year)
Dividers:
- Standard tab dividers (8-tab or 5-tab sets)
- Dividers with pockets (for loose items)
- Insertable tab dividers (for custom labels)
- Color-coded divider sets
Paper Protection:
- Hole reinforcement tabs (for frequently referenced pages)
- Sheet protectors (for important documents)
- Three-hole punch (desktop or portable)
Labeling:
- Label maker (for professional appearance)
- Write-on tabs
- Adhesive labels
- Permanent markers
Optional Enhancement Tools
Organization Aids:
- Binder pencil pouches (for supplies, small items)
- Zip pouches (for business cards, receipts)
- CD/DVD sleeves (for digital media)
- Business card holders
Retrieval Aids:
- Page flags/sticky tabs (marking specific pages)
- Colored page markers
- Index tabs
Maintenance Tools:
- Three-hole punch with adjustable guides
- Paper trimmer (for oversized documents)
- Scissors
- Stapler and staple remover
Quality Considerations
When to Invest in Premium:
- Daily-use binders: Heavy-duty with reinforced rings
- Frequently transported binders: Padded or hard covers
- Long-term storage: Acid-free materials
- Professional presentation: Leather or professional covers
When Standard Quality Works:
- Short-term projects
- Temporary organization
- Archived materials (rarely accessed)
- Student binders replaced annually
Frequently Asked Questions
How many dividers should I use in one binder?
Use 5-12 dividers for most applications. Fewer than 5 means you’re probably not organizing enough; more than 12 fragments information and slows retrieval. Research shows the human brain processes 5-9 categories most efficiently.
Exception: Alphabetical systems may use more dividers (A-Z or grouped letters), but this represents one logical system, not 26 separate categories.
Start minimal. Add dividers only when a section exceeds 30-40 pages and natural subdivisions become apparent.
Can I use different organization systems in different binders?
Yes, absolutely. Use the system that matches each binder’s content and purpose. Your work binder might use client-based alphabetical organization while your home binder uses categorical organization.
The key is consistency within each binder. Don’t mix systems randomly in a single binder without clear hybrid logic.
Many people successfully maintain:
Chronological for financial records
Categorical for work projects
Alphabetical for client files
Priority-based for active task lists
How often should I replace my binder organization system?
Review annually; change only when clear problems emerge. Organization systems should be stable, not constantly changing.
Replace your system when:
Your retrieval success rate drops below 80%
Your work or life situation changes fundamentally
The current system creates consistent frustration
You find yourself working around the system rather than with it
Don’t change systems because:
It’s a new year (continuity has value)
You see a new organization method (grass-is-greener syndrome)
One or two documents were hard to file (occasional ambiguity is normal)
What’s the best binder size for organization?
Match binder size to 6-12 months of expected content:
1″ binder: Single course/subject, short-term projects (3-4 months)
1.5″ binder: Standard office work, academic semester (4-6 months)
2″ binder: Comprehensive projects, full academic year (6-12 months)
3″ binder: Reference materials, multi-year compilations
Rule of thumb: Your binder should be 50-75% full when in active use. Too empty wastes space and portability; too full makes adding materials difficult and increases wear.
Plan to archive or split materials before binders exceed 90% capacity.
How do I organize documents that fit multiple categories?
Four solutions:
1. Choose primary placement based on how you’ll search: “Where will I look for this first?” File there.
2. Use cross-references: File in one location, add a note in the other location: “See Marketing section for Q2 Campaign Materials.”
3. Make copies for critical documents: File in both locations (use sparingly to avoid clutter).
4. Create a “cross-functional” category: For documents genuinely belonging to multiple areas, create an intersection category (example: “Finance + HR” for payroll documents).
Most important: Make a decision and file it. Indecision creates “to file” pile-ups.
Should I organize chronologically forward or backward?
Reverse chronological (newest first) works best for most applications:
Advantages of newest-first:
Most recent information typically most relevant
Matches how we check email and social media
Easy to add new materials to front
Natural workflow for active projects
Use traditional chronological (oldest first) when:
Creating historical narratives or timelines
Archiving completed projects
Documenting progression over time
Maintaining permanent records
Practical tip: Use reverse chronological during active phases; reorganize to traditional chronological when archiving.
How can I keep my binder organized when I’m busy?
Three strategies:
Strategy 1: The “To File” Pocket
Add a pocket divider at the front labeled “To File”
Immediately three-hole punch new documents and place in this pocket
Batch-file once weekly (10 minutes)
Strategy 2: The Daily Two-Minute Rule
Spend 2 minutes at day’s end filing papers
File anything that takes less than 30 seconds immediately
Batch more complex items weekly
Strategy 3: The Simplified System
Reduce to 5 broad categories maximum
Accept “good enough” filing (broad category vs. perfect subsection)
Schedule monthly 30-minute reorganization sessions
Remember: A slightly imperfect system you maintain beats a perfect system you abandon.
What should I do with old materials when the binder gets full?
Follow this decision process:
Step 1: Identify items older than your retention period
Student work: One semester/term old
Project materials: 90 days after project completion
Financial: 1-7 years depending on document type
Reference: When superseded by updated information
Step 2: Categorize old materials:
Discard: Outdated, duplicates, no future value
Archive: Historical value but rarely accessed
Digitize: Worth keeping but space-consuming
Step 3: Create archive binders
Label clearly: “2023 Client Work Archive” or “Fall 2023 Coursework”
Use same organization system as active binder
Store in designated location
Maintain archive inventory list
Step 4: Purge ruthlessly
Most materials have less long-term value than we think. When in doubt: Can you obtain this elsewhere? If yes, discard.
Can I combine paper binder organization with digital files?
Yes, hybrid paper-digital systems work excellently:
Best practices for paper-digital integration:
1. Use consistent organization across both: If using categorical organization in binder, use same categories in digital folders.
2. Decide paper vs. digital placement rules:
Paper: Handwritten notes, signed originals, frequently referenced
Digital: Typed documents, large files, archives, backups
3. Cross-reference between systems: In binder, note “Digital version: Folder > Subfolder > Filename”
4. Scan and archive: Digitize old paper materials before archiving physically
5. Use paper as active/digital as archive: Work on paper during active phases, scan and digitize when completed
Example hybrid system:
Current project materials: Paper binder (organized categorically)
Project archives: Digital (same categorical organization)
Working notes: Paper
Final deliverables: Digital
Reference materials: Digital with one-page paper quick-reference in binder
How do I organize a shared binder that multiple people use?
Shared binder success requires clarity and simplicity:
Setup requirements:
1.Choose universal systems: Alphabetical, numeric, or color-coded work best (everyone understands)
2.Create visual guides: Index on inside cover, labeled dividers, color coding
3.Document the system: One-page guide explaining organization logic
4.Assign ownership: One person maintains organization
Best systems for sharing:
Alphabetical: Everyone knows alphabetical order
Color-coded categorical: Visual navigation requires no training
Numeric with index: Clear reference system
Avoid for shared use:
Priority-based (priorities differ between people)
Complex hybrid systems (too much learning curve)
Personal categorical systems (categories may not be intuitive to others)
Maintenance for shared binders:
Weekly designated organizer reviews and maintains
Monthly team review of system effectiveness
“To file” pocket for materials needing organizer’s attention
Tags: binder organization systems, binder organization methods, how to organize binders, best binder organization system, binder filing system, organize binder efficiently, 3-ring binder organization, binder divider systems, paper organization in binders, binder setup methods, paper management, document organization, filing methods, tab systems, color coding, index organization, reference materials, archival systems, workflow organization, how to organize a binder for multiple subjects, best way to organize work binders, binder organization for students, office binder filing systems, home document binder organization, what is the best binder organization system, how should I organize my binder, what are different ways to organize binders, which binder organization method works best, how do you maintain an organized binder, best binders for organization, binder organization supplies, professional binder systems









Leave a Reply