

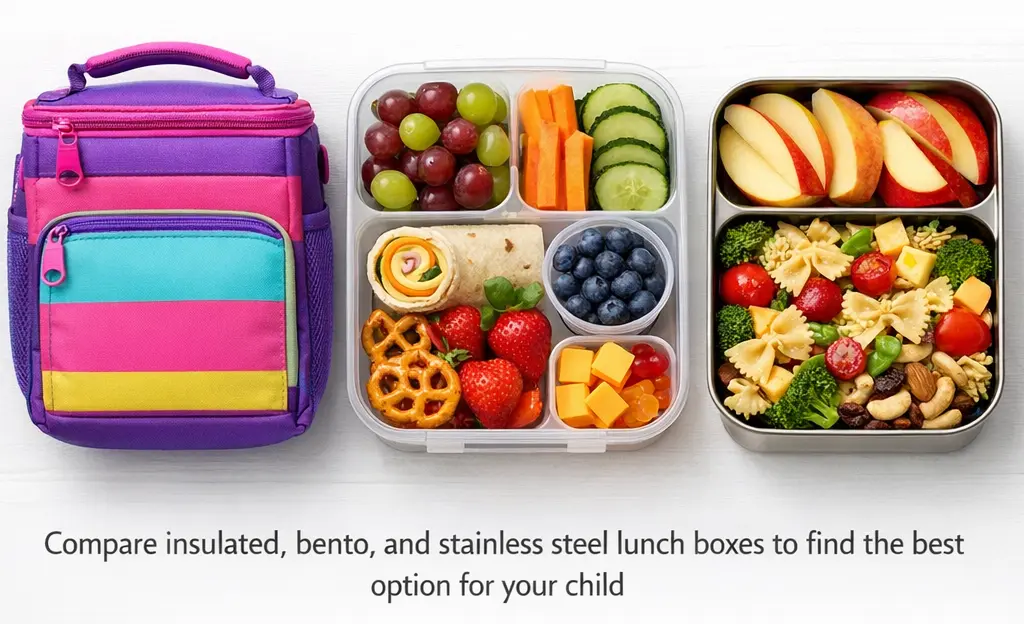
Choosing the best lunch boxes for kids involves balancing safety, functionality, and your child’s developmental stage. Parents face the challenge of keeping food fresh, preventing leaks, and finding containers children can open independently. With options ranging from insulated thermal containers to compartmentalized bento boxes, understanding the differences helps you select a lunch box that lasts through the school year while keeping meals safe and appealing.
This guide compares insulated lunch boxes, bento-style containers, and hybrid options. You’ll learn about material safety standards, age-appropriate features, temperature retention capabilities, and durability factors. Whether you’re packing lunches for a toddler or an elementary student, these insights will help you make an informed decision that fits your family’s needs and budget.
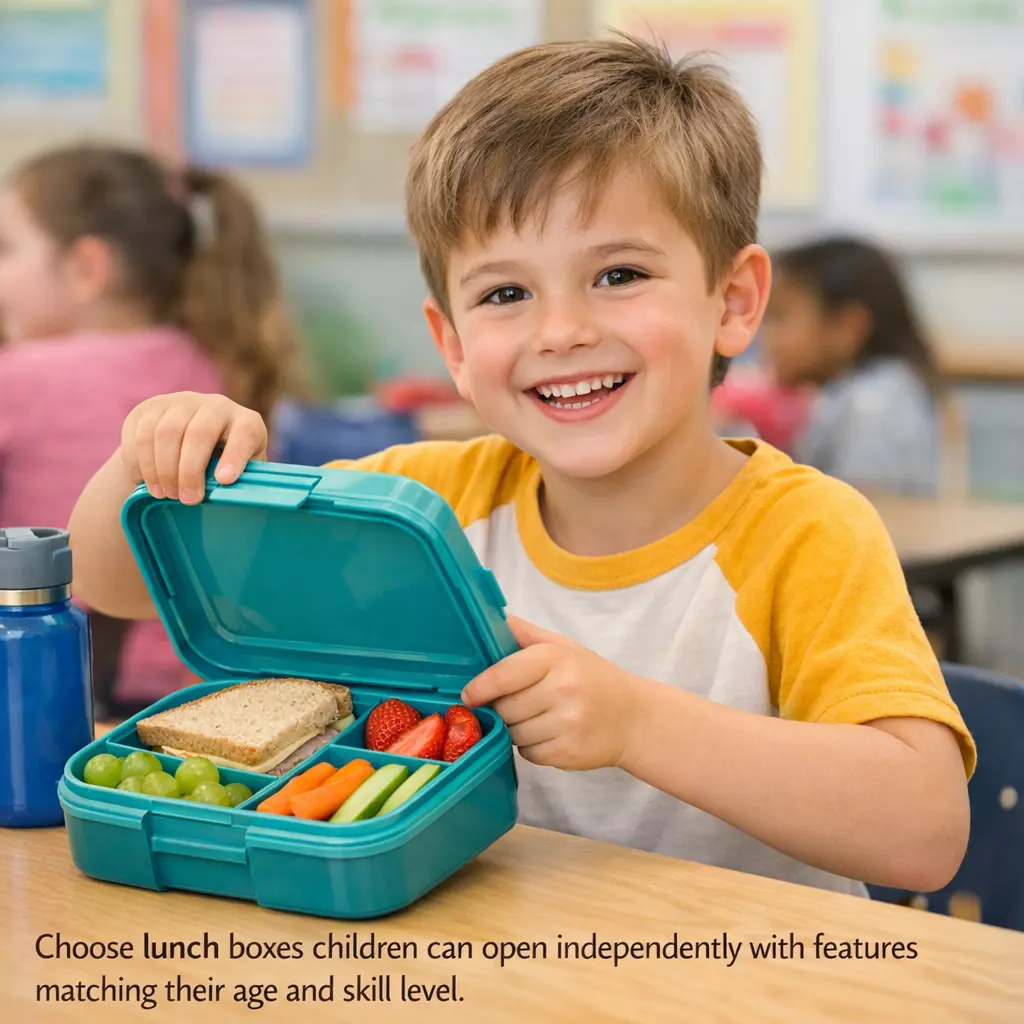
Understanding Lunch Box Types
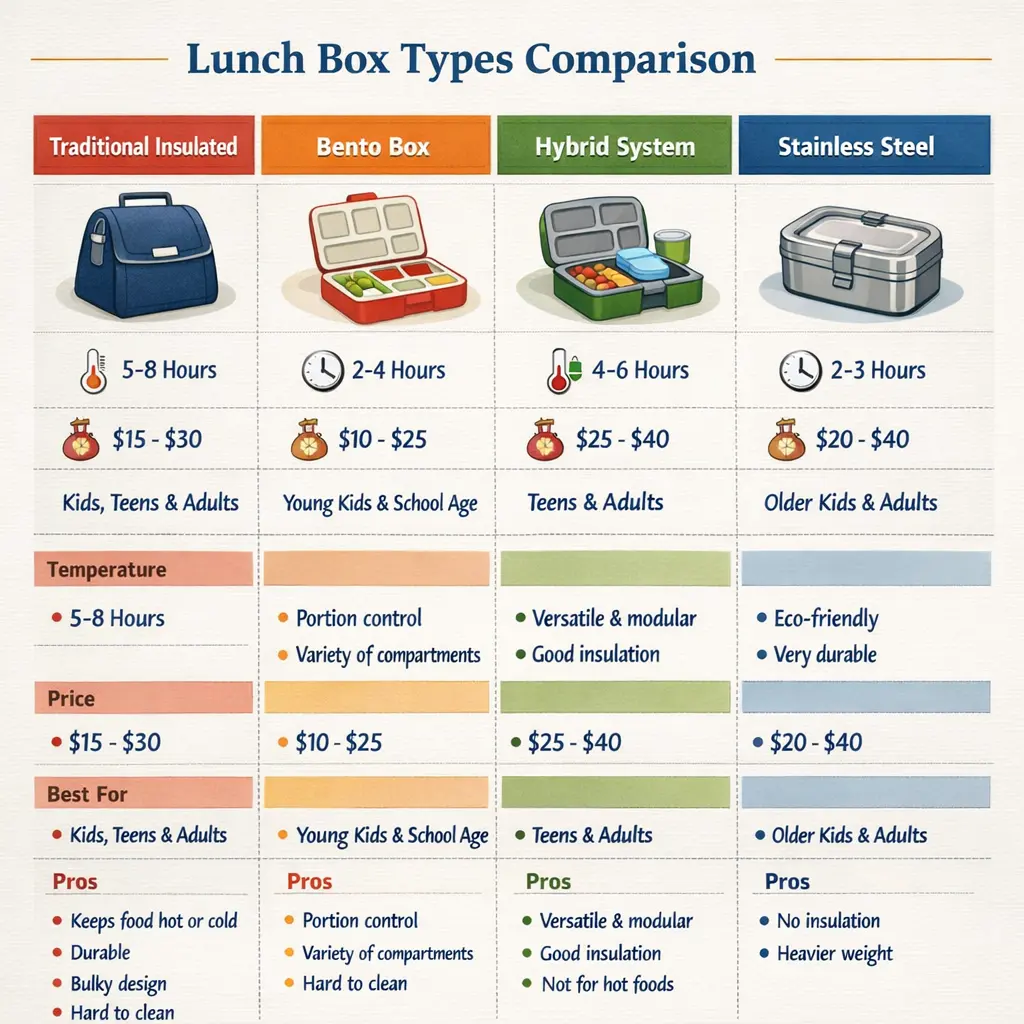
Lunch boxes fall into three main categories, each designed for different priorities and age groups.
Traditional Insulated Lunch Boxes
Traditional insulated lunch boxes use foam or vacuum insulation to maintain food temperature. These soft-sided or hard-shell containers typically feature a single large compartment with a zip or snap closure. The insulation layer sits between exterior and interior fabric or plastic shells.
Best for: Parents prioritizing temperature control for perishable foods like dairy, deli meats, and leftovers.
Typical features:
- 4-6 hour cold retention with ice packs
- Exterior pockets for utensils or napkins
- Carrying handles or shoulder straps
- Capacity: 4-8 cups
Limitations: Single compartment means foods touch unless you use separate containers inside. Requires ice packs for optimal performance. Fabric exteriors can stain and absorb odors over time.
Bento Lunch Boxes
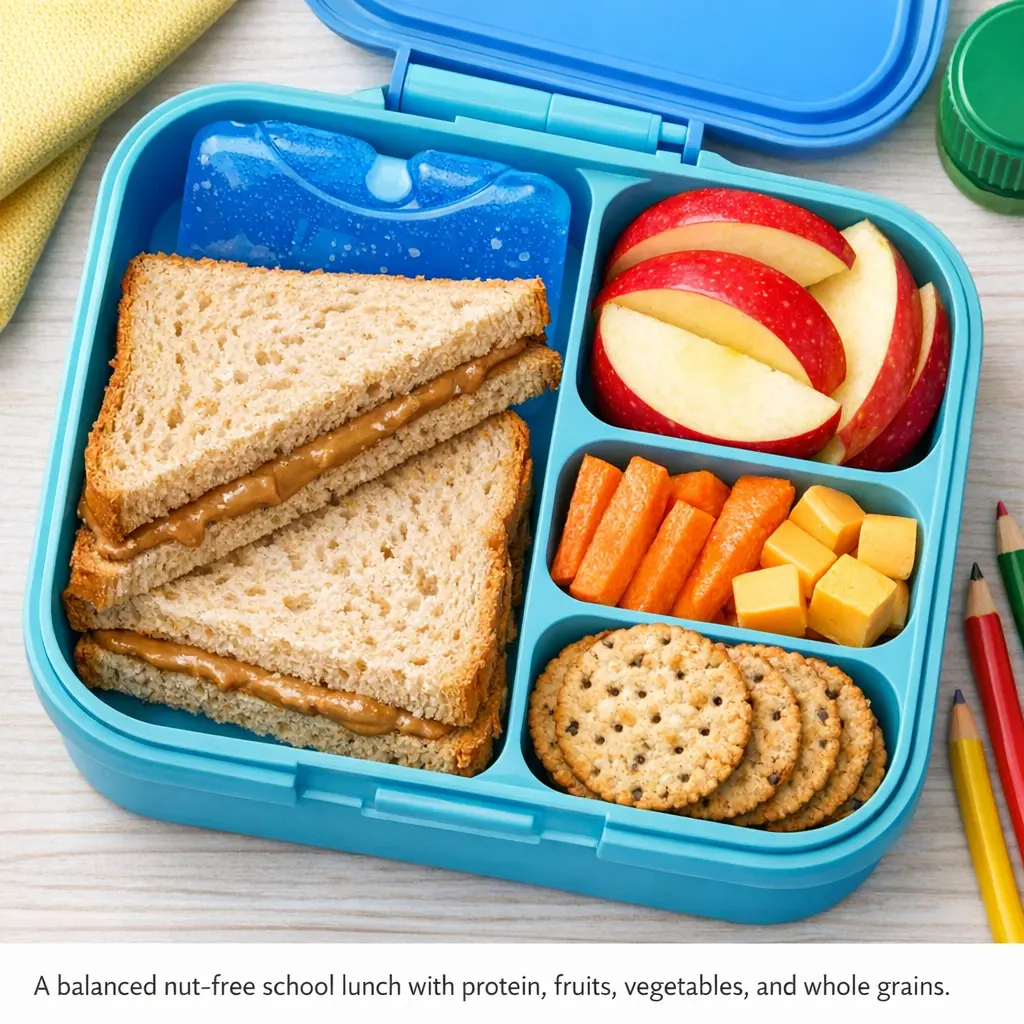
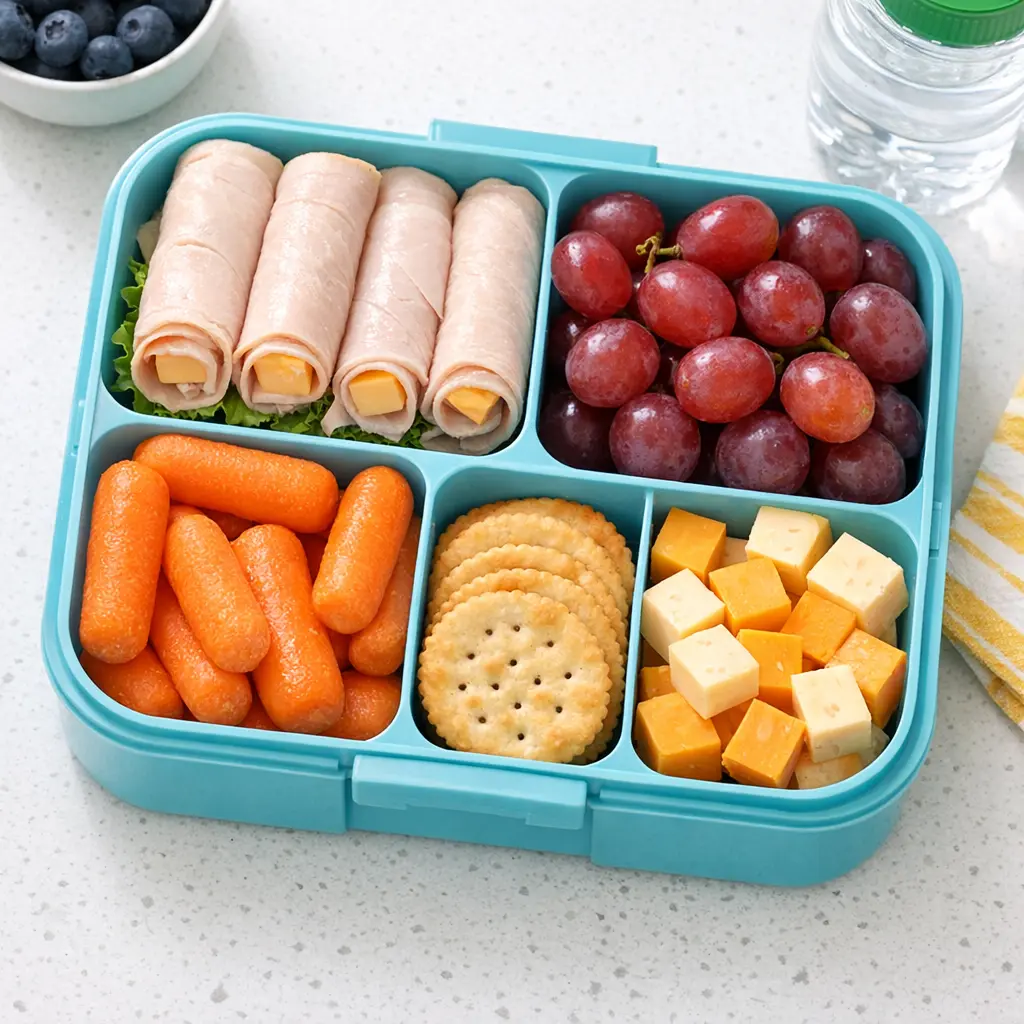
Bento boxes originated in Japan and feature multiple compartments within a single container. Modern versions come in plastic or stainless steel with removable dividers or fixed sections.
Best for: Parents wanting portion control, variety in meals, or children who prefer foods separated.
Typical features:
- 3-5 compartments
- Removable dividers in some models
- Leak-resistant (not always leak-proof)
- Capacity: 3-5 cups total
- Compact, space-efficient design
Limitations: Most lack insulation (food reaches room temperature within 2 hours). Compartments limit certain food types. Some children find multiple sections confusing or overwhelming.
Hybrid Insulated Bento Systems
Hybrid systems combine insulation with compartmentalization. These include insulated lunch bags containing removable bento-style containers or all-in-one insulated boxes with internal dividers.
Best for: Families wanting both temperature control and food separation.
Typical features:
- Insulated outer bag or shell
- Removable compartmentalized insert
- 3-5 hour cold retention
- Mix of sealed and open compartments
Limitations: Higher price point ($30-$50). More complex for young children to manage. Heavier than single-function options.
Insulated Lunch Boxes: Features and Benefits
Insulated lunch boxes maintain food temperature through thermal barriers that slow heat transfer. Understanding how insulation works helps set realistic expectations.
How Insulation Works
Insulation creates dead air space or vacuum layers that prevent warm outside air from reaching cold food inside. Quality matters significantly:
Foam insulation (most common): Polyethylene or polyurethane foam provides moderate temperature control. Effective for 3-4 hours with ice packs. Found in budget to mid-range lunch boxes ($12-$25).
Vacuum insulation (premium): Double-wall construction with air removed from the space between walls. Maintains temperature 5-6+ hours without ice packs. Typically found in stainless steel containers ($35-$50).
Temperature Retention Expectations
Realistic temperature retention with proper use:
- With quality ice pack: 4-6 hours keeping food below 40°F (safe zone)
- Without ice pack: 1-2 hours of slight cooling effect
- Pre-chilled container: Adds 30-60 minutes retention time
Professional Tip: Freeze juice boxes or water bottles to serve double-duty as ice packs and beverages. They’ll thaw by lunchtime while keeping surrounding food cold.
Best Insulated Options for Different Ages
Ages 2-4 (Toddler/Preschool):
Soft-sided insulated bags with simple zip closures. Look for:
- Lightweight construction
- Wide openings for easy access
- Minimal external pockets (less to manage)
- Compact size (3-4 cup capacity)
Ages 5-8 (Early Elementary):
Structured insulated boxes with handles. Priorities:
- Easy-grip carrying handles
- Interior mesh pocket for ice pack
- Moderate capacity (5-6 cups)
- Durable zippers or magnetic closures
Ages 9-12 (Upper Elementary):
Larger insulated containers or bag systems. Consider:
- Increased capacity (6-8 cups)
- Multiple internal containers
- Adjustable shoulder straps
- Style preferences (colors, characters)
Common Insulated Lunch Box Mistakes
Mistake #1: Not pre-chilling the lunch box. Room temperature containers absorb cold from food and ice packs, reducing retention time.
Solution: Store empty lunch box in refrigerator overnight or place ice pack inside 15 minutes before packing.
Mistake #2: Packing warm food directly into insulated containers. This raises internal temperature and reduces effectiveness.
Solution: Refrigerate all lunch components before packing. Never pack warm leftovers unless using a specific thermal container designed for hot foods.
Mistake #3: Overfilling containers. Compressed insulation loses effectiveness.
Solution: Follow manufacturer capacity recommendations. Leave small air gap around ice pack.
Bento Lunch Boxes: Compartmentalized Solutions
Bento boxes transform lunch packing through organized compartments that control portions and prevent food mixing.
The Bento Advantage
Compartmentalization offers several benefits beyond organization:
Portion control: Pre-sized sections naturally limit quantities, helpful for managing overeating or ensuring adequate nutrition. Typical bento ratios follow 3:2:1 (main:vegetable/fruit:treat).
Food acceptance: Picky eaters often respond better to small portions of multiple foods rather than large servings of single items. Seeing variety reduces mealtime pressure.
Visual appeal: Separated, colorful foods create attractive presentations that encourage eating. Children perceive meals as more interesting when compartmentalized.
Waste reduction: Clear visibility of all components reduces forgotten food. Reusable dividers eliminate plastic bags.
Bento Box Materials Compared
Plastic Bento Boxes:
- Lightweight and affordable ($10-$20)
- Polypropylene (#5 plastic) is most common and safe
- Dishwasher-safe (top rack)
- Stain-prone with tomato-based foods
- Lifespan: 2-3 years with daily use
Stainless Steel Bento Boxes:
- Durable and long-lasting ($25-$40)
- No staining or odor absorption
- Naturally BPA-free and chemical-free
- Heavier (8-12 oz empty)
- Hand-wash recommended (some brands allow dishwasher)
- Lifespan: 5+ years
Silicone Compartment Inserts:
- Flexible, collapsible design
- Oven and freezer safe
- Easy to clean
- Work inside other containers
- Not standalone solutions
- Cost: $8-$15
Leak-Resistance vs. Leak-Proof
Important distinction: Most bento boxes are leak-resistant, not leak-proof.
Leak-resistant means typical lunch foods (sandwiches, crackers, cut fruit) won’t leak under normal conditions. Slight tipping or compression may cause minimal seepage. Suitable for semi-solid foods and thick dips.
Leak-proof indicates liquids won’t escape even when fully inverted. Requires silicone gaskets and locking mechanisms. Necessary for yogurt, applesauce, salad dressings, or soups.
Professional Tip: For bento boxes that aren’t fully leak-proof, use silicone muffin cups or small containers within compartments for wet foods. This creates additional barriers while maintaining the organized presentation.
Age-Appropriate Bento Features
Toddlers (2-4 years):
- 3 compartments maximum (less overwhelming)
- Large compartment sizes (easier to scoop food)
- Simple snap or magnetic closures
- Rounded edges (safety)
- Maximum 3-cup total capacity
Preschool (4-6 years):
- 4-5 compartments
- Mix of sizes for variety
- Easy-open latches children can manage
- Removable dividers (parent-adjusted)
- 3-4 cup capacity
Elementary (7+ years):
- 5+ compartments
- Smaller sections for snacks and treats
- Secure locking systems (okay if complex)
- Customizable configurations
- 4-5 cup capacity
Material Safety: What Parents Need to Know
Lunch box materials contact food daily, making safety certifications essential for protecting children’s health.
BPA and Why It Matters
BPA (Bisphenol A) is a chemical used in some plastics and can linings. Studies by the National Institute of Environmental Health Sciences show BPA can leach into food, particularly with heat or acidic foods.
Health concerns: Potential hormone disruption, developmental effects in children.
Current status: FDA banned BPA in baby bottles and sippy cups (2012) but still permits use in other food containers.
What to look for: Products labeled “BPA-free” on packaging. Most major manufacturers now use BPA-free plastics (polypropylene, polyethylene) in children’s products.
Safe Plastic Types for Food Contact
Not all plastics are equal. Check recycling codes:
Safe options:
- #2 HDPE (High-Density Polyethylene): Rigid, durable, minimal leaching
- #4 LDPE (Low-Density Polyethylene): Flexible, safe, commonly used in bags
- #5 PP (Polypropylene): Heat-resistant, dishwasher-safe, most common in lunch containers
Avoid if possible:
- #3 PVC: May contain phthalates
- #6 PS (Polystyrene): Can leach styrene
- #7 Other: Catch-all category; may include BPA-containing polycarbonate
Stainless Steel Safety
Food-grade stainless steel (typically 18/8 or 304 grade) is considered the safest material for food containers. Benefits:
- Naturally BPA-free and phthalate-free
- Non-reactive with acidic foods
- No coating to chip or degrade
- Doesn’t retain flavors or odors
- Recyclable at end of life
Consideration: Some stainless steel bottles and containers have plastic lids. Verify lid materials are also BPA-free.
Certifications to Trust
Look for products meeting these standards:
FDA Compliance: Materials approved for food contact under FDA regulations (Title 21 CFR).
CPSIA Compliance: Consumer Product Safety Improvement Act standards for children’s products, including lead and phthalate limits.
LFGB Certification: German food safety standard (voluntary but indicates rigorous testing).
Warning: “Non-toxic” or “food-safe” without specific certifications are marketing claims, not verified standards. Prioritize products explicitly stating BPA-free and FDA compliance.
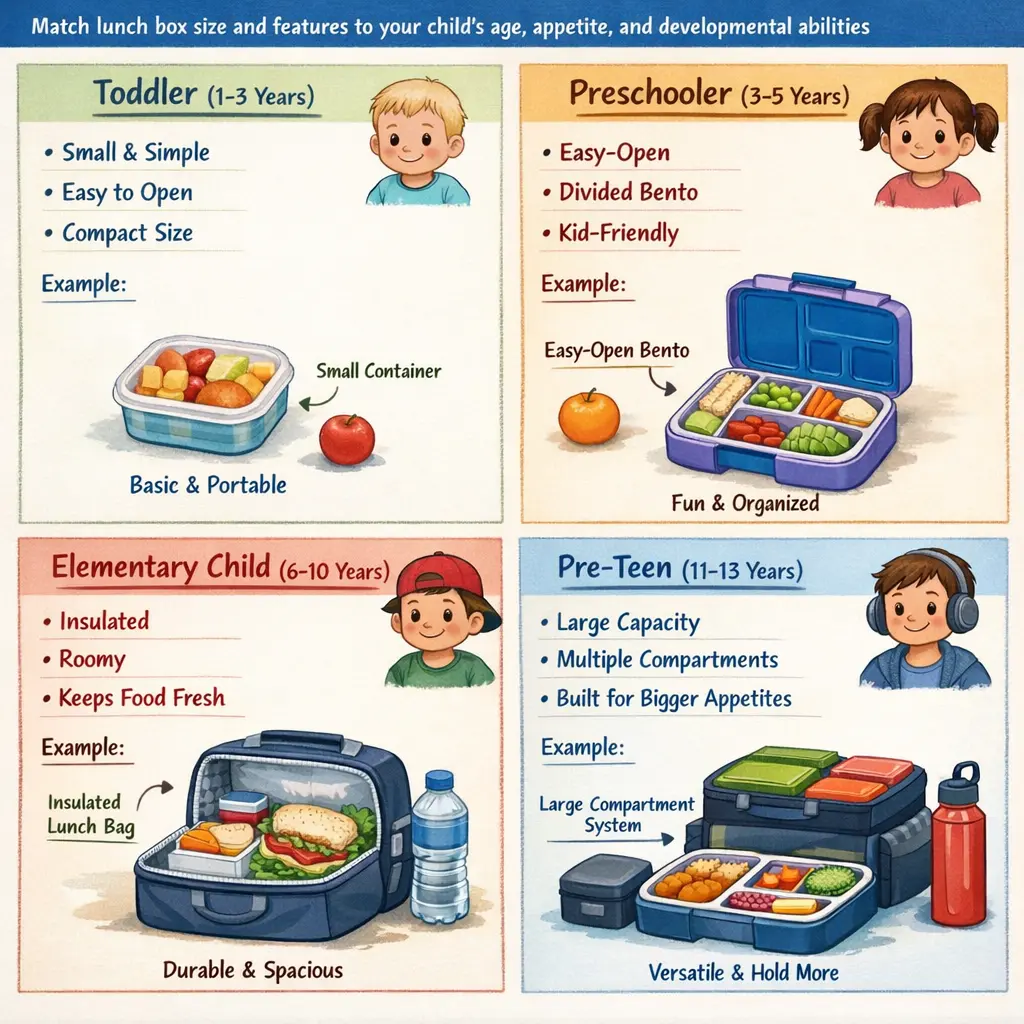
Age-Specific Recommendations
Children’s developmental abilities and nutritional needs change dramatically from toddlerhood through elementary school. Matching lunch box features to age prevents frustration and supports independence.
Toddlers (Ages 2-4)
Developmental considerations:
- Developing fine motor skills
- Limited patience with complex closures
- Prone to dropping and throwing
- Eating smaller portions more frequently
Recommended features:
- Closure type: Wide flip-top lids, magnetic closures, or simple snap locks
- Capacity: 2-3 cups total (toddlers eat 1/4 to 1/3 adult portions)
- Weight: Under 8 oz when empty
- Handle type: Short, thick grips easy for small hands
- Compartments: 2-3 maximum
Best lunch box type: Compact bento boxes with easy-open lids or small soft-sided insulated bags with wide zip openings.
Common challenge: Toddlers can’t manage multiple containers or complicated latches. Choose all-in-one solutions with minimal steps.
Preschool (Ages 4-6)
Developmental considerations:
- Growing independence
- Improving dexterity
- Awareness of peers’ lunch boxes
- Establishing food preferences
Recommended features:
- Closure type: Combination latches (simple enough to open, secure enough not to pop open)
- Capacity: 3-4 cups
- Weight: 8-12 oz empty
- Design elements: Favorite colors or characters (motivation to use)
- Compartments: 3-4 sections
Best lunch box type: Bento boxes with visual compartment separation or insulated lunch bags with simple removable containers inside.
Common challenge: Children this age want to “do it myself” but may struggle with frustration if closures are too difficult. Test opening mechanisms before purchasing.
Professional Tip: Involve preschoolers in choosing their lunch box. Ownership increases likelihood they’ll manage it independently and communicate when it’s damaged or lost.
Early Elementary (Ages 6-9)
Developmental considerations:
- Fully independent lunch management
- Longer school days (need more food)
- Social awareness (care about appearance)
- Can handle multi-step processes
Recommended features:
- Closure type: Any style (child can manage complexity)
- Capacity: 4-6 cups
- Insulation: Important (longer time between packing and eating)
- Organization: Multiple compartments or ability to add containers
- Durability: Must withstand rough handling in backpacks and cafeterias
Best lunch box type: Insulated lunch boxes with removable containers or insulated bento boxes with 4-5 compartments.
Common challenge: Lunch boxes get lost or damaged more frequently due to cafeteria chaos. Choose distinctive colors or add permanent labels.
Upper Elementary (Ages 10-12)
Developmental considerations:
- Increasing appetite
- Strong style preferences
- Awareness of sustainability and environment
- May be self-conscious about “babyish” designs
Recommended features:
- Capacity: 6-8 cups (approaching adult portions)
- Style: Mature colors, patterns, or minimalist designs
- Flexibility: Ability to pack varied food types
- Eco-friendly options: Appeals to developing values
- Temperature control: Essential for varied foods
Best lunch box type: Premium insulated systems, large capacity bento boxes, or stainless steel multi-tier containers.
Common challenge: Pre-teens may resist using lunch boxes altogether, preferring to buy school lunch. Involve them in selection and meal planning to maintain buy-in.

Temperature Control and Food Safety
Proper temperature management prevents foodborne illness and food waste. Understanding safe temperature zones protects your child’s health.
The Danger Zone
The USDA defines the “danger zone” as 40°F to 140°F—the temperature range where bacteria multiply rapidly. Perishable foods left in this zone for more than 2 hours become unsafe to eat.
High-risk foods requiring temperature control:
- Dairy products (milk, yogurt, cheese)
- Deli meats and hot dogs
- Eggs and egg-based dishes
- Cut fruits and vegetables (once cut, bacterial growth accelerates)
- Cooked rice and pasta
- Meat, poultry, and fish
Lower-risk foods (shelf-stable at room temperature):
- Whole fruits with peel/rind intact
- Raw vegetables (whole carrots, celery, snap peas)
- Bread and crackers
- Nut or seed butters (unopened containers)
- Dried fruit and nuts
- Commercially packaged shelf-stable items
Ice Pack Best Practices
Ice packs extend temperature control but require proper use:
Types of ice packs:
- Gel packs: Reusable, flexible when frozen, last 3-4 hours
- Hard ice packs: Rigid, last 4-6 hours, maintain shape
- Frozen water bottles: Multi-purpose, become drinkable, last 3-4 hours
- Frozen juice boxes: Add nutrition, last 2-3 hours
Maximizing effectiveness:
- Use minimum 2 ice packs for lunches with perishables
- Place ice packs on top and bottom (cold sinks)
- Freeze ice packs solid overnight (minimum 8 hours)
- Avoid opening lunch box until mealtime
- Pre-chill all food components
Professional Tip: Wrap ice packs in thin paper towels to prevent condensation from making food soggy while still allowing cold transfer.
Testing Your Lunch Box Temperature Retention
If unsure whether your lunch box keeps food safe, conduct a simple test:
- Pack lunch box exactly as you would for school
- Include refrigerated foods and proper ice packs
- Insert a refrigerator thermometer in the center of the lunch box
- Leave closed for the same duration as your child’s school schedule
- Check temperature at “lunchtime”
Safe result: 40°F or below
Unsafe result: Above 40°F (upgrade insulation, add ice packs, or switch containers)
Hot Food Options
Some children prefer warm lunches. Thermos-style containers designed for hot food maintain temperatures above 140°F (safe hot zone) for 4-6 hours.
Hot food container tips:
- Pre-heat container with boiling water for 5 minutes before packing
- Heat food to 165°F+ before transferring
- Fill container completely (less air space = better retention)
- Keep sealed until eating
Foods that work well: Soups, pasta dishes, rice bowls, oatmeal, warm sandwiches
Foods that don’t work well: Fried foods (become soggy), crispy items, layered dishes with varying ideal temperatures
Leak-Proof Technology Explained
Leaks ruin backpacks, damage school supplies, and create frustrating messes. Understanding sealing mechanisms helps select truly leak-proof containers.
How Leak-Proof Seals Work
Effective leak-proof systems combine two elements:
1. Gaskets/Seals:
Silicone or rubber rings create compression barriers between lid and container body. The gasket deforms slightly under pressure to fill microscopic gaps.
2. Locking mechanisms:
Latches, clips, or screw threads apply pressure to compress gaskets and maintain seal integrity.
Important distinction: Both components must work together. Strong latches with worn gaskets will leak. Perfect gaskets without secure latches won’t seal under pressure.
Types of Closure Systems
Snap-lid with gasket:
- Plastic lid snaps over silicone gasket
- Effectiveness: 70-80% (works for semi-liquid foods)
- Ease: Simple for children 5+
- Longevity: Gaskets wear in 1-2 years
Four-point latch system:
- Clips on all four sides compress lid
- Effectiveness: 90-95% (handles liquids well)
- Ease: Difficult for children under 6
- Longevity: 3-4 years with care
Screw-top with silicone gasket:
- Threaded lid screws onto container
- Effectiveness: 95-98% (excellent for liquids)
- Ease: Moderate (depends on thread size)
- Longevity: 4-5 years (threads can strip if cross-threaded)
Magnetic or slide closures:
- Magnets or sliding panels secure lid
- Effectiveness: 60-70% (not for liquids)
- Ease: Very simple for young children
- Longevity: 2-3 years
Testing Leak-Proof Claims
Before trusting a lunch box with liquids in a backpack:
Water test:
- Fill container with water
- Secure all closures properly
- Hold container upside down over sink for 30 seconds
- Shake gently, then vigorously
- Dry exterior and check for moisture
Pass: No water escapes
Fail: Any water leaks (use only for solid or semi-solid foods)
Professional Tip: Even leak-proof containers can leak if not closed properly. Practice with your child to ensure they can seal containers correctly after opening at school.
When Leaks Happen: Troubleshooting
If a previously leak-proof container starts leaking:
Check gaskets: Silicone seals deteriorate, stretch, or develop small tears. Most manufacturers sell replacement gaskets ($3-$8).
Inspect latches: Broken or bent clips don’t apply adequate pressure. Some designs allow latch replacement.
Clean thoroughly: Food residue, especially fats and oils, prevent proper sealing. Deep clean with hot soapy water, focusing on gasket grooves.
Check for warping: Dishwasher heat can warp plastic, preventing proper alignment. Hand-wash warped containers or replace.

Cleaning and Maintenance Best Practices
Proper cleaning prevents bacterial growth, removes odors, and extends lunch box lifespan. Lunch boxes require more attention than typical dishes due to food-contact time and storage conditions.
Daily Cleaning Routine
Immediately after school:
- Empty all contents and dispose of uneaten food
- Rinse containers with hot water (removes fresh residue)
- Wash with hot soapy water or place in dishwasher (if safe)
- Air dry completely before storing
Critical: Never seal damp lunch boxes or containers. Moisture trapped inside creates ideal conditions for mold and bacteria growth.
Deep Cleaning Weekly
Even with daily washing, lunch boxes benefit from weekly deep cleaning:
For plastic containers:
- Fill with mixture of 1 tablespoon baking soda + 1 cup warm water
- Let soak 15-30 minutes
- Scrub with soft brush, focusing on corners and gasket grooves
- Rinse thoroughly
- Air dry completely
For stainless steel:
- Wash with hot soapy water
- For stubborn stains, make paste of baking soda and water
- Apply paste and let sit 10 minutes
- Scrub with non-abrasive sponge
- Rinse and dry
For insulated lunch bags:
- Empty all crumbs and debris
- Wipe interior with cloth dampened with mild soap solution
- For stubborn spots, use baking soda paste
- Wipe with clean damp cloth to remove soap
- Air dry with lid/zipper open (minimum 24 hours)
Odor Removal Techniques
Lunch box odors typically come from bacteria feeding on residual food particles or oils absorbed into plastic.
Baking soda method (mild odors):
- Sprinkle 2-3 tablespoons baking soda inside dry container
- Close and let sit overnight
- Dump baking soda and wash normally
Vinegar method (strong odors):
- Fill container with 1 part white vinegar, 4 parts water
- Let soak 2-4 hours
- Wash with soap and water
- Air dry in sunlight (UV helps neutralize odors)
Newspaper method (for lunch bags):
- Crumple newspaper and stuff inside bag
- Close and let sit 48 hours
- Remove newspaper (absorbs odors)
- Wipe clean and air out
Professional Tip: Sunlight acts as natural disinfectant and odor neutralizer. When weather permits, place cleaned lunch boxes in direct sunlight for 2-3 hours.
Mold Prevention
Mold grows in dark, damp environments—exactly what sealed lunch boxes provide if not properly dried.
Prevention strategies:
- Store lunch boxes with lids open/off
- Ensure complete dryness before storage
- Avoid storing in damp areas (under sinks, damp basements)
- Clean immediately after use (don’t leave dirty overnight)
- Replace gaskets annually if mold appears repeatedly
If mold appears:
- Discard any porous materials (fabric bags with absorbed mold)
- For plastic/stainless steel: soak in 1:10 bleach solution for 10 minutes
- Scrub thoroughly with brush
- Rinse multiple times
- Air dry completely in sunlight
When to replace: If mold returns after thorough cleaning, or if it has stained or damaged materials, replace the container.
Dishwasher Safety Guidelines
Many lunch boxes claim “dishwasher safe” but require specific conditions:
Top rack only: High heat from bottom dishwasher elements can warp plastic and damage insulation.
Avoid heat-dry cycle: Air-dry setting prevents warping and seal damage.
Remove gaskets: Take out silicone seals and wash separately (prevents distortion).
Latches open: Leave all latches unhooked to prevent stress on hinge points.
Stainless steel considerations: While durable, repeated dishwasher exposure can dull finishes and damage printed designs. Hand-washing extends appearance lifespan.
Durability Factors and Longevity
Understanding what causes lunch box failure helps select products that survive daily use and rough handling.
Common Failure Points
Zipper breakdown (insulated bags):
- Cause: Food debris in teeth, forced opening/closing
- Lifespan: 1-2 years with daily use
- Prevention: Clean zippers weekly, teach proper opening technique
Latch breakage (bento boxes):
- Cause: Stress from overfilling, dropping, or forcing closed
- Lifespan: 2-3 years (varies by design quality)
- Prevention: Don’t overfill, ensure proper alignment before closing
Gasket deterioration:
- Cause: Heat exposure, oils, normal wear
- Lifespan: 1-3 years depending on material quality
- Prevention: Hand-wash, replace annually if leaking
Handle/strap failure:
- Cause: Weight stress, catching on objects, swinging
- Lifespan: 2-4 years
- Prevention: Teach carrying by handle, not swinging
Insulation compression:
- Cause: Heavy stacking, crushing in backpacks
- Lifespan: 2-3 years before noticeable performance loss
- Prevention: Pack lunch box at top of backpack
Material Durability Comparison
Plastic:
- Lifespan: 2-3 years daily use
- Weaknesses: Staining, odor absorption, warping, stress fractures
- Strengths: Lightweight, affordable replacement
Stainless steel:
- Lifespan: 5-8 years daily use
- Weaknesses: Denting, higher weight, paint/print wear
- Strengths: No staining or odor, maintains structural integrity
Fabric (insulated bags):
- Lifespan: 1-2 years daily use
- Weaknesses: Staining, odor absorption, seam failure, zipper issues
- Strengths: Lightweight, flexible
When to Replace
Safety reasons (replace immediately):
- Mold that returns after thorough cleaning
- Cracks or chips where bacteria can harbor
- Gaskets that won’t seal (food safety risk)
- Broken latches that allow container to open in backpack
Performance reasons (replace when convenient):
- Persistent odors despite deep cleaning
- Cosmetic damage (staining, fading) that bothers child
- Insulation no longer maintains temperature
- Size no longer appropriate for child’s appetite
Professional Tip: Budget for replacement every 2-3 years in your back-to-school planning. Quality lunch boxes last multiple years but will eventually need replacing with normal use.
Special Considerations for Dietary Needs
Certain dietary requirements or health conditions require specific lunch box features.
Food Allergies and Cross-Contamination
Children with severe allergies need lunch boxes that minimize contamination risk.
Key features:
- Sealed compartments preventing allergen contact
- Materials that clean thoroughly (stainless steel preferred)
- Distinctive color or labeling reducing mix-ups
- No shared utensils or containers with siblings
Organization strategy: Designate specific lunch box exclusively for allergic child. Never share between children or use for non-allergy-safe foods at home.
Portion Control for Medical Conditions
Diabetes, weight management, or other conditions requiring controlled portions benefit from bento-style compartments.
Advantages:
- Visual portion guidance
- Pre-measured sections
- Balance of food groups
- Reduced temptation to overeat
Working with healthcare providers: Ask dietitian or doctor for specific portion recommendations, then select bento compartment sizes matching those guidelines.
Texture Sensitivities and Picky Eating
Children with sensory processing differences or selective eating patterns need thoughtful lunch box selection.
Helpful features:
- Multiple small compartments (reduces overwhelming portions)
- Complete food separation (prevents texture mixing)
- Clear containers (visual inspection before eating)
- Familiar, predictable organization
Accommodation strategy: Maintain consistent placement of food types. Example: protein always in largest compartment, fruit in upper left, crackers in upper right. Predictability reduces anxiety.
Vegetarian and Vegan Diets
Plant-based lunches often include foods requiring temperature control and leak-proof containers.
Common challenges:
- Hummus, nut butters, and dips need sealed containers
- Cut vegetables wilt without cold temperature
- Bean or grain-based dishes can be messy
- Dairy-free yogurt requires cold retention
Best lunch box type: Insulated bento boxes with sealed compartment options and reliable ice pack space.
Common Mistakes to Avoid
Learning from common errors prevents frustration and wasted money.
Mistake #1: Choosing Based on Appearance Alone
Cute designs attract children but may lack functional features.
Why it fails: Character lunch boxes often prioritize licensing over quality construction. Poor insulation, weak closures, and thin materials lead to early replacement.
Solution: Let child choose between 2-3 options you’ve pre-selected for quality and features. They get input; you ensure functionality.
Mistake #2: Buying Too Large for Child’s Age
Oversized lunch boxes seem like good value (“room to grow”) but create problems.
Why it fails: Empty space reduces insulation efficiency. Heavy containers discourage children from carrying independently. Excess capacity encourages overpacking or appears empty with appropriate portions.
Solution: Buy for current age and appetite. Budget to upsize in 2-3 years as needs change.
Mistake #3: Ignoring How Child Will Actually Use It
Adult convenience doesn’t always match child capability.
Why it fails: Multiple separate containers seem organized to adults but overwhelm young children. Complex latches you open easily may frustrate a first-grader.
Solution: Test opening mechanisms with your child before purchasing. Observe how they handle containers. Choose designs matching their current skill level.
Mistake #4: Not Pre-Testing Food Combinations
Assumptions about what works in compartments often prove wrong.
Why it fails: Wet foods leak into dry sections. Foods settle during transport. Containers too small for realistic portions.
Solution: Do a trial run on weekend. Pack actual lunch, transport in backpack, wait appropriate time, then evaluate. Adjust before relying on setup for school.
Mistake #5: Expecting Dishwasher to Handle All Cleaning
Dishwashers can’t reach crevices where bacteria grow.
Why it fails: Gasket grooves, latch mechanisms, and corners trap food particles. Dishwasher water pressure doesn’t dislodge stuck debris.
Solution: Hand-scrub details weekly even if dishwasher-safe. Use small brush for grooves and corners.
Mistake #6: Using Insulated Bags Without Ice Packs
Insulation slows temperature change but doesn’t actively cool.
Why it fails: Insulation only delays room temperature equilibrium. Without ice packs, food reaches unsafe temperatures within 3-4 hours.
Solution: Always pack ice packs with perishable foods, regardless of insulation quality.
How to Choose the Right Size
Capacity directly impacts whether children eat enough, food stays fresh, and lunch boxes fit backpacks.
Capacity by Age Guidelines
Toddlers (2-4 years): 2-3 cups total
- ½ sandwich or 3-4 oz protein
- ½ cup fruit
- ½ cup vegetable
- Small treat (2-3 crackers)
Preschool (4-6 years): 3-4 cups total
- Full sandwich or 4-6 oz protein
- ¾ cup fruit
- ¾ cup vegetable
- Small treat and drink
Early Elementary (6-9 years): 4-6 cups total
- Full sandwich plus protein or double protein
- 1 cup fruit
- 1 cup vegetable
- Treat and drink
- Optional: additional snack for after-school
Upper Elementary (10-12 years): 6-8 cups total
- Large sandwich or significant protein
- 1-1.5 cups fruit
- 1 cup vegetable
- Treat and drink
- After-school snack
Professional Tip: Children’s appetites vary significantly. Observe what your child actually eats, not portion guidelines. Adjust size based on what comes home uneaten vs. requests for more.
Measuring Your Needs
If unsure about capacity:
- Pack typical lunch in containers you currently use
- Arrange items as you would in lunch box
- Measure total volume using measuring cups or note container sizes
- Add 20% for future growth and variety
Backpack Fit Considerations
Lunch box must fit child’s backpack without:
- Requiring force to insert
- Preventing other items from fitting
- Crushing soft items
- Making backpack too heavy to carry
Sizing guideline: Lunch box should occupy no more than 1/3 of backpack’s main compartment.
Separate lunch bag consideration: For children carrying heavy backpacks, separate insulated lunch bags with shoulder straps distribute weight better than adding lunch box to already-full backpack.
Budget vs. Premium: What You Get
Lunch boxes range from $10 to $50+. Understanding value differences helps prioritize spending.
Budget Options ($10-$20)
What you get:
- Basic insulation (if any)
- Polypropylene plastic construction
- Simple closures (snap-lids or basic zippers)
- Limited color/design options
- 1-2 year expected lifespan
Best for: Toddlers and preschoolers who outgrow designs quickly, backup lunch boxes, families on tight budgets
Limitations: Lower temperature retention, faster wear on zippers/latches, may stain or absorb odors quickly
Mid-Range Options ($20-$35)
What you get:
- Quality foam insulation
- BPA-free plastics or basic stainless steel
- Reliable gaskets and closures
- Multiple compartment options
- 2-3 year expected lifespan
- Better design variety
Best for: Most families balancing cost and functionality, elementary-age children, daily school use
Sweet spot: This range offers best value—significant quality improvement over budget without premium pricing.
Premium Options ($35-$50+)
What you get:
- Superior vacuum insulation
- High-grade stainless steel
- Precision-engineered gaskets and locks
- Modular/customizable systems
- Eco-friendly materials and production
- 4-5+ year expected lifespan
- Replacement part availability
Best for: Families prioritizing sustainability, children with special dietary needs requiring strict temperature control, long-term investment approach
Consideration: Premium doesn’t always mean better for your specific needs. A $45 stainless steel bento box isn’t better than a $25 option if your child can’t open the complex latches.
Cost-Per-Use Analysis
Real value emerges from cost-per-use, not purchase price.
Budget example:
$15 lunch box ÷ 1.5 year lifespan ÷ 180 school days/year = $0.056 per use
Premium example:
$45 lunch box ÷ 4 year lifespan ÷ 180 school days/year = $0.063 per use
Insight: When products last their expected lifespan, cost difference is negligible. Premium value comes from better performance (temperature, durability) rather than cost savings.
Professional Tip: Buy premium for children who are careful with belongings and in sizes that will last multiple years. Choose budget-to-mid-range for young children still developing responsibility or who frequently lose items.
Comparison Tables
Lunch Box Type Comparison
| Feature | Insulated Bag | Bento Box | Hybrid System | Stainless Steel |
|---|---|---|---|---|
| Temperature Control | 4-6 hours with ice pack | None (1-2 hours slight cooling) | 3-5 hours with ice pack | 5-6+ hours (vacuum models) |
| Compartments | 1 (add containers) | 3-5 built-in | 3-5 built-in | 2-4 built-in |
| Leak-Proof | Depends on internal containers | 70-90% (not liquids) | 80-95% | 90-98% |
| Weight (empty) | 6-10 oz | 8-14 oz | 12-18 oz | 12-20 oz |
| Dishwasher Safe | No (spot clean) | Yes (top rack) | Partial (containers yes, bag no) | Hand-wash recommended |
| Lifespan | 1-2 years | 2-3 years | 2-3 years | 5+ years |
| Best Age Range | 3-12 | 3-10 | 5-12 | 6+ |
| Price Range | $12-$30 | $15-$35 | $30-$50 | $25-$50 |
Material Safety Comparison
| Material | BPA-Free | Phthalate-Free | Stain Resistant | Odor Resistant | Durability | Weight |
|---|---|---|---|---|---|---|
| Polypropylene (#5) | Yes | Yes | Moderate | Moderate | Good | Light |
| Polyethylene (#2, #4) | Yes | Yes | Moderate | Moderate | Good | Light |
| Stainless Steel (304) | Yes | Yes | Excellent | Excellent | Excellent | Heavy |
| Silicone | Yes | Yes | Good | Good | Good | Light |
| Fabric (exterior) | N/A | N/A | Poor | Poor | Moderate | Very Light |
Age-Appropriate Features
| Age Group | Capacity | Closure Type | Compartments | Insulation | Independence Level |
|---|---|---|---|---|---|
| 2-4 years (Toddler) | 2-3 cups | Simple snap/magnetic | 2-3 | Optional | Adult assistance needed |
| 4-6 years (Preschool) | 3-4 cups | Easy-open latches | 3-4 | Helpful | Minimal assistance |
| 6-9 years (Early Elementary) | 4-6 cups | Standard latches | 4-5 | Recommended | Fully independent |
| 10-12 years (Upper Elementary) | 6-8 cups | Any complexity | 5+ | Recommended | Fully independent |
Checklists
Pre-Purchase Checklist
Before buying, verify:
Safety & Materials
- BPA-free certification stated on packaging
- Food-grade materials (FDA compliant)
- CPSIA compliant for children’s products
- No strong chemical smells when opened
Functionality
- Child can open all closures independently (test in store if possible)
- Capacity matches child’s age and appetite
- Fits in child’s backpack with room for other items
- Leak-proof level matches foods you’ll pack
- Insulation quality matches time between packing and lunch
Durability
- Latches feel sturdy (not flimsy plastic)
- Zippers operate smoothly with metal teeth (if applicable)
- Gaskets fit snugly without gaps
- No sharp edges or rough seams
- Handles/straps securely attached
Maintenance
- Cleaning method acceptable (hand-wash vs. dishwasher)
- Replacement parts available for gaskets/lids
- Design allows access to all corners for cleaning
- Brand has positive reviews for customer service
Daily Lunch Packing Checklist
Efficient packing process:
Night Before
- Place ice packs in freezer (if not already frozen)
- Pre-chill lunch box in refrigerator (optional but helpful)
- Prepare any make-ahead items (cut vegetables, portion snacks)
Morning Of
- Pack perishable items last (minimize time at room temperature)
- Include ice pack(s) with dairy, meat, or cut produce
- Check all container lids secure properly
- Verify child can open containers (occasionally re-test)
- Include napkin and utensils if needed
- Note anything special in lunch (new food, treat) so child looks for it
After School
- Empty lunch box immediately
- Rinse containers before food dries
- Wash thoroughly or load dishwasher
- Dry completely before closing
- Return ice packs to freezer
- Note what child didn’t eat (adjust future lunches)
Weekly Maintenance Checklist
Extend lunch box life:
- Deep clean with baking soda soak
- Scrub gasket grooves with small brush
- Check latches for stress cracks or bending
- Inspect zippers for debris or damage
- Air out lunch box in sunlight 2-3 hours
- Check for developing odors
- Wipe backpack lunch compartment
- Inventory ice pack condition
- Replace any damaged components
Decision Frameworks
Framework 1: If-Then Selection Guide
IF your child is 2-4 years old
THEN choose: Simple bento box OR compact insulated bag with easy-open zip
BECAUSE: Fine motor skills still developing; needs maximum simplicity
IF temperature control is your top priority
THEN choose: Premium insulated box with vacuum technology OR quality insulated bag with 2+ ice packs
BECAUSE: Standard foam insulation won’t maintain safe temperatures beyond 4 hours
IF your child is a picky eater
THEN choose: Bento box with 4-5 small compartments
BECAUSE: Variety in small portions encourages trying foods; visual separation reduces overwhelm
IF budget is primary concern
THEN choose: Mid-range plastic bento box ($15-$25)
BECAUSE: Best balance of features and longevity; avoids premium pricing without sacrificing safety
IF sustainability matters to your family
THEN choose: Stainless steel bento box OR insulated bag with lifetime warranty
BECAUSE: Longer lifespan reduces waste; stainless steel fully recyclable
IF your child has food allergies
THEN choose: Stainless steel with sealed compartments
BECAUSE: Easiest to clean thoroughly; eliminates cross-contamination concerns; no odor/residue absorption
Framework 2: Priority Weighting
Rank these factors 1-5 (5 = most important) to find your best match:
Temperature Control: _____
- High priority (4-5): Insulated lunch box or hybrid system
- Low priority (1-2): Standard bento box
Budget: _____
- High priority (4-5): Budget-to-mid-range plastic options
- Low priority (1-2): Premium stainless steel or modular systems
Durability/Longevity: _____
- High priority (4-5): Stainless steel or premium brands with warranties
- Low priority (1-2): Budget plastic options
Portion Control/Organization: _____
- High priority (4-5): Bento boxes with multiple compartments
- Low priority (1-2): Single-compartment insulated bags
Child’s Independence: _____
- High priority (4-5): Simple closures matching child’s ability
- Low priority (1-2): Any closure type (parent will assist)
Add your top 2 priorities → Find lunch box type offering both
Framework 3: Problem-Solution Matching
Current Problem: Food spoils before lunch
Solution: Upgrade to better insulation + add second ice pack + pre-chill all components
Current Problem: Constant leaking
Solution: Switch to containers with 4-point latch systems + silicone gaskets + test before purchasing
Current Problem: Child can’t open containers
Solution: Age-inappropriate closures; choose magnetic or simple snap-lid designs
Current Problem: Lunch box smells despite cleaning
Solution: Materials absorbing odors; switch to stainless steel OR replace aging plastic
Current Problem: Child refuses to eat packed lunch
Solution: Involvement issue; let child choose new lunch box + help plan meals + bento presentation
Current Problem: Lunch box breaks repeatedly
Solution: Quality or handling issue; upgrade to mid-range+ OR address rough handling through teaching
FAQs
1. How long do insulated lunch boxes keep food cold?
Quality insulated lunch boxes maintain safe temperatures (below 40°F) for 4-6 hours when used with ice packs. Vacuum-insulated stainless steel containers perform best at 5-6+ hours. Standard foam insulation provides 3-4 hours. Variables affecting performance include: initial food temperature (pre-chilled food lasts longer), ice pack quality and quantity, frequency of opening, and ambient temperature. For school schedules longer than 5 hours, use two ice packs and pre-chill the lunch box itself. Test your specific lunch box with a thermometer to verify performance meets your needs.
2. Are bento boxes good for picky eaters?
Yes, bento boxes often work well for picky eaters because they address common barriers to eating. Multiple small compartments reduce the overwhelming appearance of large portions. Visual separation prevents foods from touching, which many selective eaters prefer. Variety presentation encourages trying small amounts of different foods without pressure to finish large servings. The organized, colorful appearance makes meals more appealing. Compartments also allow “safe” familiar foods alongside new items, reducing anxiety. However, some children find multiple sections confusing or prefer simple meals, so consider your specific child’s preferences.
3. What lunch box materials are safest for kids?
Food-grade stainless steel (304/18-8 grade) is considered safest, being naturally BPA-free, phthalate-free, and non-reactive with foods. For plastics, choose products labeled BPA-free and made from polypropylene (#5 plastic) or polyethylene (#2 or #4), which have excellent safety profiles. Avoid polycarbonate plastics (#7) which may contain BPA, and PVC (#3) which can contain phthalates. Look for FDA compliance for food-contact materials and CPSIA certification for children’s products. Silicone gaskets and seals should be food-grade. If concerned about chemicals, stainless steel with minimal plastic components offers peace of mind.
4. Can you put hot food in kids’ lunch boxes?
Standard lunch boxes designed for cold food should not be used for hot items. However, thermos-style containers specifically designed for hot food safely maintain temperatures above 140°F for 4-6 hours. These use vacuum insulation to retain heat. To use safely: pre-heat the container with boiling water for 5 minutes, heat food to 165°F+, fill container completely, and keep sealed until eating. Good hot foods include soups, pasta dishes, rice bowls, and stews. Avoid fried foods (become soggy) and items requiring specific textures. Check manufacturer specifications—not all insulated lunch boxes are rated for hot food.
5. How do you get smells out of plastic lunch boxes?
Remove odors from plastic lunch boxes using these methods: (1) Baking soda soak: Fill container with 2-3 tablespoons baking soda and warm water, let sit overnight, then wash normally. (2) Vinegar soak: Mix 1 part white vinegar with 4 parts water, soak 2-4 hours, then wash thoroughly. (3) Sunlight exposure: After washing, place container in direct sunlight for 2-3 hours; UV rays neutralize odors. (4) Newspaper method: Crumple newspaper inside dry container, seal overnight; newspaper absorbs odors. If odors persist after these treatments, plastic may have absorbed oils permanently and should be replaced, as odor-causing bacteria may be embedded in material.
6. What size lunch box does a kindergartener need?
Kindergarteners (ages 5-6) typically need lunch boxes with 3-4 cup total capacity. This accommodates a standard kindergarten lunch: full sandwich or 4-6 oz protein, ¾ cup fruit, ¾ cup vegetable, small treat, and drink. Consider your specific child’s appetite—active children or those with longer school days may need slightly more. The lunch box should fit easily in the child’s backpack while leaving room for school supplies. Weight when full should be manageable for the child to carry independently (maximum 2-3 lbs total). Choose closures the child can operate without assistance, as kindergarten is transition time to lunch independence.
7. Are stainless steel lunch boxes dishwasher safe?
Most stainless steel lunch boxes are technically dishwasher-safe but hand-washing is recommended. While the stainless steel itself withstands dishwasher conditions, repeated exposure can: dull the finish, damage printed designs or logos, degrade silicone gaskets over time, and cause plastic lids or components to warp. If using a dishwasher, place on top rack only, remove gaskets and wash separately, use air-dry setting (not heat-dry), and avoid harsh detergents. Hand-washing with hot soapy water extends the appearance and lifespan of stainless steel lunch boxes while ensuring thorough cleaning of corners and crevices that dishwashers may miss.
8. How often should you replace kids’ lunch boxes?
Replace lunch boxes when they fail safety or performance standards, not on a fixed schedule. Replace immediately if: mold returns after thorough cleaning, cracks or chips develop where bacteria can harbor, gaskets won’t seal (food safety risk), or latches break allowing containers to open unexpectedly. Replace for performance reasons when: persistent odors remain despite deep cleaning, insulation no longer maintains safe temperatures, or the size no longer fits child’s appetite. Quality plastic lunch boxes typically last 2-3 years with daily use; stainless steel versions last 5+ years. Budget for replacement every 2-3 years as normal wear, but many lunch boxes exceed this timeline with proper care.
9. Do you need ice packs with insulated lunch boxes?
Yes, ice packs are necessary with insulated lunch boxes when packing perishable foods. Insulation slows temperature change but doesn’t actively cool—it only delays the time food takes to reach room temperature. Without ice packs, insulated lunch boxes provide 1-2 hours of slight cooling effect, insufficient for typical school schedules. Perishable foods (dairy, meat, cut fruits/vegetables) enter the danger zone (40°F-140°F where bacteria multiply rapidly) within 2 hours at room temperature. Use minimum one ice pack for short periods (under 4 hours); two ice packs for longer schedules or warm weather. Pre-freeze ice packs solid (8+ hours) and pre-chill food for maximum effectiveness.
10. What’s the difference between leak-resistant and leak-proof?
Leak-resistant containers prevent typical lunch foods (sandwiches, crackers, cut fruit) from leaking under normal conditions but may seep with liquids or when tipped/compressed. They work well for semi-solid foods and thick items. Leak-proof containers prevent liquids from escaping even when fully inverted, achieved through silicone gaskets and secure locking mechanisms. This distinction matters for food choice—leak-resistant containers work for most lunch items (peanut butter, cut vegetables, pasta salad) but fail with true liquids (yogurt drinks, soup, thin dressings). Test by filling with water and inverting: no leaks = leak-proof; some seepage = leak-resistant. Choose leak-proof only if regularly packing liquids; leak-resistant suffices for typical school lunches.
Tags: best lunch boxes for kids, insulated lunch boxes for kids, bento lunch boxes for kids, kids lunch containers, school lunch boxes, toddler lunch boxes, leak proof lunch boxes, best kids lunch box, top rated lunch boxes for children, lunch boxes for school, preschool lunch containers, elementary school lunch boxes, thermal lunch containers, compartmentalized lunch boxes, stainless steel lunch boxes, BPA-free lunch containers, eco-friendly lunch boxes, portion control containers, ice packs for lunch boxes, lunch box inserts, best insulated lunch box for kindergarten, leak proof bento box for toddlers, dishwasher safe kids lunch containers, lunch boxes that keep food cold all day, best lunch box for picky eaters, how long do insulated lunch boxes keep food cold, what size lunch box for 5 year old, are bento boxes good for kids, how to clean kids lunch boxes, what is the safest lunch box material, buy kids lunch box, affordable insulated lunch boxes, best lunch box brands for kids, where to buy bento boxes for children



Leave a Reply