
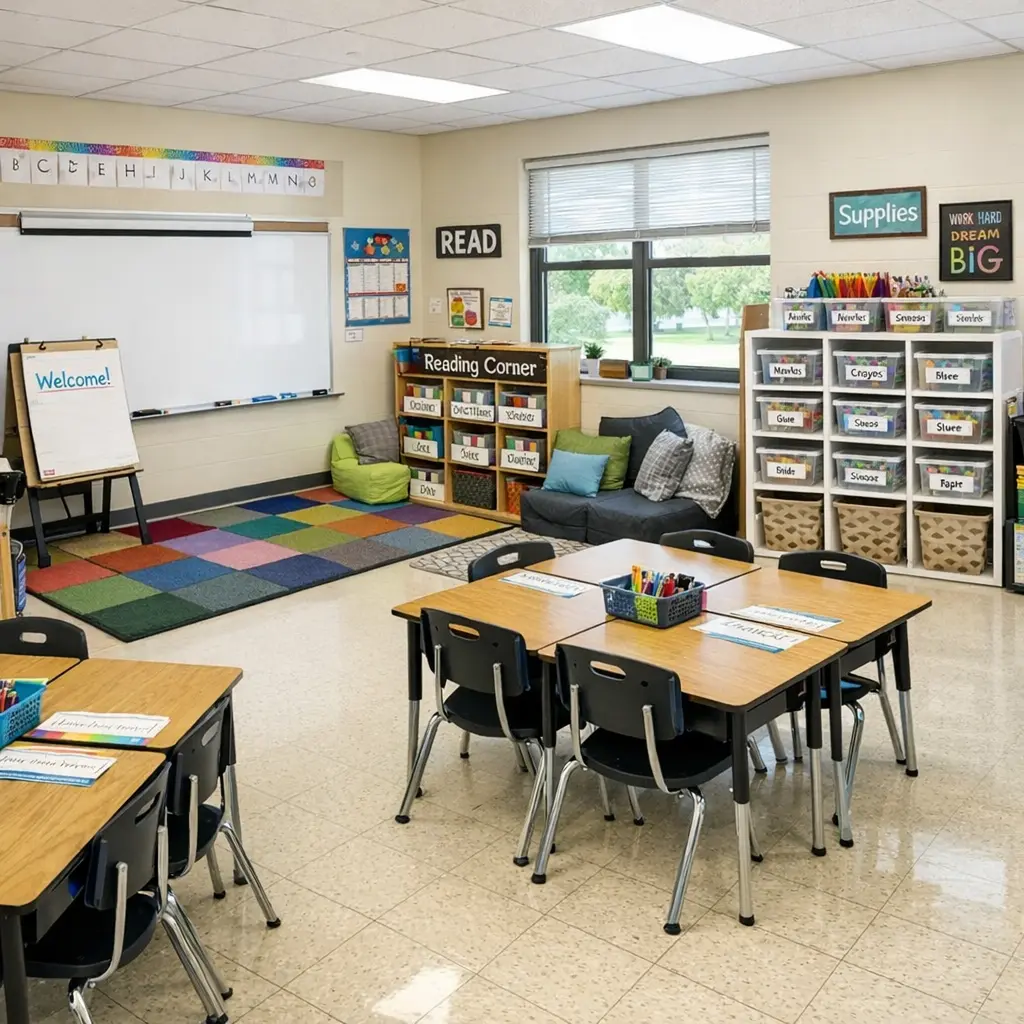
Introduction
An organized classroom creates the foundation for effective teaching and engaged learning. When you walk into your classroom and everything has a designated place, you spend less time searching for materials and more time connecting with students.
The difference between a chaotic classroom and an organized one is not perfection. The best classroom organization ideas create systems that are easy to maintain and support student independence. This guide provides 30 practical classroom organization ideas that work across grade levels, classroom sizes, and budgets.
You will learn how to maximize limited space, create zones that serve specific purposes, organize materials for easy access, and establish systems that stay functional throughout the school year. Whether you are setting up your first classroom or redesigning an existing space, these strategies will help you create an environment that supports both teaching efficiency and student success.
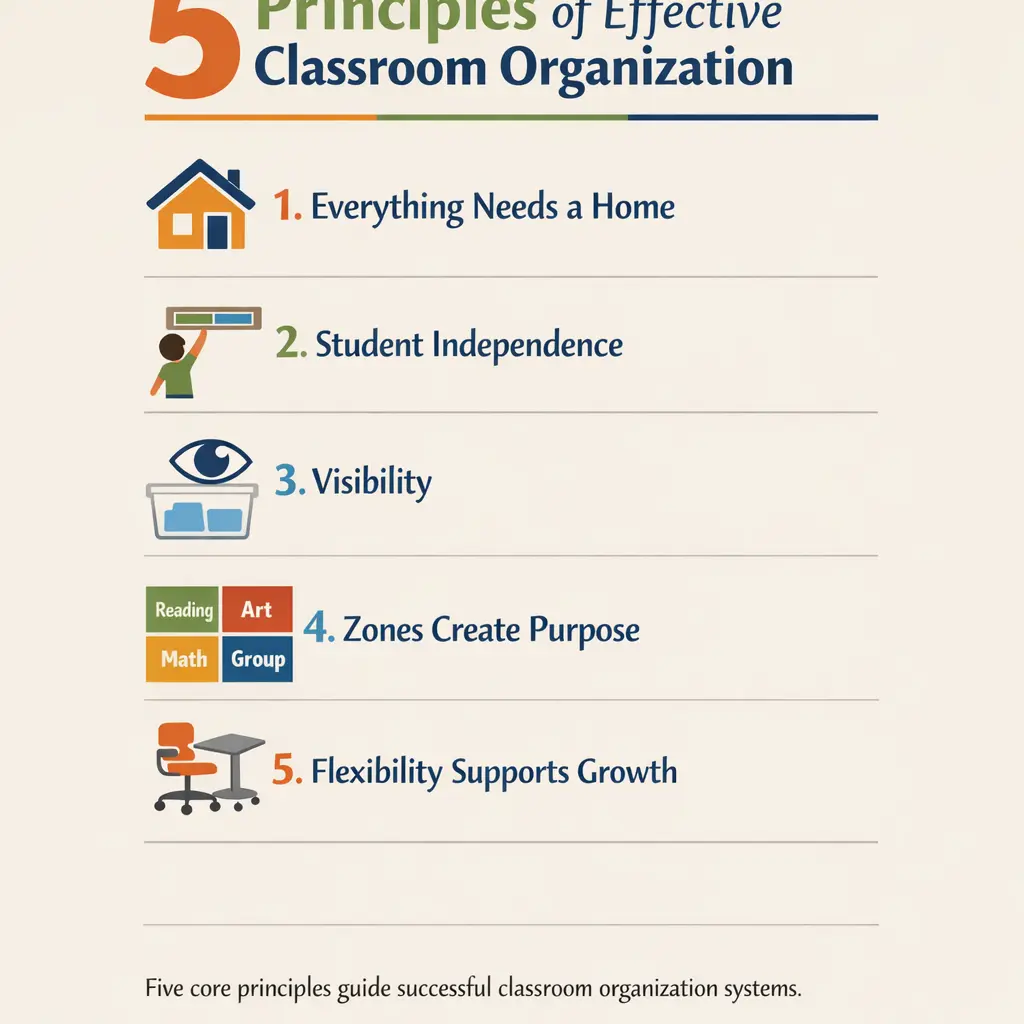
The Foundation: Classroom Organization Principles
Before diving into specific classroom organization ideas, understand the core principles that make any organizational system successful.
Everything Needs a Home
Every item in your classroom should have a specific, designated location. When students and teachers know exactly where materials belong, cleanup takes minutes instead of extended periods. This principle prevents the gradual accumulation of clutter in “temporary” piles.
Assign homes based on frequency of use. Daily materials get prime real estate within easy reach. Weekly items can go on higher shelves or secondary storage areas. Seasonal materials belong in closets or storage rooms until needed.
Student Independence Drives Design
The most successful classroom organization ideas enable students to get what they need without asking for help. This reduces constant interruptions and teaches responsibility.
Design storage at student height for materials they need regularly. Use visual labels that combine words and pictures. Create clear pathways to supply stations. When students can function independently, you gain valuable instructional time.
Visibility Reduces Search Time
Clear containers, open shelving, and well-placed labels eliminate the need to dig through boxes or cabinets. If you can see what you need at a glance, you save countless minutes throughout each day.
This principle applies to student work systems too. Clear turn-in trays show you immediately which assignments are missing. Visible supply levels signal when you need to restock before you run out completely.
Zones Create Purpose
Dividing your classroom into functional zones helps students understand behavioral expectations for different areas. A reading nook signals quiet, independent work. A collaboration station indicates group work and conversation are appropriate.
Zones also streamline your teaching workflow. When related materials live together in their designated zone, lesson preparation becomes more efficient.
Flexibility Supports Growth
Your organizational systems should adapt as your teaching evolves. Avoid permanent solutions that lock you into one configuration. Use mobile furniture, adjustable shelving, and temporary labels that allow reorganization without major renovation.
Maintenance Must Be Realistic
The Pinterest-perfect classroom that requires an hour of daily organizing will fail. Sustainable classroom organization ideas include systems that students help maintain and routines that take five minutes or less.
Build cleanup into transitions between activities. Assign classroom jobs that distribute responsibility. Design systems that are slightly imperfect but reliably functional over systems that are beautiful but constantly break down.
Space Planning & Layout Ideas
How you arrange the physical space in your classroom impacts everything from student behavior to instructional effectiveness.
Zoning Your Classroom
Create distinct areas that serve specific purposes:
Whole-Group Instruction Zone
This area centers around your main teaching space, whether that is a whiteboard, smartboard, or easel. All students should have clear sightlines to this zone. Arrange student seating so you can easily move among desks during instruction.
Keep this area free of clutter. Materials you use during whole-group lessons should be within arm’s reach but out of student sight to minimize distraction. Many teachers use a rolling cart with daily lesson materials parked beside the instruction area.
Small-Group Learning Zone
Designate a space for guided reading groups, intervention instruction, or collaborative projects. A kidney-shaped table or cluster of desks works well. Position this zone where you can see the rest of the classroom while working with a small group.
Store leveled books, manipulatives, whiteboard materials, and other small-group tools in this zone. Many teachers use a bookshelf or rolling cart adjacent to the small-group table.
Independent Work Zone
Students need spaces for focused, individual work. This might be their assigned desks or alternative seating options like cushions, lap desks, or standing tables.
Provide visual barriers for students who need reduced distractions. Privacy boards, low shelving units, or even strategically placed plants can create semi-private work spaces without expensive renovations.
Collaboration Station
If space allows, create an area where students can work together on projects. A larger table with multiple chairs or floor space with clipboards serves this purpose.
Store collaboration supplies here: chart paper, markers, tape, scissors, and other project materials. This keeps messy materials contained to one area.
Calm-Down Corner
A designated space for emotional regulation helps students develop self-awareness and coping strategies. Include comfortable seating, calming visuals, fidget tools, and perhaps a few books about emotions.
Position this zone in a quieter corner where students can reset without classroom distractions. Keep the area simple and calming rather than stimulating.
Supply Station
Create a central location where students access pencils, paper, tissues, hand sanitizer, and other daily supplies. This prevents constant interruptions to your instruction.
Organize supplies in clearly labeled bins at student height. Many teachers use a bookshelf or cart as a supply station positioned where students can access it without disrupting instruction.
Desk Arrangement Strategies
The way you configure student desks affects classroom management, collaboration, and your ability to circulate during instruction.
Rows
Traditional rows work well for testing situations, independent work periods, and classes where you need maximum focus on the front of the room. Rows provide clear pathways for teacher circulation and minimize student-to-student distraction.
Limitations: Rows reduce collaboration opportunities and can feel impersonal. They work best when you can easily rearrange desks for group activities.
Pods or Clusters
Groups of 4-6 desks facing each other facilitate collaboration and discussion. Pods create built-in partner and small-group configurations without furniture moving.
Arrange pods so students can easily turn to see the main instruction area. Leave sufficient space between pods for teacher circulation. Many teachers assign each pod a color or name for quick group designation.
Limitations: Some students struggle to stay focused when facing peers. Off-task conversation increases if you do not establish clear expectations.
U-Shape or Horseshoe
Desks arranged in a U-shape allow every student to see each other during discussions while maintaining clear sightlines to the front. This configuration excels for Socratic seminars, literature discussions, and other talk-intensive activities.
The open center provides space for demonstrations, movement activities, or small-group work areas. Teachers can easily reach every student from the open center.
Limitations: U-shapes require more floor space than rows or pods. They work best in medium to large classrooms with 25 or fewer students.
Pairs
Pairing desks creates built-in partners for think-pair-share, peer editing, and collaborative activities while maintaining more structure than larger pods.
Arrange pairs in rows, U-shapes, or staggered configurations depending on your space and needs. This flexibility makes pairs a popular choice across grade levels.
Flexible or No Assigned Seats
Some teachers skip assigned seats entirely, allowing students to choose their spots based on the day’s activities. Provide a variety of seating options: traditional desks, standing tables, floor cushions, wobble stools.
Flexible seating requires strong classroom management and clear expectations. It works best with mature students and teachers comfortable with less structure.
Traffic Flow Optimization
How students move through your classroom affects transition time and behavior.
Create Clear Pathways
Leave at least 24-30 inches between furniture for comfortable passage. Main aisles should be even wider, especially routes to the door, pencil sharpener, trash can, and turn-in areas.
Avoid arrangements that require students to squeeze between desks or navigate obstacle courses to reach essential areas.
Minimize Bottlenecks
Place high-traffic areas—supply station, turn-in trays, pencil sharpener, hand sanitizer—in different parts of the room. This prevents congestion when multiple students need these resources simultaneously.
Position your trash can away from your desk unless you want constant traffic near your workspace.
Position Your Desk Strategically
Your desk location affects classroom dynamics. Desks positioned at the front create a traditional authority structure. Desks at the back or side allow you to move freely during instruction while maintaining a workspace.
Many teachers position their desk in a back corner, freeing the front of the room for instruction and student work areas. Some teachers skip a traditional desk entirely, using a small table or counter space for essential items.
Storage Solutions That Work
Effective storage maximizes your available space while keeping materials accessible and organized.
Vertical Storage Systems
When floor space is limited, build upward.
Wall-Mounted Shelving
Install shelves above student reach for materials you access infrequently: seasonal decorations, extra supplies, archived student work, backup textbooks.
Use sturdy brackets rated for the weight you are storing. Books and binders get heavy quickly. Label shelves clearly so you can locate materials without climbing a ladder.
Over-Door Organizers
Shoe organizers and over-door pocket systems provide dozens of storage compartments without using any floor space. These work exceptionally well for:
- Individual student mailboxes (one pocket per student)
- Supply organization (scissors in one pocket, glue in another)
- Small manipulative storage (math counters, letter tiles)
- Classroom job materials
Hanging File Systems
Wall-mounted file holders keep papers organized without taking desk space. Create files for:
- Daily schedules and lesson plans
- Parent communication
- Grade-level team materials
- Student work awaiting grading
- Blank forms and templates
Pegboards and Grid Panels
Pegboards with hooks provide customizable storage that adapts as your needs change. Hang baskets, hooks, and shelves in any configuration. Grid panels work similarly and often look more modern.
Use pegboards for:
- Art supplies and tools
- STEM materials
- Classroom keys and hall passes
- Frequently used manipulatives
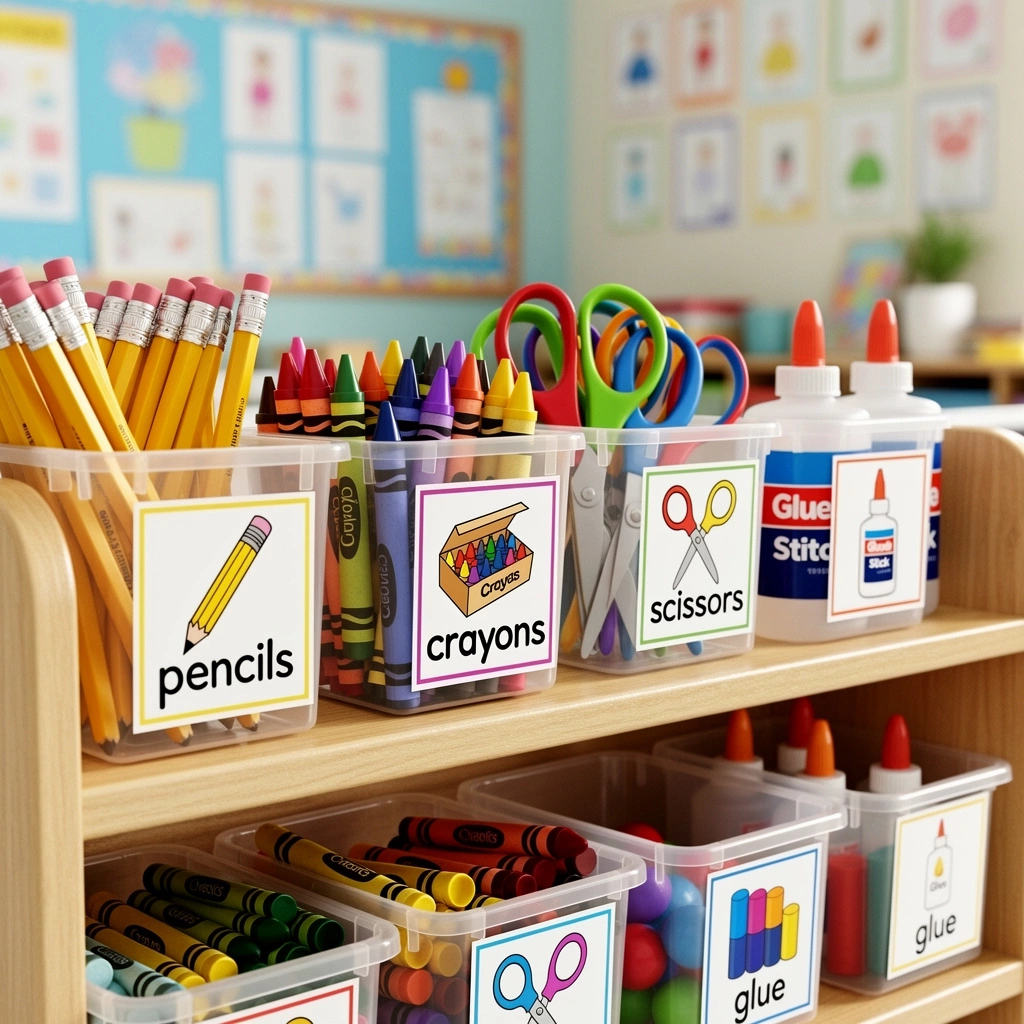
Supply Organization
How you organize classroom supplies affects daily efficiency and your supply budget.
Categorize by Use
Group supplies by how students use them rather than by type:
- Writing station: pencils, pens, erasers, sharpeners
- Paper station: lined paper, construction paper, drawing paper
- Art station: crayons, markers, colored pencils, scissors, glue
- Math station: manipulatives, calculators, rulers, protractors
This organization reduces traffic as students gather what they need for specific tasks.
Use Clear Containers
Transparent bins allow you to see supply levels at a glance. You know when you are running low on glue sticks before you run out completely during a project.
Label containers on multiple sides so labels are visible from different angles. Include pictures on labels for younger students or visual learners.
Control Access to Expensive Items
Some supplies disappear quickly when students have unlimited access: sticky notes, tape, markers. Keep these in your personal storage and distribute as needed, or use a check-out system.
This is not about distrust. It is about budget management. When you spend your own money on supplies, controlling expensive items is sensible.
Create Individual Supply Kits
For younger grades, consider personal supply boxes each student keeps at their desk. Stock these with frequently needed items: crayons, glue, scissors, pencils.
This reduces traffic to supply stations and teaches responsibility for personal materials. Replenish kits weekly or as needed from your central supply stock.
Establish Donation Systems
Organize donated supplies in a separate area so you can locate them easily. Group like items together: tissues, hand sanitizer, disinfecting wipes.
When a donation comes in mid-year, you have a designated spot instead of cramming items wherever they fit.
Student Material Storage
Students need places to keep their belongings organized.
Cubbies
If your classroom has built-in cubbies, use bins or baskets to subdivide the space. Students can separate textbooks, take-home folders, library books, and personal items.
Label each cubby with student names and, for younger students, their photos. This reduces confusion and saves time during arrival and dismissal.
Backpack Storage
Backpacks on the floor create tripping hazards. Solutions include:
- Hooks mounted at student height along a wall
- Over-chair backpack holders that hang on seat backs
- Designated backpack area in a hallway or cloakroom
- Individual bins or cubbies large enough for bags
Choose the method that best fits your available space and student age.
Book Boxes
Individual book boxes hold students’ independent reading books, keeping them clean and organized. Students can easily transport their book box to different reading locations.
Use magazine holders, small bins, or book bags. Label with student names and perhaps their reading level (using discrete codes rather than obvious labels).
Work-in-Progress Storage
Long-term projects need storage between work sessions. Options include:
- Hanging file folders labeled with student names
- Flat drawers in a storage cart
- Designated shelf space with dividers
- Large zippered bags hanging on hooks
This prevents projects from cluttering desks and protects work from damage.
Teacher Workspace Organization
Your desk and surrounding area need organization too.
Daily, Weekly, Monthly System
Organize your materials by how frequently you use them:
Daily: Keep on your desk surface or in top drawers—planner, grading pen, sticky notes, current lesson plans.
Weekly: Store in desk drawers or nearby shelves—grade book, parent contact log, upcoming week’s materials.
Monthly or Less: File in cabinets or storage areas—curriculum guides, standardized test materials, archived lesson plans.
This system ensures your most-used items are immediately accessible while less frequent materials do not clutter your prime workspace.
Inbox System
Create an inbox system that actually works:
- Action needed: Papers requiring immediate attention
- To file: Completed items awaiting proper storage
- To read: Professional development materials, parent notes, administrative memos
- To grade: Student work awaiting assessment
Process these trays regularly. Many teachers schedule 15 minutes on Friday afternoons to clear inboxes before the weekend.
Digital Organization
Your computer desktop needs organization too:
- Create folders by subject or unit
- Use consistent naming conventions for files
- Back up important documents to cloud storage
- Delete or archive old files annually
A cluttered digital workspace slows you down just like physical clutter.
Frequently Used Materials
Keep daily teaching materials within arm’s reach:
- Whiteboard markers and erasers
- Sticky notes in multiple sizes
- Pens and highlighters
- Scissors and tape
- Timer
- Hall passes
A desktop caddy or drawer organizer keeps these items accessible without creating desk clutter.
30 Classroom Organization Ideas
These specific strategies address common organization challenges teachers face.
Ideas 1-10: Essential Foundations
1. Magazine Holder Supply Stations
Transform inexpensive magazine holders into vertical supply organizers. Label each holder with a supply category: notebooks, folders, composition books, graph paper. Stack holders on a bookshelf to create an organized supply wall students can access independently.
This system works exceptionally well for storing different paper types, workbooks, and thin manipulatives like sentence strips or construction paper. The vertical orientation maximizes shelf space.
Tip: Use the same color holders for visual cohesion, or color-code by subject if you teach departmentalized classes.
2. Color-Coded Subject System
Assign each subject a specific color and apply it consistently:
- Math = blue folders, bins, labels
- Reading = red
- Science = green
- Social studies = yellow
Students (and you) can quickly identify materials by subject without reading labels. This reduces cognitive load during transitions and helps visual learners stay organized.
Apply your color system to bulletin boards, storage bins, student folders, and even dry-erase markers if you teach multiple subjects in one space.
Limitation: Color coding requires upfront investment in colored supplies. Budget-friendly alternative: use colored electrical tape or labels on neutral containers.
3. Turn-In Tower
Create a vertical turn-in system using stacked letter trays or a plastic drawer unit. Label each drawer or tray for different assignments: “Homework,” “Exit Tickets,” “Late Work,” “Parent Forms.”
This system prevents the single-pile chaos where papers get lost or mixed up. You can grab the specific drawer you need for grading without sorting through everything.
Position your turn-in tower in an accessible location where students can submit work without disrupting instruction or crowding your desk.
4. Classroom Library Organization
Organize your classroom library in a way that helps students find books independently. Options include:
- By level: Sort books into leveled bins (A-Z, Lexile ranges, or reading level colors). This works well for guided reading collections and beginning readers.
- By genre: Create sections for fantasy, realistic fiction, nonfiction, poetry, biography, etc. This system helps older students explore new genres.
- By topic: Organize nonfiction by subject—animals, space, sports, history. This supports research and student interests.
- Author study: Group books by the same author to encourage students to read series and develop favorite authors.
Use clear labels with pictures for younger students. Forward-facing book displays showcase new additions or connect to current units.
Store books in bins, on shelves, or using a combination of both. Ensure students can reach books without climbing and that books return easily to their designated spots.
5. Anchor Chart Storage
Anchor charts are valuable reference tools, but storing them challenges classroom organization. Solutions:
Binder rings and pants hangers: Hole-punch anchor charts at the top and attach them to large binder rings hung on pants hangers. These hang on a coat rack or hook system. Flip through charts like pages in a book.
Poster storage boxes: Rolling poster tubes or specialized poster boxes protect charts from tears and wrinkles. Label the outside with chart topics for easy location.
Clothesline system: String a rope or wire across a wall or between cabinets. Use clothespins to hang current anchor charts. Rotate charts as topics change.
Pocket chart strips: Create a pocket chart labeled with unit names or standards. Slide miniature versions of anchor charts into pockets. Students can remove charts when needed.
Store archived charts separately from current charts to reduce visual clutter while preserving your hard work for next year.
6. Weekly Work Folders
Give each student a two-pocket folder that stays at school. On Monday, place the week’s assignment sheets, parent communications, and handouts in the folder’s right pocket.
Students complete work throughout the week, moving finished papers to the left pocket labeled “Finished Work.” On Friday, students take folders home to share work with families.
This system reduces lost papers, provides families with regular communication, and creates a predictable routine students can manage independently.
Alternative: Use a monthly folder for older students who can manage longer timelines.
7. Morning Work Station
Designate a specific location where students find their morning work upon arrival. This might be:
- Papers placed on student desks the night before
- Assignment displayed on the board with materials in a central bin
- Individual morning work folders students collect from a designated shelf
Morning work stations create calm, productive starts to the school day. Students enter the room knowing exactly what to do without waiting for instructions.
Store morning work materials—pencils, crayons, scissors—near the work station so students do not need to return to desks for supplies.
8. Absent Work System
Create a clear system for students who were absent:
Absent binder: Use a three-ring binder with dividers for each day of the week. When students are absent, hole-punch copies of handouts and place them in the appropriate day’s section. Returning students check the binder for makeup work.
Absent buddy: Assign each student an “absent buddy” who collects handouts and copies notes when their partner is absent. This teaches responsibility and ensures absent students have peer support.
Absent bin: Place copies of all handouts in a labeled bin organized by date or subject. Students check the bin upon return.
Pair your system with a posted makeup work deadline policy so students know expectations.
9. Seasonal Decoration Storage
Rotate seasonal decorations throughout the year, but where do you store off-season materials?
Clear plastic bins: Store each season’s decorations in separate clear bins labeled “Fall,” “Winter,” “Spring,” “End of Year.” Include bulletin board letters, themed books, decorations, and activity materials.
Stack bins in a storage closet, under cabinets, or on high shelves. When the season approaches, pull down one bin instead of hunting through multiple storage areas.
Photo documentation: Take photos of bulletin boards before taking them down. Next year, the photo serves as a reference for recreating displays quickly.
Digital storage: Scan bulletin board templates and letters. Save digital files organized by season. Print as needed instead of storing physical materials.
10. Emergency Substitute Folder
Organize materials a substitute teacher might need:
Create a clearly labeled folder or binder that includes:
- Class roster with seating chart
- Daily schedule
- Attendance procedures
- Lunch count process
- Student information (allergies, IEPs, behavior plans)
- Emergency procedures (fire drill route, lockdown protocol)
- List of helpful students
- Neighboring teacher contacts
- Lesson plans for 1-2 days
- Grade book location
- Classroom rules and consequences
Store this folder in an obvious location—top desk drawer or hanging file labeled “START HERE.”
Update the folder quarterly and after any significant schedule or student changes.
Ideas 11-20: Advanced Organization Systems
11. Differentiation Station
Create a dedicated space for differentiated learning materials organized by skill level or learning style.
Use a bookshelf or rolling cart with bins labeled by skill level (below grade level, on grade level, above grade level) or learning approach (visual, auditory, kinesthetic). Store alternative assignments, modified texts, enrichment activities, and intervention materials.
When you plan differentiated lessons, you know exactly where to find materials for each group. This prevents last-minute scrambling and ensures all students have appropriate challenges.
Include a mix of teacher-created and purchased materials. Many teachers add student self-selection options for “must do” vs. “may do” assignments.
12. Daily Schedule Pocket Chart
A visual daily schedule helps students anticipate transitions and reduces anxiety, particularly for students with executive function challenges or autism spectrum disorders.
Use a pocket chart with cards for each subject or activity. Include start times for older students. Use pictures alongside words for younger learners or visual processors.
Some teachers make schedule cards velcro-backed so students can move completed activities to a “finished” column, providing visual progress through the day.
Update the schedule when you have assemblies, guest speakers, or special activities. The consistency of seeing schedule changes in advance helps students adapt.
13. Small-Group Rotation System
If you run learning centers or small-group rotations, students need a clear system for knowing where to go.
Rotation chart: Create a visual chart showing which students go to which stations. Use colors, group names, or numbers. Rotate the chart or pointer to indicate the current rotation.
Individual rotation cards: Give each student a card listing their rotation schedule. Students keep cards on their desks or clipped to a lanyard.
Digital timers with signals: Use a projected timer that chimes when rotation time ends. Students learn the routine and transition independently.
Station must-do lists: Post clear expectations at each station: “Read for 15 minutes, complete 2 comprehension questions, choose 1 vocabulary activity.” This reduces management questions during rotations.
14. Technology Organization
Classrooms with tablets, laptops, or Chromebooks need charging and storage systems.
Charging station: Designate one location for device charging. Use a charging cart, power strip with multiple outlets, or USB charging station. Number each charging cable to match device numbers. Students charge devices in the correct spot, preventing cable tangling.
Device checkout system: Create a visual chart showing which devices are checked out to which students. This prevents disputes and helps you track missing devices.
Headphone storage: Use shower caddies, over-door shoe organizers, or labeled bags for student headphones. Number headphones to match device numbers or student numbers. This prevents sharing and spreading germs.
Cord management: Use binder clips, velcro cable ties, or cord organizers to prevent tangled charging cables. Label cords with matching device numbers using colored tape or labels.
15. Maker Space Organization
For STEM, STEAM, or maker spaces, organization prevents frustration and preserves expensive materials.
Use clear bins sorted by material type:
- Building materials (LEGO bricks, K’NEX, blocks)
- Robotics components (sorted by type)
- Craft supplies (sorted by type: buttons, fabric scraps, pipe cleaners)
- Recycled materials (cardboard tubes, bottle caps, egg cartons)
- Tools (scissors, tape, glue guns, rulers)
Label bins with pictures showing what belongs inside. This helps students return materials correctly and reduces time spent sorting.
Create a checkout system for expensive items. Students sign out specific materials and return them before leaving the area.
Establish a cleanup routine where the last five minutes of maker time focuses on organization. Assign specific cleanup jobs: “Lego sorters,” “floor sweepers,” “table wipers.”
16. Classroom Job Display
Visual job charts teach responsibility and distribute classroom maintenance.
Create a pocket chart, clip system, or Velcro board showing student names matched with jobs. Rotate jobs weekly or bi-weekly.
Effective classroom jobs for organization:
- Line leader (organizes hallway transitions)
- Desk inspector (checks that desks are cleared before transitions)
- Supply manager (restocks supplies, reports low inventory)
- Paper passer (distributes handouts efficiently)
- Board cleaner (erases and cleans whiteboards)
- Technology manager (ensures devices are charging, reports issues)
- Library (straightens classroom library, reshelves books)
- Recycling (empties recycling bin, reminds students to recycle)
- Plant caretaker (waters plants on schedule)
- Lost and found (manages classroom lost and found box)
Position the job chart where students check it easily during morning routines.
17. Standards-Based Grading Organization
If your school uses standards-based grading, organize student data so you can track mastery efficiently.
Spreadsheet system: Create a digital spreadsheet with standards across the top and student names down the side. Color-code cells: red (below standard), yellow (approaching), green (meets), blue (exceeds). This provides visual overview of class mastery.
Data binders: Give each student a binder with tracking sheets for each standard. Students graph their own progress, promoting ownership and metacognition.
Standard-specific storage: File graded assessments by standard rather than by date. When you need evidence of student mastery for conferences or report cards, pull the standard-specific folder instead of searching chronologically.
Sticky note system: Keep a sticky note for each standard. As you assess students, jot names and performance levels on the relevant sticky note. Transfer data to your grade book weekly.
18. Centers Management Board
A centers management board shows students which centers are available, what materials are needed, and how many students can participate.
Create a board (poster, bulletin board, or whiteboard section) divided into columns for each center. In each column, include:
- Center name and icon
- Number of students allowed (use clothespins or magnets students move to show spots filled)
- “Must do” or “may do” designation
- Materials needed
- Approximate time required
Students check the board to choose centers independently. This reduces management questions and teaches decision-making.
Update centers as units change, keeping the system fresh and aligned with current learning targets.
19. Visual Timer and Transition Warnings
Students struggle with time management and sudden transitions. Visual timers provide concrete understanding of time remaining.
Use:
- Digital countdown timers projected on your screen
- Time Timer (shows red diminishing circle)
- Hourglass or sand timers for short activities
- Online timers with customizable alerts
Give time warnings at regular intervals: “10 minutes left,” “5 minutes left,” “2 minutes left,” “1 minute left.” This helps students pace work and prepare mentally for transitions.
Some teachers use music as a timer—play a specific song and students know they have the song’s duration to complete the task.
20. Flexible Seating Organization
If you offer flexible seating options, organization prevents chaos.
Seating choice board: Display available seating options with pictures and rules for each. Include number of students allowed at each location.
First-come, first-served with limits: Students choose seating when they arrive, but each option has a maximum capacity. Use clips, magnets, or a chart to track filled spots.
Earned privilege system: Students earn flexible seating through positive behavior or completed work. Those who struggle with self-regulation start with assigned seats and transition to choice as they demonstrate readiness.
Material stations: If students do not have assigned desks, create personal storage spaces with each student’s supplies. Students carry a pencil box or small caddy to their chosen seat.
Furniture arrangement: Organize flexible seating in zones (quiet individual work area, collaborative space, floor seating section) to guide appropriate choices based on task.
Ideas 21-30: Specialized Solutions
21. Sensory Tools Organization
Many classrooms now include sensory tools—fidgets, noise-canceling headphones, wobble cushions, resistance bands.
Store sensory tools in a designated “sensory station” or “calm corner”:
- Use clear bins labeled by tool type
- Create a checkout system if tools are limited
- Sanitize regularly (establish a “clean” and “used” bin system)
- Teach appropriate use and return procedures
Some teachers allow students to keep one selected fidget tool in their desk, while others require tools to stay in the sensory area.
Position sensory tools near the calm-down corner so students can access them when needed without disrupting instruction.
22. Bulletin Board Organization System
Instead of creating new bulletin boards from scratch, design boards you can update with minimal effort.
Template approach: Create a bulletin board border and title that stay up all year. Change only the interior content as units change. Example: “Student Spotlight” board where you swap student work monthly but keep the same frame.
Learning target display: Dedicate one board to current learning targets or standards. Update weekly or by unit. This keeps focus on academic goals.
Interactive boards: Design boards students can manipulate—word walls they add to, data tracking charts they update, question boards where they post inquiries.
Pre-made sets: Invest in one or two high-quality bulletin board sets per year. Reuse sets annually, storing them in labeled bins during off-months.
Minimalist approach: Some teachers skip elaborate bulletin boards entirely, using only essential displays: classroom rules, daily schedule, learning targets. This reduces visual clutter and maintenance time.
23. Math Manipulative Organization
Math manipulatives easily become disorganized chaos. Prevent this with intentional systems.
Tackle boxes: Use fishing tackle boxes or craft organizers with multiple compartments. Each compartment holds a different manipulative type. Students take the whole box to their desk rather than accessing a communal bin.
Labeled bags: Store each manipulative type in a labeled zippered bag. Stack bags in a designated math manipulative bin or shelf.
Group sets: Pre-count manipulatives into group sets. Students take one complete set for their table or pair. Count materials back in before cleanup.
Rotation system: Keep only current unit’s manipulatives accessible. Store others until needed. This reduces clutter and decision fatigue.
Student responsibility: Assign a “manipulative manager” student job. This student ensures materials return properly and reports missing pieces.
24. Teacher Planner and Materials Organization
Your lesson planning materials need a system that supports efficient preparation.
Physical planner setup:
- Use divider tabs for each month or unit
- Keep master copies of frequently used handouts in page protectors
- Store planner near your teacher desk for quick reference
- Use sticky flags for important dates or notes
Digital planning:
- Create a folder structure: Year > Unit > Lesson
- Use consistent file naming: Date_Subject_Topic
- Bookmark frequently accessed websites
- Use cloud storage for access from school and home
Materials by unit:
Store physical teaching materials by unit in labeled bins or file folders. Include:
- Copy masters
- Anchor chart templates
- Manipulatives specific to unit
- Read-aloud books
- Assessment materials
When the unit approaches, pull the complete bin. You have prepared materials from previous years plus space to add new ideas.
25. Assessment Organization
Keep formative and summative assessments organized for data tracking and parent conferences.
Assessment binders: Create a binder for each grading period with sections for each assessment type: quizzes, tests, projects, performance tasks. File one sample of each assessment with an answer key.
Student data folders: Keep a folder for each student containing assessment results, work samples, and progress monitoring data. During conferences, you have comprehensive information at hand.
Digital portfolios: Use cloud storage to scan or photograph student work samples. Organize by student name and date. This creates a growth portfolio over time and reduces paper storage.
Item analysis: After assessments, note which questions most students missed. File this with the assessment. Next year, you know which concepts need additional instruction before assessing.
26. Small-Space Solutions
Teaching in a small classroom requires creative organization.
Mobile furniture: Use rolling carts, folding tables, and stackable chairs that reorganize quickly for different activities.
Under-utilized spaces:
- Space under windows for low storage
- Wall space above student reach for teacher materials
- Door backs for over-door organizers
- Corners for triangular shelving units
Multi-purpose furniture:
- Ottoman storage seats
- Bookcases that double as room dividers
- Desk with built-in shelving
- Hollow benches that open for storage
Minimal decorations: In small spaces, visual clutter feels overwhelming. Choose essential displays only.
Vertical focus: Build up instead of out. Use tall, narrow shelving instead of wide, short units.
27. Digital File Organization
Your computer files need organization systems too.
Folder hierarchy:
textTeaching (main folder)
  > Grade 3 or Subject (school year folder)
    > Math (subject folders)
      > Unit 1: Place Value (unit folders)
        > Lesson Plans
        > Handouts
        > Assessments
        > Anchor Charts
Consistent naming:
Use dates and descriptive names: 2024-09-15_Math_PlaceValue_Worksheet.pdf
Archive old years: At year’s end, move the entire year folder to an “Archive” folder. Start fresh each year but keep old materials accessible.
Bookmark organization: Create bookmark folders by subject or unit. Save frequently accessed websites, interactive tools, and educational resources.
Cloud backup: Store important files in Google Drive, OneDrive, or another cloud service. If your computer crashes, your materials are safe.
28. Reading Group Materials Organization
Guided reading requires many materials accessible during small-group instruction.
Rolling cart system:
Set up a cart with drawers or shelves:
- Top level: Current week’s leveled books organized by group
- Second level: Dry-erase boards, markers, magnetic letters
- Third level: Phonics cards, word work materials
- Bottom level: Assessment materials, reading records
Book band bins:
Organize leveled readers in bins by level (Level A, Level B, etc. or color bands). Label bins clearly. Pull books for upcoming week and store in your cart system.
Lesson plan binder:
Keep a binder with tabs for each reading group. Include:
- Running records
- Lesson plan templates
- Student progress notes
- Word lists specific to group
The binder travels with you to the guided reading table.
Student book bags:
Give each student in a reading group a bag containing their current book, bookmark, and perhaps a reading response journal. Bags stay in the guided reading area between sessions.
29. Parent Communication Organization
Keep parent communication organized for reference and documentation.
Communication log:
Maintain a log (digital spreadsheet or paper chart) with:
- Date
- Parent name
- Communication method (email, phone, note)
- Topic
- Resolution or next steps
This log provides documentation and helps you remember previous conversations.
Email folders:
Create email folders for:
- Parent communication (archived by school year)
- Administration
- Grade-level team
- Individual students (for ongoing situations)
Physical folder system:
Keep a file folder for each student containing:
- Parent contact information
- Copies of sent home notes
- Signed permission slips
- IEP or 504 documentation
- Behavior documentation
These folders prove invaluable during parent conferences or if concerns escalate.
Template collection:
Save templates for frequently sent communications:
- Welcome letter
- Conference invitation
- Missing work notification
- Positive behavior note
- Weekly newsletter template
Having templates ready reduces composition time.
30. End-of-Year Organization
End the year with organization systems that prepare you for next year.
June tasks:
- Label and store items you will reuse: “Keep for next year”
- Discard broken materials, dried markers, damaged books
- Clean and inventory manipulatives
- Archive this year’s lesson plans and materials
- Take photos of successful bulletin boards
- Note what organizational systems worked and what failed
Student material return:
Create a system for returning student belongings:
- Label individual bags with student names
- Pack student work samples, projects, supplies
- Send home library books, forgotten items
- Clear out student storage areas systematically
Summer storage:
Store materials strategically:
- Group by first use: September materials most accessible
- Label all boxes clearly: “Math—Unit 1” not just “Math”
- Store seasonal items together: “Fall decorations,” “Winter bulletin boards”
- Protect materials: use plastic bins for water protection if stored in basements
Reset classroom:
Leave your classroom organized for August you:
- Clear desk surface
- Remove all trash
- Organize supplies by category
- Leave a note to yourself about planned changes
- Store furniture strategically for summer cleaning
Visual Organization Systems
Visual organization reduces cognitive load and supports diverse learners.
Labeling Strategies
Effective labels eliminate guessing and enable independence.
Picture and word labels work for all ages. Younger students rely on pictures while they develop reading skills. Older students and adults process visual information faster than text alone.
Take photos of what belongs in each bin or area. Print and laminate photos as labels. Attach to containers or shelves.
Color-coding adds an additional visual layer. Assign colors to subjects, groups, or categories. Use colored labels, bins, or tape to mark materials.
Label placement matters. Position labels where people naturally look:
- Front and spine of containers on shelves
- Top and front of bins in cubbies
- Eye-level for most-used materials
- Multiple sides for bins accessed from different directions
Font and size affect readability. Use simple, clear fonts (Arial, Verdana, Comic Sans). Make text large enough to read from a few feet away. High contrast (black on white or white on dark colors) increases visibility.
Laminate labels to extend their life. Laminated labels survive spills, handling, and years of use.
Consistent format across your classroom helps students generalize. If you use picture + word labels in one area, use the same format throughout.
Color Coding Systems
Color coding creates visual shortcuts that speed up location and organization tasks.
By subject helps students quickly grab correct materials:
- Math = blue
- Reading/ELA = red
- Science = green
- Social Studies = yellow
- Specials = purple
Apply colors to folders, bins, bulletin board borders, and labels.
By group helps differentiate materials:
- Red group books, materials, folders
- Blue group books, materials, folders
- Green group books, materials, folders
This works well for reading groups, math stations, or table teams.
By task or system:
- Turn-in work = yellow tray
- Graded papers to file = green tray
- Papers to send home = blue tray
By time or frequency:
- Daily use = green labels
- Weekly use = yellow labels
- Monthly or rare use = red labels
This helps you organize storage by accessibility needs.
Limitations: Color coding requires investment in colored supplies. Budget alternative: use colored tape or labels on neutral containers. Also, colorblind students may struggle with some color combinations. Include text labels alongside color.
Visual Schedules and Displays
Visual schedules help all students, particularly those with executive function challenges, anxiety, autism, or language processing difficulties.
Daily schedule display shows the day’s structure. Include:
- Subject or activity name
- Icon representing the activity
- Time or duration
- Location if students move rooms
Update the schedule when there are changes (assemblies, fire drills, guest speakers). Consistency of seeing changes displayed reduces anxiety about disrupted routines.
Classroom rules poster serves as a visual reminder. Keep rules:
- Positively worded (“Use kind words” vs. “No mean words”)
- Limited (3-5 rules maximum)
- Supported by pictures or icons
- Posted at student eye level
Learning target display keeps academic focus visible:
- “Today we will…” statement
- Success criteria (How will we know we learned it?)
- Connection to standards (for older students or teacher reference)
Update daily or by lesson to reflect current learning.
Visual directions for multi-step tasks help students work independently:
- Numbered steps
- Picture for each step
- Checklist format students can mark off
Use visual directions for routine tasks: morning arrival routine, how to use the pencil sharpener, cleanup procedures, center rotations.
Anchor charts display key concepts, strategies, or examples students reference during work. Effective anchor charts:
- Co-create with students when possible
- Use clear headings and organization
- Include visuals and color
- Display only current, relevant charts
- Refresh as topics change
Word walls build vocabulary systematically. Organize alphabetically, by topic, or by frequency of use. Include pictures for visual learners and ELL students.
Grade-Level Specific Strategies
Different age groups need different organizational approaches.
Early Childhood (PreK-2)
Young learners need simplified systems with heavy visual support.
Picture-heavy labels: Use actual photos or clip art showing what belongs in each location. Minimize text or pair with simple words.
Limited choices: Too many options overwhelm young students. Offer 2-3 center choices rather than 6-8. Keep supply options simple.
Low, accessible storage: Everything students need independently should be at their height. Adult-only materials go on high shelves.
Routine and consistency: Young children thrive on predictable routines. Keep organizational systems consistent throughout the year. Changes confuse and slow down students still developing independence.
Personal spaces: Each child needs clearly marked personal space: cubby, desk, coat hook. Use their photo alongside name labels.
Cleanup songs and timers: Make cleanup fun and time-bound. Sing cleanup songs or use sand timers to motivate young children to tidy spaces.
Large motor incorporation: Young children clean more effectively when they can use large movements. Provide child-sized brooms, dust pans, spray bottles for wiping.
Play-based organization: Use toy storage concepts—see-through bins, picture labels, specific homes for materials. Learning materials are toys to young children.
Elementary (3-5)
Upper elementary students can handle more complex systems and take greater responsibility.
Student ownership: By third grade, students can maintain organizational systems with guidance. Create student jobs, teach organizational procedures explicitly, and hold students accountable.
Multiple organizational methods: Offer options that match different learning styles. Some students prefer color coding; others work better with labeled lists.
Independence with support: Students need less hand-holding than early childhood but still benefit from visual reminders, checklists, and structured systems.
Personal organizational tools: Teach students to use planners, assignment notebooks, and folders. Organizational skills are explicit learning targets at this age.
Desk management: Upper elementary often uses individual desks with storage. Teach desk organization as a skill:
- Schedule weekly or bi-weekly desk cleanouts
- Provide simple systems: folder for current work, folder for finished work, pencil pouch
- Conduct “desk inspections” where students earn rewards for organized desks
Differentiation complexity: You will have wider skill ranges, requiring more sophisticated differentiation. Organize materials so you can quickly access on-level, below-level, and above-level resources.
Collaborative work: Students engage in more group projects. Organize collaboration materials centrally and teach students to return materials properly after group work.
Middle School (6-8)
Middle school organization balances student independence with adolescent disorganization tendencies.
Locker reliance: Students often keep materials in lockers rather than classrooms. Classroom organization focuses on instructional materials and daily supplies rather than personal storage.
Period-based organization: If you teach multiple classes, organize by period or use color-coding by class. This prevents mixing materials for different groups.
Student resistance to “elementary” systems: Middle schoolers reject systems that feel childish. Use mature aesthetics—neutral colors, simple labels, sophisticated organizational products.
Personal responsibility emphasis: Hold students accountable for tracking assignments, bringing materials, and managing their space. Natural consequences (lost points for missing materials) teach organizational skills.
Digital organization: Middle school often introduces more technology. Teach digital file organization, bookmark management, and online assignment submission systems.
Less visual clutter: Middle schoolers generally need less decorated, visually busy spaces than elementary. Focus on functional organization over aesthetic displays.
Group work materials: Students do frequent collaborative projects. Create checkout systems for shared materials: poster boards, markers, research resources.
Flexible spaces: Middle schoolers benefit from varied learning environments. Organize to support both collaborative group work and quiet independent work.
High School (9-12)
High school organization supports student independence and teacher efficiency across many students per day.
Minimal personal storage: High schoolers typically do not have assigned seats or personal classroom storage. Focus on organizing instructional materials and communal supplies.
Period or course organization: With multiple sections of the same course or multiple different courses, organize digitally and physically by course:
- Color-code folders or bins by course or period
- Store materials by unit within each course
- Create separate grade books or spreadsheets
Student independence: High schoolers handle organizational responsibility independently. Provide systems (turn-in bins, supply stations) but expect students to use them without reminders.
Digital-first approach: Much work is digital. Focus on organizing digital files, online grade book, and cloud-based materials. Physical organization decreases.
Professional aesthetics: High school spaces can look more like college classrooms or offices. Skip cutesy decorations in favor of clean, professional organization.
Resource library: Instead of multiple copies of materials at student desks, create reference libraries students access as needed: dictionaries, style guides, calculators, research materials.
Differentiation by course level: Teaching both regular and honors sections, or multiple ability levels, requires clear organization so you do not mix materials. Label everything by course and level.
Organization on a Budget
Effective classroom organization does not require expensive specialty products.
Dollar Store Organization Hacks
Plastic bins and baskets: Dollar stores carry bins in multiple sizes, perfect for organizing supplies, manipulatives, and materials. They lack durability of expensive bins but work for a few years.
Over-door organizers: Shoe organizers create dozens of pockets for student mailboxes, supply sorting, or manipulative storage.
Shower caddies: Portable supply carriers for student table groups. Fill with frequently used supplies students access without leaving their seats.
Dish racks: Use as book displays or to organize composition books vertically.
Ice cube trays: Perfect for sorting tiny manipulatives, beads, or small parts.
Magazine holders: Vertical storage for notebooks, folders, or thin books.
Drawer organizers: Keep desk drawers tidy with cutlery organizers or small bins.
Clothespins: Clip papers, create number lines, label cords, attach to hangers for anchor chart storage.
Command hooks: Hang items without damaging walls. Perfect for rental classrooms or temporary setups.
Spray bottles: Clean supplies for student helpers.
Baskets: Paper plate holders work as book baskets. Plastic baskets hold supplies.
DIY Projects
Cardboard box storage: Cover cardboard boxes (diaper boxes, shipping boxes) with contact paper or wrapping paper. Create custom-sized storage bins.
Cereal box magazine holders: Cut cereal boxes diagonally to create magazine holders. Cover with decorative paper.
Tin can organizers: Wash and remove labels from tin cans. Cover with paper or paint. Group cans together for a desktop organizer.
PVC pipe organizer: Cut PVC pipes to create slots for rolled papers, posters, or anchor charts.
Binder clip hacks:
- Clip to shelf edges to create cord management
- Attach to desk edge to hold papers while grading
- Create photo holders for student name displays
Tennis ball chair feet: Cut slits in tennis balls and push onto chair legs. Reduces noise during movement.
Pool noodle solutions:
- Cut pool noodles to create bumpers for sharp table corners
- Slice lengthwise to create cushioned pencil grips
- Cut into sections for fidget tools
Shoebox storage: Covered shoeboxes create uniform storage for shelves. Students can personalize their boxes.
Plastic bottle organizers: Cut 2-liter bottles to create supply cups or organizers.
Free and Donated Materials
Community donations: Send wish lists to families at the start of the year. Many parents have extra office supplies, bins, or organizational materials at home.
Local business partnerships: Office supply stores, organizing stores, and furniture stores sometimes donate discontinued or display items to teachers.
Thrift stores and garage sales: Find bins, baskets, small furniture, and organizational tools at fraction of retail cost.
Teacher swap events: Organize grade-level or school-wide swaps where teachers exchange materials they no longer need.
Grants and donors: Apply for classroom grants through:
- DonorsChoose.org
- Local education foundations
- Community service organizations (Rotary, Lions Club)
- Parent-teacher organizations
Recycled materials: Ask families to save and donate:
- Egg cartons (sorting trays)
- Yogurt cups (small containers)
- Baby wipe containers (storage bins)
- Cardboard boxes
- Coffee cans with lids
- Plastic containers
- Magazines for cutting
End-of-year scores: Some teachers clear out materials in May. Offer to take organizational items they no longer want.
Community resource centers: Some communities have teacher resource centers with free materials, often including organizational supplies.
Budget-Friendly Principles
Buy multi-purpose items: Invest in items that serve multiple functions rather than single-purpose specialty products.
Prioritize durability for high-use items: Spend more on items students use daily (bins for frequently accessed supplies). Save money on seasonal or occasional-use items.
Reuse and refresh: Instead of replacing organizational systems entirely, refresh with new labels, reorganize contents, or update one component.
Start small: You do not need to organize everything perfectly in one year. Add organizational systems gradually as budget allows.
Trade aesthetics for function: Pinterest-perfect classrooms are beautiful but expensive. Focus on functional organization even if it is not Instagram-worthy.
Common Organization Mistakes
Learning what does not work prevents wasted time and money.
Mistake 1: Over-organizing Before Understanding Needs
Setting up elaborate organizational systems before teaching in the space often leads to mismatch. You do not yet know your workflow, what materials you will use frequently, or how students will move through the space.
Solution: Start with basic, flexible organization. Teach for a few weeks. Notice where bottlenecks occur, what materials you search for repeatedly, and what students struggle to find. Then create targeted solutions.
Mistake 2: Prioritizing Aesthetics Over Function
Beautiful classrooms look inspiring, but if gorgeous bins are too small for your materials or your color-coded system is too complex to maintain, the organization fails.
Solution: Function first, aesthetics second. Choose organizational systems that work for your materials and habits. If they also look nice, that is a bonus.
Mistake 3: Creating Student-Independent Systems That Are Too Complex
If your organizational system requires you to supervise every material retrieval, it is not creating independence—it is creating more work for you.
Solution: Design systems students can use without asking questions. Test systems by having a student try to find and return items without your help. If they struggle, simplify.
Mistake 4: Not Involving Students in Maintenance
Teachers who maintain all organizational systems themselves burn out by October.
Solution: Teach students the organizational systems explicitly. Assign classroom jobs. Build reset time into transitions. When students share responsibility, systems stay functional.
Mistake 5: Copying Pinterest Classrooms Without Adaptation
What works beautifully for a second-grade teacher with 18 students and a large room will not work for a fifth-grade teacher with 30 students in a small space.
Solution: Get ideas from others but adapt to your specific situation: grade level, classroom size, number of students, teaching style, and available budget.
Mistake 6: Labeling Everything Permanently
Your first organizational setup rarely remains optimal. Permanent labels prevent reorganization when you discover better systems.
Solution: Use removable labels, write with dry-erase markers on plastic bins, or use label holders that allow label replacement.
Mistake 7: Storing Everything in the Classroom
Keeping every material you might possibly need creates cramped, cluttered spaces.
Solution: Evaluate what you actually use regularly. Archive or donate materials you have not used in two years. Store seasonal materials outside the classroom if possible. Less is often more.
Mistake 8: Not Planning for Growth
Classrooms accumulate materials throughout the year. Organizational systems filled to capacity in September overflow by December.
Solution: Leave empty space in storage areas. Plan for growth when designing systems. Schedule quarterly decluttering sessions.
Mistake 9: Inconsistent Systems
Using different organizational methods in different parts of the classroom increases cognitive load. Students (and you) must remember multiple systems.
Solution: Choose organizational principles and apply consistently. If you use picture labels for classroom library, use picture labels for supply bins too. Consistency reduces mental energy.
Mistake 10: Giving Up After Initial Failure
Organizational systems sometimes do not work as planned. Materials end up on the floor, students do not follow procedures, or the system is too cumbersome.
Solution: View organization as iterative. When something does not work, analyze why and adjust. Failed organizational attempts teach you what you need.
Maintaining Your Organization Systems
Creating organized systems is step one. Maintaining them is the real challenge.
Daily Routines
Five-Minute Reset
Build a five-minute cleanup into the end of each day or period. Students return materials to designated homes, clear desk surfaces, push in chairs, and straighten areas they used.
This prevents the gradual slide into chaos. Five daily minutes is far easier than spending an hour on Friday afternoon restoring order.
Arrival Routine
Students entering a space for the first time in the day should have clear expectations: where to put backpacks, what to do with homework, what materials to get out, where to find morning work.
A posted arrival routine checklist helps students remember steps. The more automated this routine becomes, the smoother your day starts.
Transition Procedures
Each transition between activities creates opportunity for disorder. Establish clear expectations:
- What to do with current materials
- What to get out for next activity
- Where to move
- Volume level during transition
Teach transitions explicitly and practice until students execute smoothly.
End-of-Day Routine
Clear expectations for departure prevent lost items and messy classrooms:
- Check cubbies for items going home
- Clear desk surfaces
- Push in chairs
- Return borrowed materials
- Check turn-in trays for missing work
Student Responsibility Systems
Classroom Jobs
Distribute organizational maintenance through assigned jobs:
- Supply manager restocks and straightens supply station
- Library organizer reshelves books
- Technology manager ensures devices are charging
- Table captains check that their table area is clean
Rotate jobs weekly so all students learn all systems.
Personal Space Accountability
Hold students responsible for their assigned spaces. Weekly desk checks, cubby inspections, or personal area assessments teach organizational skills.
Positive reinforcement (table group with neatest area earns a reward) works better than punitive approaches for most students.
Student-Created Solutions
When organizational systems break down, involve students in problem-solving. Ask: “Our book bins are messy by the end of each day. What system would help us keep them organized?” Students are more invested in solutions they help create.
Modeling and Teaching
Do not assume students know how to organize. Model explicitly:
- How to return books so spines face out
- How to stack papers neatly in turn-in trays
- How to leave a workspace better than you found it
Younger students especially need repeated modeling and practice.
Weekly Reset Tasks
Friday Afternoon Cleanup
Schedule 15-30 minutes on Friday for deeper organization:
- Sort accumulated papers on teacher desk
- Restock supply station
- Clean whiteboard thoroughly
- Straighten all storage areas
- Return borrowed items to other teachers
- Process turn-in work completely
Grading Organization
Establish a weekly grading routine so papers do not accumulate. Many teachers designate specific evenings for grading specific subjects.
File or return graded work weekly. Papers sitting in stacks create visual clutter and prevent students from learning from feedback.
Communication Catch-Up
Respond to pending parent emails, make scheduled parent contact calls, and update communication logs. Staying current prevents overwhelming backlog.
Seasonal Refresh Strategies
August/September: Setup
Establish systems and teach procedures. Over-teach organizational routines. Front-load explicit instruction so systems become automatic.
October: First Adjustment
After a month of teaching, you will notice what is not working. Make adjustments while student habits are still forming.
January: Winter Reset
After holiday break, students return with forgotten routines. Re-teach organizational procedures. Declutter materials that have accumulated. Refresh bulletin boards and learning displays.
March/April: Energy Boost
Spring slump affects organization too. A mid-spring refresh re-energizes students:
- Rearrange classroom slightly for novelty
- Introduce one new organizational system
- Declutter accumulated materials
- Deep clean surfaces
May/June: Year-End Archive
Systematically break down classroom organization:
- Archive successful materials for next year
- Discard broken or worn materials
- Clean and inventory all supplies
- Label everything clearly for August
- Document what worked and what to change
Summer: Planning
Before the new year begins, review last year’s documentation. Plan organizational improvements based on what you learned. Set up basic systems so you start organized.
When Systems Break Down
Even well-designed systems occasionally fail.
Diagnose the Problem
Is the system:
- Too complicated for students to maintain?
- Missing key elements (bins too small, labels unclear)?
- Not aligned with actual workflow?
- Sabotaged by a few students who need redirection?
- Breaking down because materials have accumulated beyond capacity?
Identifying root cause guides solutions.
Involve Students
Ask students why the system is not working. Their perspective often reveals issues you have not noticed.
Simplify
Complex systems often fail. Look for ways to streamline:
- Reduce categories
- Combine steps
- Make locations more obvious
- Remove unnecessary components
Reteach
Sometimes systems fail simply because students forgot or never fully learned the procedures. Brief reteaching often solves the problem.
Accept Imperfection
No classroom stays perfectly organized all the time. Functional is better than perfect. If the system works adequately most of the time, that is success.
Implementation Timeline
You do not need to implement all 30 organization ideas immediately. Pace yourself.
Before School Starts
Week 1-2: Planning Phase
- Measure classroom space
- Sketch rough floor plan
- Decide on desk arrangement
- Identify zones (whole-group area, small-group area, supply station, etc.)
- Make list of needed organizational supplies
Week 3: Shopping and Gathering
- Purchase or gather organizational supplies
- Collect donated materials
- Borrow items from other teachers
- Raid dollar stores and thrift shops
Week 4: Physical Setup
- Arrange furniture
- Set up zones
- Organize supplies into bins and shelves
- Label everything
- Set up teacher workspace
- Create turn-in systems
Week 5: Preparation for Students
- Prepare student name labels
- Set up student storage (cubbies, desks, backpack hooks)
- Create visual schedules and rule posters
- Prepare first week’s materials
- Set up classroom job chart
First Month of School
Week 1: Teaching Procedures
Explicitly teach organizational systems:
- Where to find supplies
- How to use the turn-in system
- Arrival and dismissal routines
- Transition procedures
- Classroom jobs
Week 2-3: Reinforcing and Adjusting
Notice what is working and what is not. Make small adjustments. Continue reinforcing procedures.
Week 4: First Maintenance Cycle
Implement weekly reset routines. Involve students in maintaining systems.
Mid-Year Adjustment (January)
After winter break, refresh organization:
- Declutter accumulated materials
- Reorganize systems that are not working well
- Introduce new organizational tools if needed
- Reteach procedures students have forgotten
Spring Sustaining (March-May)
- Maintain systems without major changes
- Add small tweaks as needed
- Plan improvements for next year
- Begin end-of-year archiving in May
End of Year (May-June)
- Systematically pack and label materials
- Discard worn items
- Clean and inventory supplies
- Document successes and failures
- Plan summer improvements
Troubleshooting Organization Failures
“Students Keep Losing Materials”
Possible causes:
- Storage locations are not obvious
- Too many places materials could go
- Labels are unclear or missing
- Students are not invested in organization
Solutions:
- Simplify: fewer storage locations, clearer labels
- Use picture labels
- Teach retrieval and return procedures explicitly
- Create personal accountability for personal materials
- Reduce quantity of materials to track
“My Desk is Always Cluttered”
Possible causes:
- No designated inbox system
- Trying to keep too many things accessible
- Papers have no clear workflow
- Using desk as catch-all storage
Solutions:
- Implement inbox trays (action needed, to file, to grade, to read)
- Keep only daily-use items on desk surface
- Process inboxes weekly
- Create specific homes for papers instead of “on desk”
- Go paperless where possible
“Supplies Disappear Too Quickly”
Possible causes:
- Unlimited student access to expensive items
- Students taking supplies home accidentally
- Waste due to unclear expectations
- Materials stored where you cannot monitor use
Solutions:
- Limit access to expensive supplies (teacher distributes or check-out system)
- Teach conservation: “Use one glue stick per project, not one per day”
- Number expensive items and assign to specific students
- Monitor supply station periodically
- Buy in bulk at discount to reduce per-item cost
“Students Do not Follow Organizational Procedures”
Possible causes:
- Procedures were not explicitly taught
- Procedures are too complex
- Lack of accountability
- Inconsistent enforcement
Solutions:
- Reteach procedures step-by-step
- Model expected behavior
- Practice with whole class
- Simplify procedures if too complex
- Provide positive reinforcement for following procedures
- Establish logical consequences for ignoring procedures
“I Cannot Maintain Organization Long-Term”
Possible causes:
- Systems require too much teacher effort
- No built-in maintenance routines
- Students are not helping maintain systems
- Trying to maintain perfection instead of functionality
Solutions:
- Build five-minute daily reset into schedule
- Assign classroom jobs that distribute maintenance
- Lower standards from perfect to functional
- Eliminate organizational systems that require excessive maintenance
- Accept seasonal fluctuation (more organized in September than May)
“Organizational Systems Work for Some Students But Not Others”
Possible causes:
- One-size-fits-all approach does not match all learning styles
- Some students need additional support
- Executive function challenges
Solutions:
- Offer options that accommodate different preferences
- Provide additional scaffolding for students who struggle: checklists, visual schedules, simplified systems
- Teach organizational skills explicitly as part of curriculum
- Partner struggling students with organized peers
- Communicate with families about supporting organization at home
Frequently Asked Questions
1. How do I organize a classroom with limited space?
Small classrooms require vertical thinking and multi-purpose solutions. Install wall-mounted shelving above student reach for materials you access infrequently. Use over-door organizers to create storage without using floor space. Choose furniture that serves multiple purposes, like hollow storage benches or bookcases that double as room dividers. Arrange desks to maximize floor space—rows often use space more efficiently than pods in small rooms. Limit decorations and displays to reduce visual clutter. Store seasonal materials outside the classroom if possible. Use mobile furniture on wheels that can be rearranged or pushed aside when you need open floor space. Keep only current materials in the classroom and archive or store everything else.
2. What is the best classroom layout for student engagement?
The best layout depends on your teaching style and grade level, but flexible arrangements that support multiple instructional modes work well. A U-shape or horseshoe arrangement allows students to see each other during discussions while maintaining clear sightlines to the teacher. Pods or table clusters facilitate collaboration and group work. Leave open floor space in the center for movement activities, demonstrations, or gathering as a whole class. Position your small-group instruction table where you can monitor the rest of the class. Create distinct zones for different types of learning: whole-group instruction, small-group work, independent reading, collaboration, and technology. The key is arranging furniture to support how you actually teach rather than copying a layout that worked for someone else.
3. How can I organize my classroom on a tight budget?
Start with free and repurposed materials before buying anything. Ask families to donate organizational supplies at the beginning of the year. Shop dollar stores for bins, baskets, and basic organizational tools. Repurpose household items: cereal boxes become magazine holders, tin cans become supply caddies, shoeboxes create uniform storage. Check thrift stores and garage sales for bins and small furniture. Apply for classroom grants through Donors Choose or local education foundations. Focus spending on durable items you will use daily and save money on seasonal or occasional items. Create DIY solutions: cover cardboard boxes with contact paper for custom storage, use binder clips and command hooks for creative solutions. Remember that function matters more than aesthetics—organizational systems do not need to be expensive to work effectively.
4. How often should I reorganize my classroom?
Do a minor refresh at the beginning of each semester (August and January). This includes decluttering accumulated materials, adjusting systems that are not working optimally, and deep cleaning surfaces. Make small adjustments whenever you notice inefficiencies—do not wait for major overhauls. At the end of each school year, pack and organize thoughtfully so you start the next year with good systems. Avoid frequent major reorganizations during the school year, as constant change disrupts student routines and wastes instructional time. Instead, make incremental improvements. If something is not working well, change that specific element rather than overhauling the entire classroom. Most teachers find their organizational systems stabilize after the first month of school and then need only minor tweaks until the next year.
5. What are the essential organizational supplies every classroom needs?
Core organizational supplies include: storage bins or baskets in various sizes for grouping materials, labels (or label maker) for clearly marking everything, file folders or magazine holders for paper organization, pencil boxes or caddies for student supplies, shelving units for vertical storage, hooks for hanging backpacks or materials, turn-in trays or folders for student work, and containers with lids for small manipulatives. You will also need basic classroom supplies: pencils, paper, tissues, hand sanitizer. The specific products matter less than having designated homes for all materials and clear labeling so students can find and return items independently. Start with basic organizational tools and add specialty items as your budget allows and specific needs emerge.
6. How do I get students to maintain classroom organization?
Teach organizational procedures explicitly, just like academic content. Model exactly how to return books to shelves, how to stack papers in turn-in trays, and how to leave workspaces clean. Create classroom jobs that distribute organizational responsibility: supply manager, library organizer, technology coordinator. Build five-minute cleanup routines into transitions and end-of-day procedures. Use positive reinforcement when students follow organizational systems—recognize table groups that clean up thoroughly or students who consistently return materials properly. Make organization systems simple enough that students can use them independently without constant teacher reminders. When systems break down, involve students in problem-solving rather than just telling them what to do. Students maintain systems better when they help create solutions and understand the purpose behind organization.
7. Should I assign seats or let students choose where to sit?
This depends on grade level, class dynamics, and your teaching style. Assigned seats give you control over who sits near whom, which helps manage behavior and facilitate instructional grouping. Assigned seats work well for younger students, classes with behavior challenges, or teachers who prefer structure. Flexible seating allows students choice, which can increase engagement and accommodate different learning preferences. Flexible seating works best with mature students, strong classroom management, and teachers comfortable with less control. Many teachers use a hybrid: assigned home-base seats but freedom to choose alternative seating during independent work. Consider starting with assigned seats while students learn routines, then transitioning to more choice as appropriate. The key is matching your seating approach to your students’ developmental level and your classroom management style.
8. How do I organize materials for multiple grade levels or subjects?
Use clear color-coding or labeling by grade level or subject. Dedicate specific shelves, bins, or file cabinets to each group. For example, if you teach both third and fourth grade, use blue bins for all third-grade materials and green bins for all fourth-grade materials. Apply color or label coding consistently to lesson plans, teaching materials, student work, and assessments. Store materials by unit within each grade or subject area. Digital organization matters too—create separate folders on your computer for each grade or subject. Some teachers use rolling carts, one per grade or subject, that contain all materials for that group. This allows you to wheel the appropriate cart to your teaching area. Keep materials you use across all groups (staplers, paper, general supplies) in a shared area. The investment in clear organizational systems prevents mixing materials and saves time during planning and instruction.
9. What should I do with old student work and projects?
Establish a clear system for handling student work. Send most completed work home weekly in Friday folders so it does not accumulate. Keep representative samples for each student in individual portfolios to document growth and provide evidence during conferences. Take photos of large projects before sending them home—the photos preserve the work without requiring storage space. Shred or recycle work that has been returned to families after a reasonable time. At the end of the year, give families any remaining work rather than storing it yourself. For work samples you want to keep as exemplars for future years, store them by unit or standard in labeled folders or bins. Limit yourself to a few excellent examples per concept rather than saving everything. Some teachers create digital portfolios by photographing or scanning student work throughout the year, then sharing digital files with families instead of sending home paper copies.
10. How do I organize a classroom I share with other teachers?
Shared classrooms require extra communication and clear boundaries. Meet with co-teachers at the beginning of the year to designate which storage spaces belong to each teacher. Use labeled bins or rolling carts for your personal materials that you can lock or move when not in your teaching time. Keep frequently used teaching materials in a cart you wheel into the room rather than storing permanently in shared space. Establish agreements about shared supplies—will you share the cost or each bring your own? Create a shared organizational system for communal materials so all teachers know where items belong. Use temporary labels that can be changed if teaching assignments shift. Be respectful of shared space: clean up thoroughly after your teaching time, return furniture to agreed-upon arrangements, and do not spread into another teacher’s storage areas. Digital organization becomes especially important—keep your lesson plans, files, and grade book in cloud storage you access from any location.


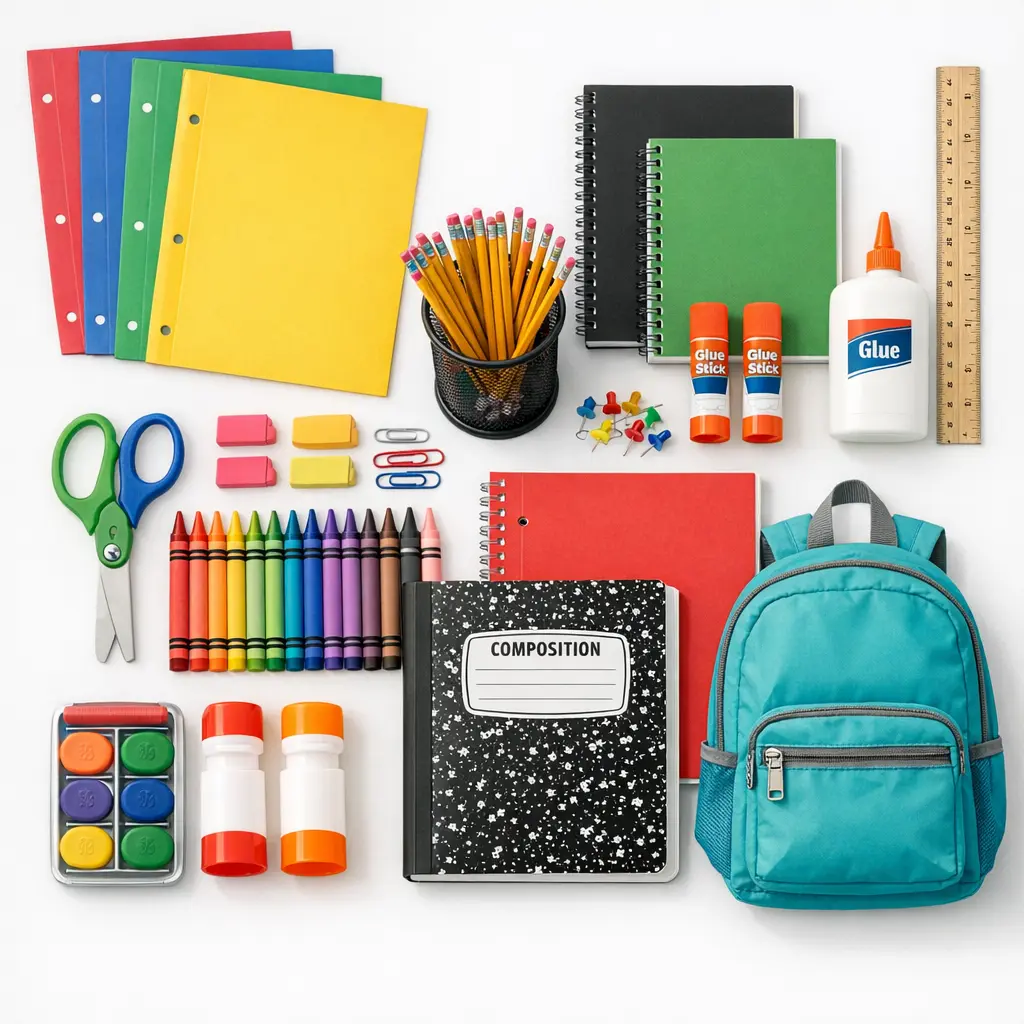
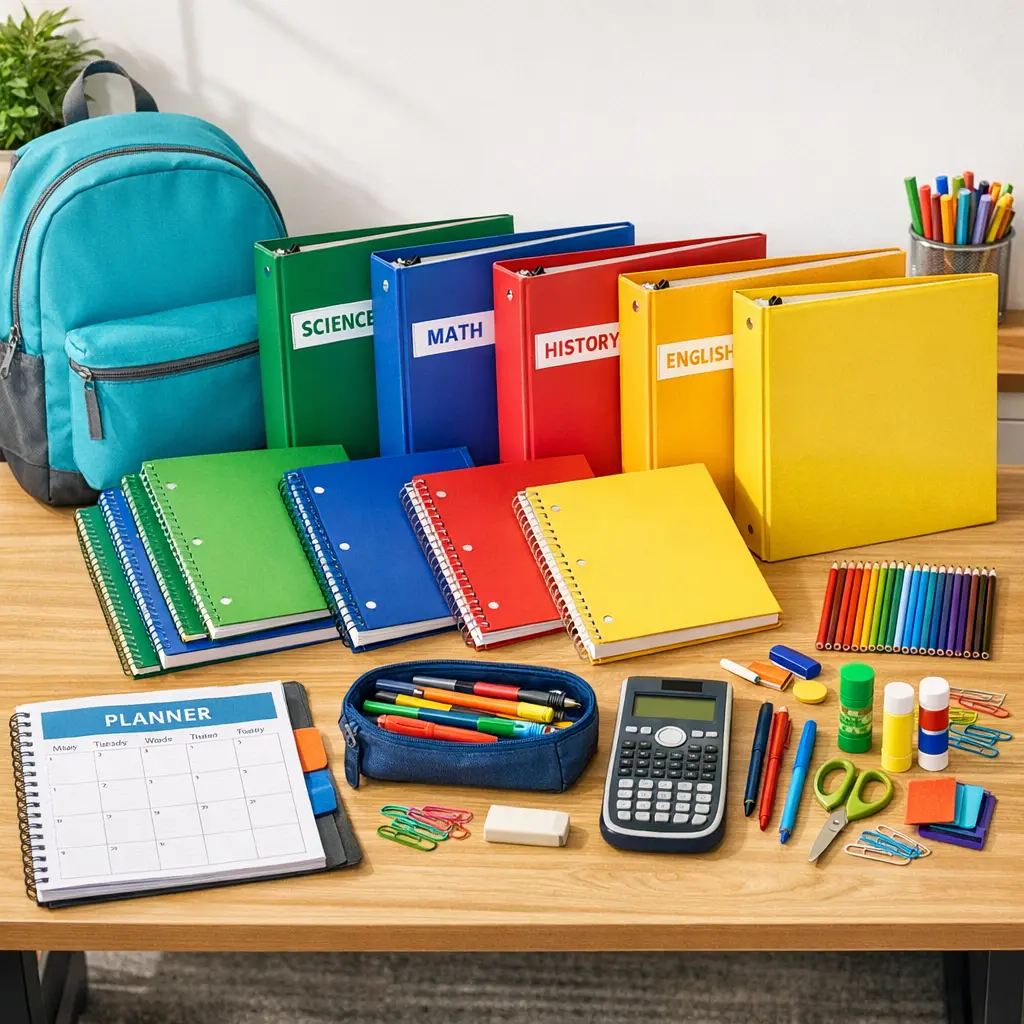

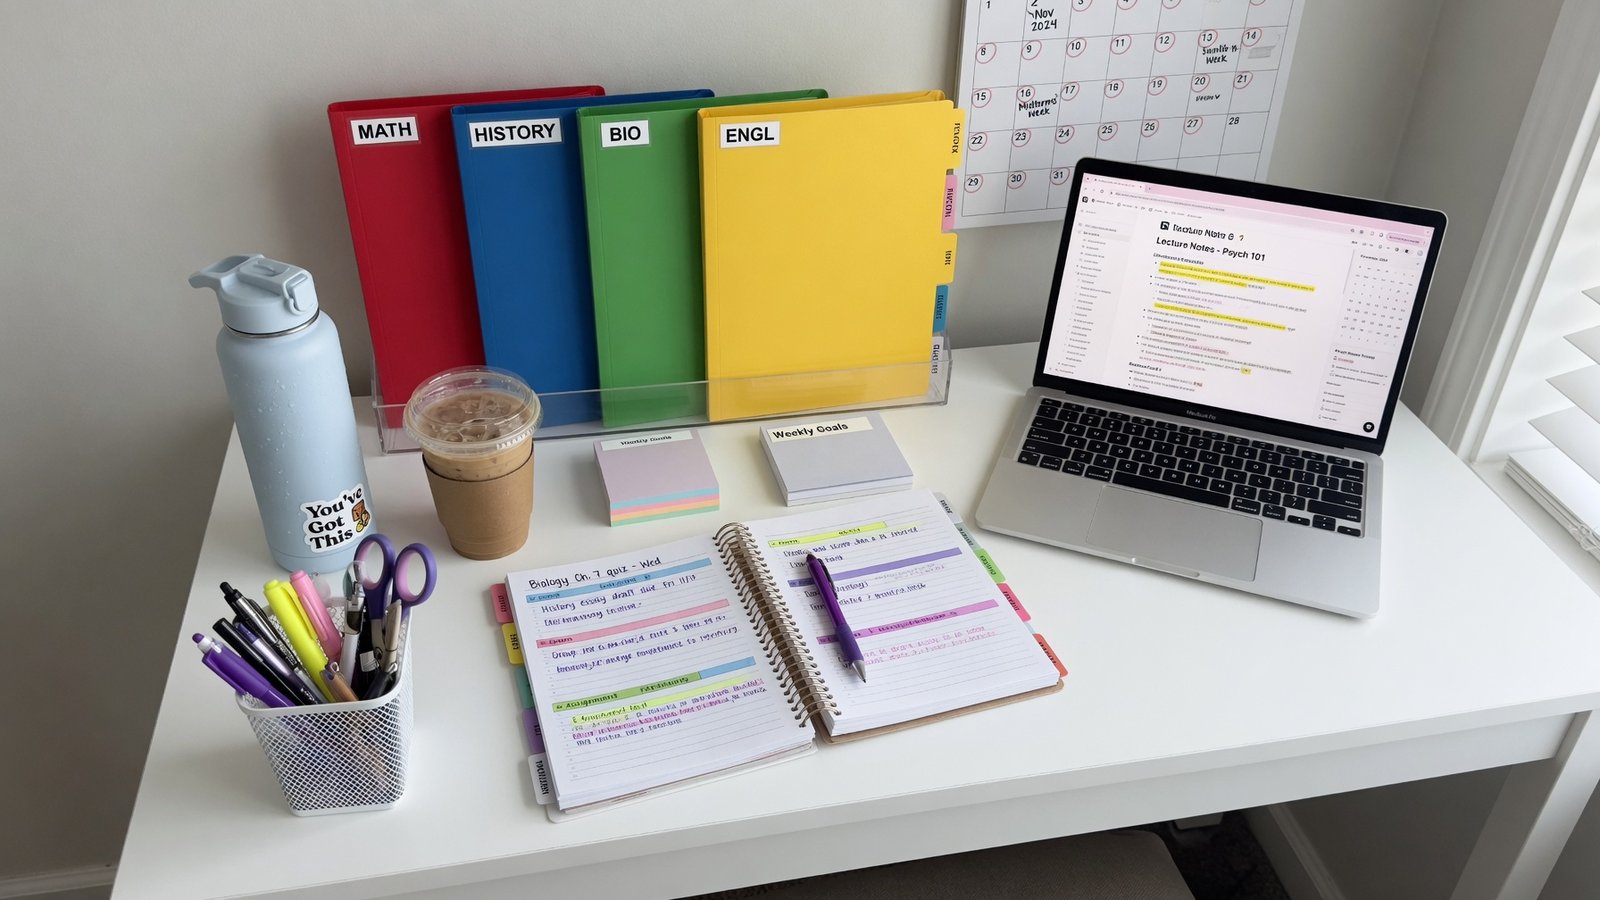
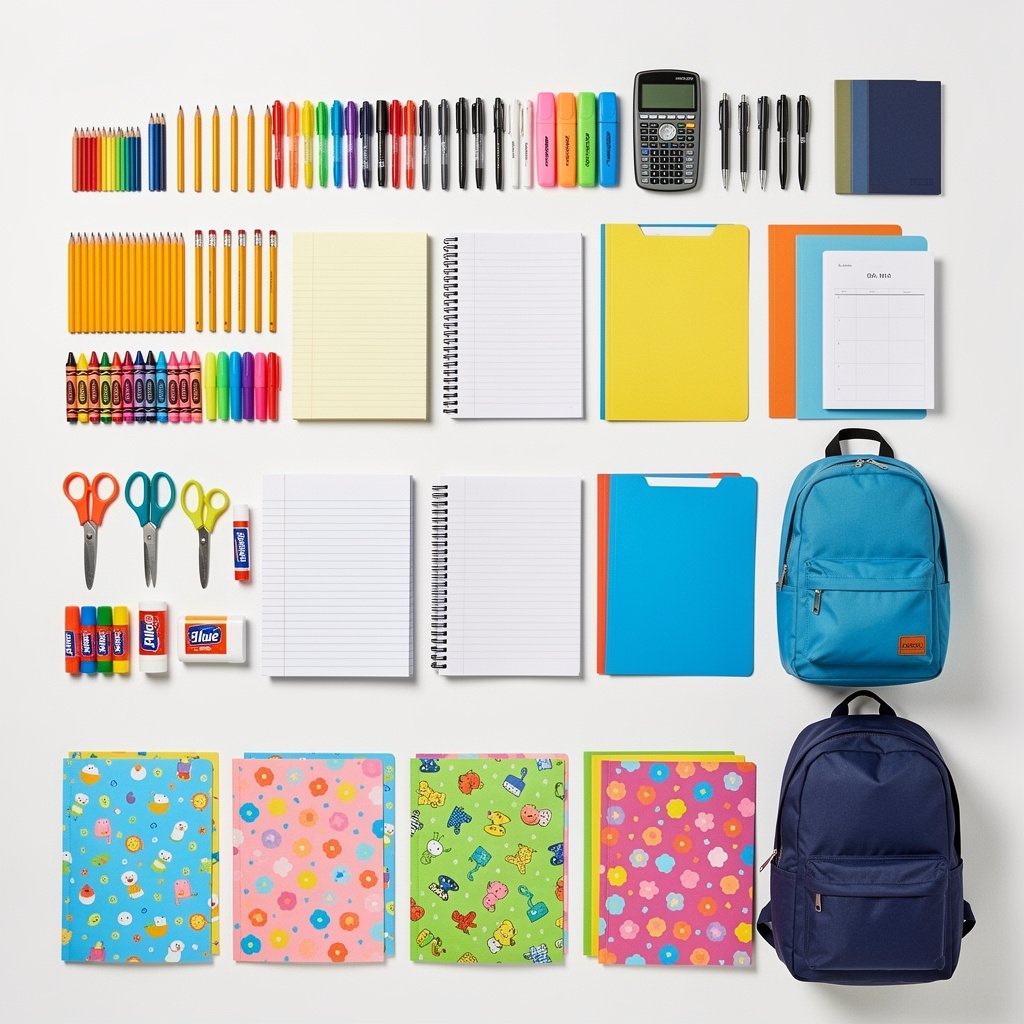


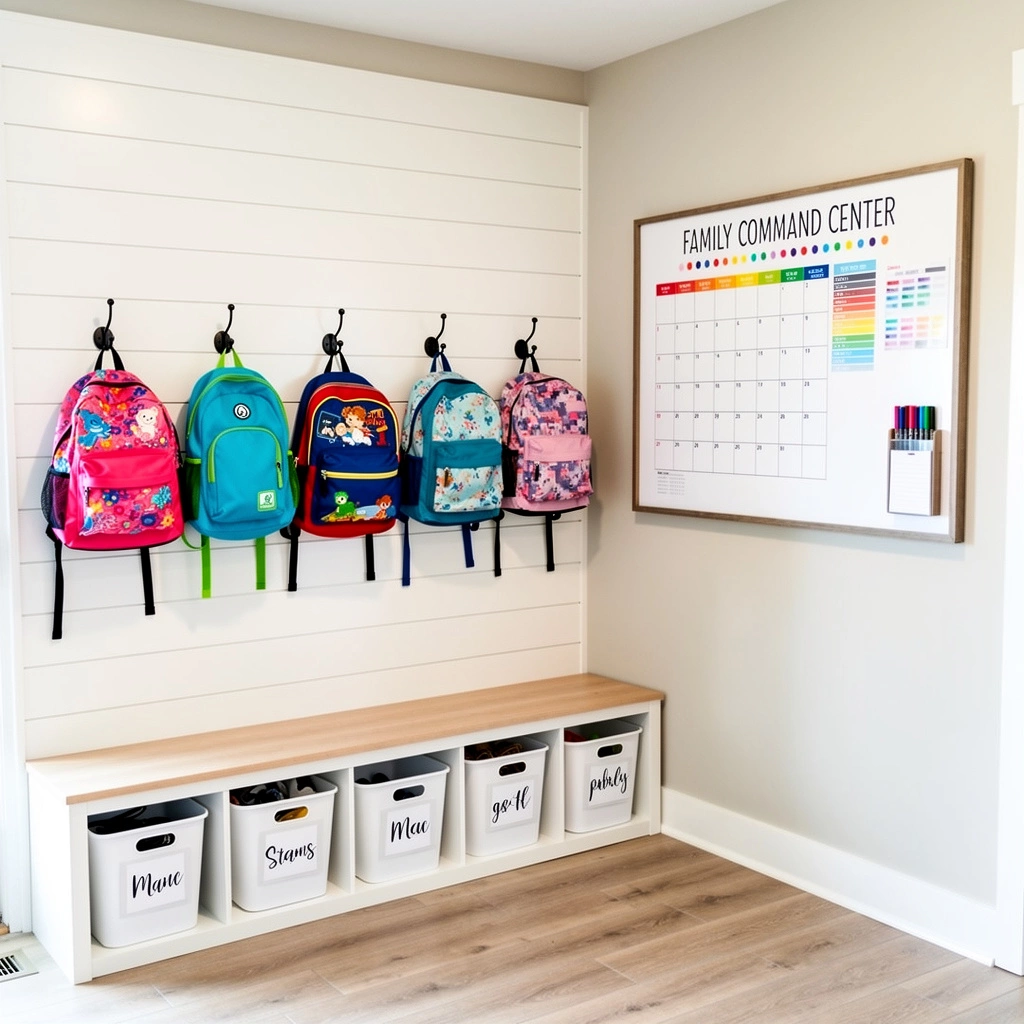
Leave a Reply