

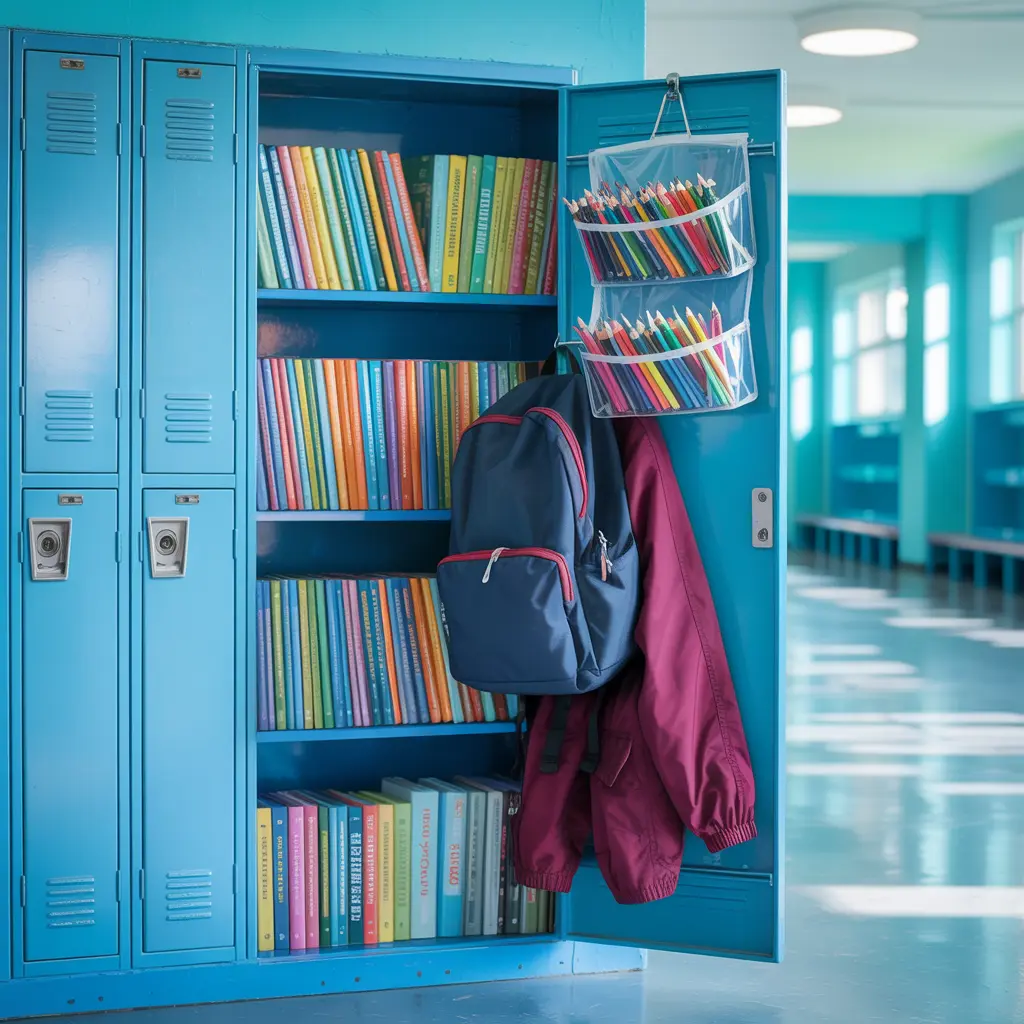
Staring at a cluttered locker where books fall out, jackets pile up, and you can never find your gym shoes wastes valuable time between classes or before workouts. Most standard school lockers measure just 12 inches wide, 12-18 inches deep, and 60-72 inches tall, creating a narrow vertical space that quickly becomes chaotic without smart organization.
These 15 locker organization ideas help you maximize every inch of available space using affordable accessories, strategic placement, and simple maintenance habits. Whether you’re organizing a school locker, gym locker, or workplace storage space, these methods transform cramped, messy areas into functional systems where everything has a designated spot.
You’ll learn exactly which products deliver the best space-saving results, how to organize items by frequency of use, and maintenance strategies that keep your locker functional all year.
Understanding Locker Dimensions and Space Potential
Before implementing any locker organization ideas, measure your specific locker dimensions. Standard measurements vary by facility type:
School Lockers:
- Width: 9-15 inches
- Depth: 12-18 inches
- Height: 60-72 inches (full-height) or 24-36 inches (half-height)
Gym Lockers:
- Width: 12-15 inches
- Depth: 15-24 inches
- Height: 12-18 inches (horizontal) or 60-72 inches (vertical)
Workplace Lockers:
- Width: 12-18 inches
- Depth: 18-24 inches
- Height: 72-78 inches
Measure the interior space, accounting for hinges, locks, and ventilation holes that reduce usable area. Standard lockers contain approximately 8-15 cubic feet of total space, but poor organization typically uses only 40-50% of available volume.
The vertical dimension offers the greatest untapped potential. By adding shelves and vertical dividers, you can increase functional storage by 200-300%.
15 Locker Organization Ideas to Maximize Space
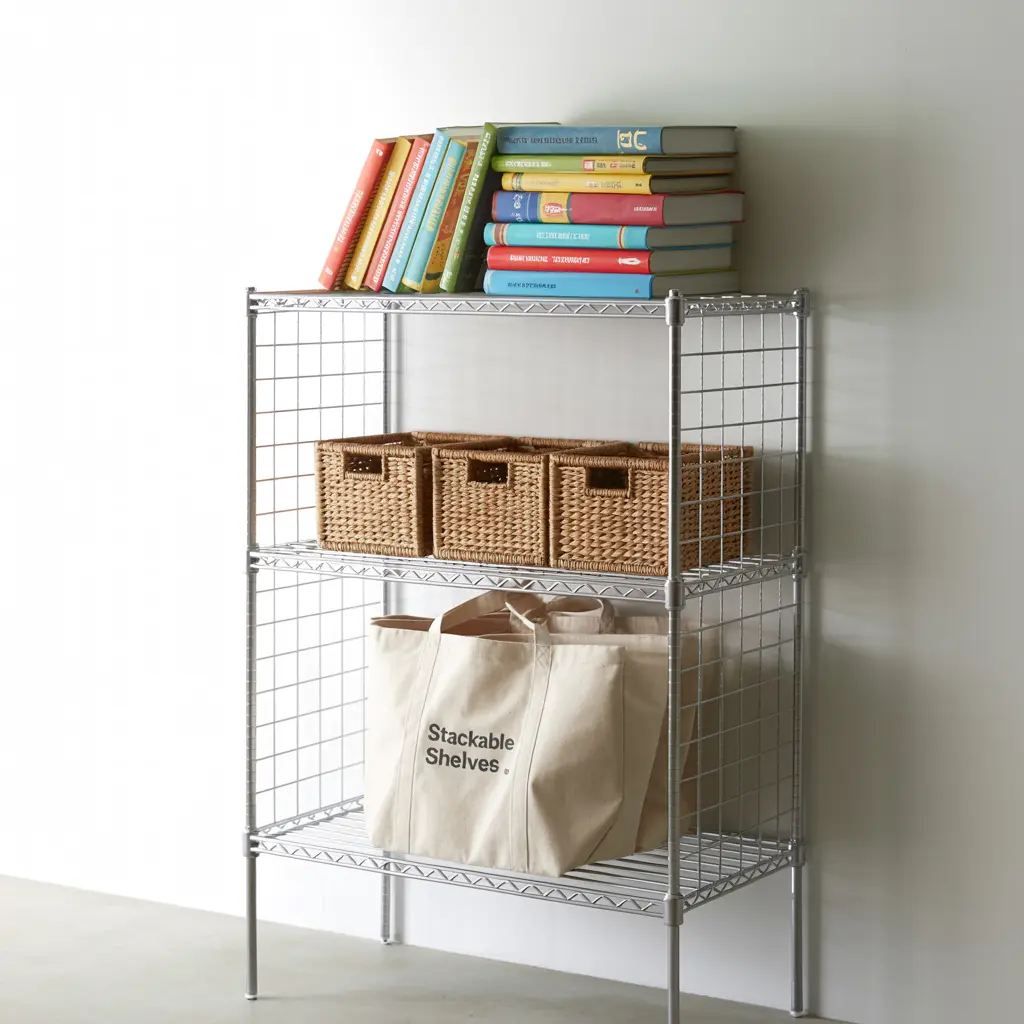
Idea 1: Install Stackable Locker Shelves
What It Does: Creates additional horizontal surfaces within your locker, effectively doubling or tripling shelf space.
Stackable locker shelves sit on the locker floor and create elevated platforms for books, supplies, and containers. Most models measure 10-12 inches wide and 5-10 inches tall.
How to Implement:
- Measure your locker’s interior width and depth
- Choose shelves 1-2 inches narrower than your locker width
- Place the first shelf on the locker floor
- Stack a second shelf on top if height allows
- Load heavier items on bottom shelves, lighter items above
Benefits:
- Increases storage capacity by 100-200%
- Creates defined zones for different item categories
- Prevents items from piling into unusable heaps
- Easily removable without damage
Limitations:
- Reduces vertical space for hanging items
- May not fit in very narrow lockers (under 10 inches wide)
- Can tip if overloaded unevenly
Professional Tip: Choose wire or ventilated shelves instead of solid surfaces. Air circulation prevents odor buildup and allows you to see through to items below.
Cost: $10-25 for a two-tier system
Idea 2: Use Magnetic Hooks for Vertical Hanging
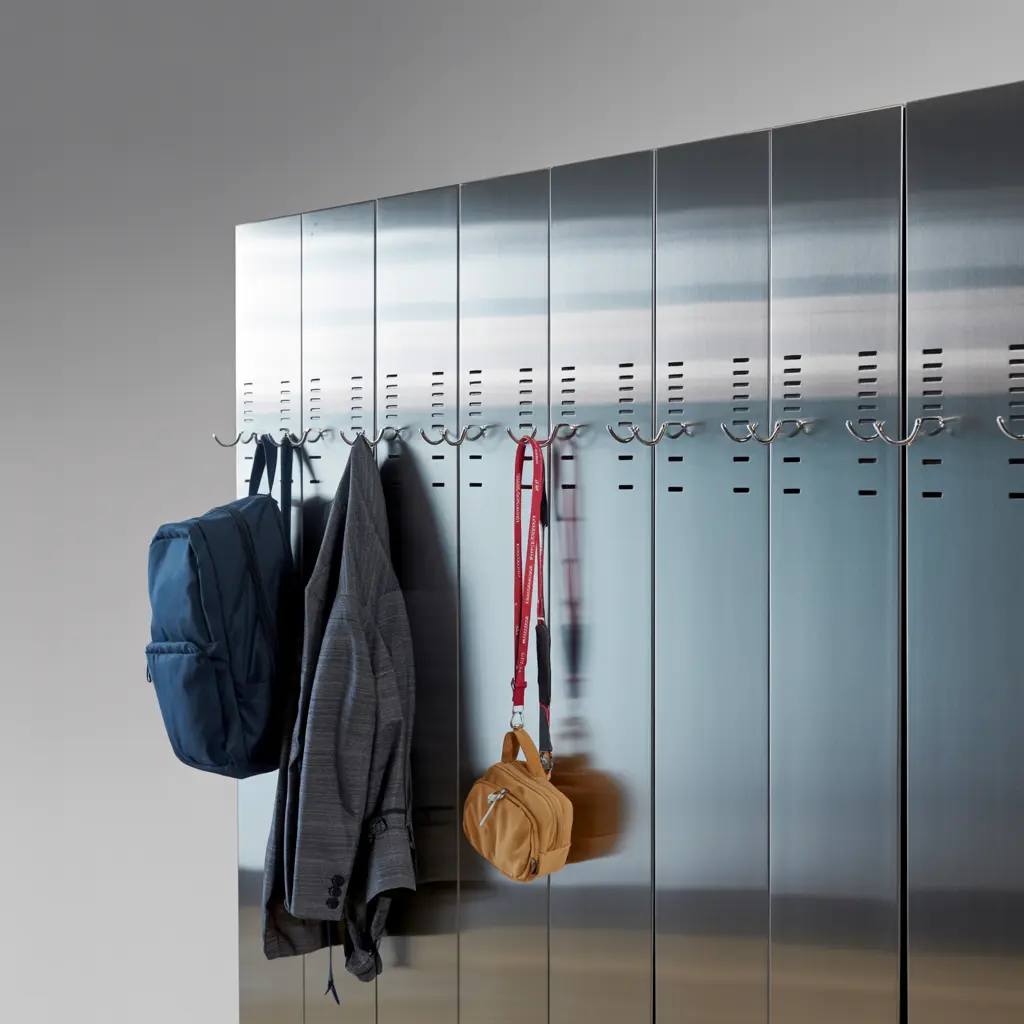
What It Does: Attaches to metal locker walls and doors without drilling, providing hanging points for coats, bags, and accessories.
Magnetic hooks hold 5-20 pounds depending on strength and typically measure 1-3 inches in diameter.
How to Implement:
- Identify magnetic surfaces (most school and gym lockers use steel)
- Place heavy-duty hooks (10+ pound capacity) on side walls
- Install lighter hooks on the door interior
- Hang backpacks, coats, gym bags, and lanyards
- Position hooks at varying heights for different item lengths
Benefits:
- No installation or damage to locker surfaces
- Easily repositionable as needs change
- Utilizes often-wasted wall space
- Keeps bags off the floor where they collect dirt
Limitations:
- Only works on magnetic (metal) surfaces
- Can slip under very heavy loads
- Items may swing when door opens/closes
Common Mistake: Placing too many hooks on the door creates weight that strains hinges. Limit door hooks to lightweight items (scarves, small bags, headphones).
Professional Tip: Use double-hook designs to separate a coat from a bag on the same mounting point, effectively doubling hanging capacity.
Cost: $5-15 for a 6-pack of quality hooks
Idea 3: Add a Hanging Locker Organizer
What It Does: Suspends from the top locker hook or rod, creating multiple pockets and compartments without using floor space.
These fabric organizers typically feature 3-6 shelves or pockets and measure 10-12 inches wide by 30-48 inches long.
How to Implement:
- Hang organizer from the built-in top hook or a sturdy magnetic hook
- Place frequently used items (calculator, pens, phone charger) in top pockets
- Store less-used items (extra supplies, hygiene products) in lower pockets
- Keep weight balanced to prevent swaying
Benefits:
- Maximizes vertical space without floor footprint
- Creates immediate visual organization
- Easy to see all contents at once
- Portable between lockers
Limitations:
- Not suitable for heavy items (textbooks)
- Pockets may sag over time with weight
- Reduces space for hanging coats
Professional Tip: Choose organizers with mesh or clear pockets so you can identify contents without digging through each compartment.
Cost: $8-20
Idea 4: Implement Clear Storage Bins
What It Does: Corrals small items while allowing you to see contents instantly, eliminating search time.
Use stackable, clear plastic bins measuring 4-8 inches tall and 8-12 inches wide.
How to Implement:
- Categorize items (school supplies, gym gear, personal care, snacks)
- Assign one bin per category
- Label each bin with contents
- Stack bins on locker shelves or floor
- Place most-used bins at eye level
Benefits:
- Prevents small items from scattering
- Clear sides eliminate rummaging
- Stackable design maximizes vertical space
- Protects items from damage
Limitations:
- Requires shelf space or sturdy locker floor
- Wrong size bins waste space
- Can create extra steps to access items
Common Mistake: Using too many small bins creates clutter instead of solving it. Limit yourself to 3-4 bins maximum.
Professional Tip: Choose bins with handles for easy removal when you need to access items at the back of your locker.
Cost: $3-8 per bin
Idea 5: Create Door-Mounted Storage
What It Does: Transforms the inside of your locker door into prime storage real estate for flat, lightweight items.
How to Implement:
- Install magnetic pockets or pouches on the door interior
- Use for notebooks, tablets, folders, or makeup
- Add a magnetic dry-erase board for schedules and notes
- Attach magnetic pencil holders for writing supplies
- Keep total door weight under 5 pounds to prevent hinge stress
Benefits:
- Utilizes completely overlooked space
- Items remain visible when door opens
- Easy to grab items quickly
- No floor or shelf space required
Limitations:
- Only suitable for lightweight items
- Too much weight damages door hinges
- Items may fall when door slams
Professional Tip: Reserve door space for items you need multiple times daily. This creates a “quick access zone” that saves 30+ seconds per retrieval.
Cost: $5-15 for magnetic accessories
Idea 6: Use Shelf Dividers to Prevent Toppling
What It Does: Creates vertical barriers on shelves that keep books, binders, and folders upright instead of collapsing into piles.
How to Implement:
- Place adjustable wire or plastic dividers on locker shelves
- Create sections for different subjects or categories
- Adjust spacing based on item thickness
- Stand books upright like a bookshelf
Benefits:
- Prevents book avalanches when removing one item
- Increases visible access to materials
- Makes grabbing specific items faster
- Protects book corners and spines from damage
Limitations:
- Requires existing shelf surfaces
- Only works for items that can stand vertically
- May slide on smooth surfaces
Professional Tip: Use foam shelf liner under dividers to prevent sliding and protect locker surfaces from scratches.
Cost: $8-15 for adjustable dividers
Idea 7: Install a Magnetic Pencil Holder
What It Does: Keeps pens, pencils, highlighters, and small supplies organized and accessible on locker walls.
How to Implement:
- Attach magnetic cup or tray to side wall
- Sort writing supplies by type
- Place most-used items (pens, pencils) in front sections
- Position at eye level for easy access
Benefits:
- Prevents pens from scattering across locker floor
- Saves time searching through bags
- Protects supplies from damage
- Takes up zero floor or shelf space
Limitations:
- Limited capacity (typically holds 10-20 pens)
- Items may fall out if bumped
- Not suitable for very deep lockers where wall access is difficult
Professional Tip: Choose holders with separate compartments to prevent different supply types from mixing together.
Cost: $5-10
Idea 8: Designate a Floor Zone for Bags
What It Does: Keeps the locker floor organized by assigning it exclusively to larger items like backpacks, gym bags, or lunch boxes.
How to Implement:
- Clear everything else off the locker floor
- Stand backpacks upright against the back wall
- Place gym bags or lunch boxes in front
- Use a small boot tray for wet shoes (especially winter/rainy seasons)
- Keep floor clear of loose papers, wrappers, and small items
Benefits:
- Prevents bags from blocking access to shelves
- Protects bags from getting crushed
- Maintains clean floor surface
- Creates logical drop zone for items entering locker
Limitations:
- Reduces vertical hanging space
- Floor items can create tripping hazard when reaching up
- Bags may collect dirt and moisture
Common Mistake: Allowing bags to sprawl across the entire floor, making it impossible to see or reach other items stored on the bottom.
Professional Tip: Place a washable mat or tray on the locker floor to catch dirt and moisture from bags and shoes. Remove and clean monthly.
Cost: $5-12 for boot tray or mat
Idea 9: Add a Magnetic Dry-Erase Board
What It Does: Provides a surface for schedules, reminders, locker combinations, and quick notes without using paper.
How to Implement:
- Attach small magnetic whiteboard to locker door or side wall
- Write class schedules, upcoming tests, or assignment due dates
- Keep a magnetic marker attached to the board
- Update weekly or as needed
- Use for motivational quotes or reminders
Benefits:
- Eliminates loose papers that create clutter
- Keeps important information visible
- Reusable and environmentally friendly
- Customizable and easy to update
Limitations:
- Takes up wall space that could store other items
- Marker may dry out if cap isn’t replaced
- Not suitable for permanent information
Professional Tip: Use color-coded markers to separate different types of information (blue for schedules, red for urgent reminders).
Cost: $6-12
Idea 10: Use Binder Clips for Cable Management
What It Does: Organizes phone chargers, headphone cables, and other wires to prevent tangling.
How to Implement:
- Clip medium-sized binder clips to locker shelf edges
- Thread cables through the metal handles
- Keep cables coiled and secured
- Label each cable if you store multiples
Benefits:
- Free or extremely cheap solution
- Prevents cable tangles and damage
- Keeps cables accessible but organized
- Easy to add or remove as needed
Limitations:
- Only works if you have shelf edges
- May not hold very heavy cables securely
- Clips can fall off if bumped hard
Professional Tip: Use different colored binder clips for different cable types (black for phone charger, silver for headphones).
Cost: $2-5 for a box of clips
Idea 11: Install a Magnetic Mirror with Shelf
What It Does: Combines a mirror for quick appearance checks with a small shelf for personal items.
How to Implement:
- Attach magnetic mirror to locker door or wall
- Use integrated shelf for chapstick, hair ties, or small cosmetics
- Position at eye level
- Limit shelf items to 3-5 small products
Benefits:
- Dual-function accessory saves space
- Mirror useful for students and gym users
- Shelf holds frequently used small items
- Magnetic installation requires no tools
Limitations:
- Mirror can break if locker door slams
- Shelf typically holds minimal weight
- May fog up in humid environments (gym lockers)
Professional Tip: Choose shatterproof acrylic mirrors instead of glass for safety and durability.
Cost: $8-15
Idea 12: Create a Shoe Organizer System
What It Does: Keeps athletic shoes, extra footwear, or boots organized and off the main locker floor.
How to Implement:
- Use a small hanging shoe rack with 1-2 pockets OR
- Place shoes in a shallow bin on the floor OR
- Use a magnetic shoe holder on the locker wall
- Store only shoes you actually need (gym shoes, rain boots)
- Remove street shoes you won’t wear during the day
Benefits:
- Prevents shoe odor from spreading to other items
- Protects shoes from getting crushed
- Keeps floor area cleaner
- Separates dirty items from clean materials
Limitations:
- Takes up significant space
- Wet shoes need time to dry
- Heavy shoes may not work with hanging organizers
Common Mistake: Storing multiple pairs of shoes when you realistically only need one pair in your locker.
Professional Tip: Stuff shoes with newspaper or activated charcoal sachets to absorb moisture and odors between uses.
Cost: $6-15
Idea 13: Implement a Labeled Folder System
What It Does: Organizes papers, handouts, and assignments by subject or category using clearly labeled folders.
How to Implement:
- Choose 5-7 two-pocket folders in different colors
- Assign one color per subject (red=math, blue=science, etc.)
- Label each folder with subject name
- Store folders vertically using shelf dividers or in a hanging organizer
- File papers immediately when you return to your locker
Benefits:
- Prevents loose papers from scattering
- Color-coding enables instant identification
- Protects important documents from damage
- Reduces time searching for specific papers
Limitations:
- Folders can become overstuffed if not cleaned regularly
- Requires discipline to file papers immediately
- Takes up shelf or hanging space
Professional Tip: Clean out folders every Friday, removing papers you no longer need and transferring important documents to a binder at home.
Cost: $5-10 for a set of folders
Idea 14: Add Scented Sachets or Deodorizers
What It Does: Prevents musty odors caused by gym clothes, wet shoes, or poor ventilation.
How to Implement:
- Place activated charcoal bags or scented sachets in corners
- Hang a small air freshener from a top hook
- Replace or refresh monthly
- Ensure adequate ventilation if your locker has vents
- Remove wet or dirty items promptly
Benefits:
- Creates pleasant locker environment
- Prevents odor transfer to clothing and books
- Small sachets take up virtually no space
- Inexpensive and easy to replace
Limitations:
- Doesn’t eliminate odor source (wet clothes, food waste)
- Strong scents may bother nearby locker users
- Requires regular replacement
Common Mistake: Using deodorizers as a substitute for cleaning instead of a supplement to regular locker maintenance.
Professional Tip: Choose natural options like lavender sachets, cedar blocks, or unscented activated charcoal to avoid competing fragrances.
Cost: $4-10
Idea 15: Use Removable Wallpaper for Visual Zones
What It Does: Creates visual boundaries between different storage areas while adding personalization.
How to Implement:
- Measure locker back wall
- Cut removable wallpaper or contact paper to fit
- Create distinct colored zones (top third, middle third, bottom third)
- Assign each zone to item categories
- Remove without residue at end of school year
Benefits:
- Visual cues make organization intuitive
- Personalizes locker space
- Protects metal from scratches
- Easy to remove without damage
Limitations:
- Requires installation time
- May not be allowed in all schools
- Doesn’t add functional storage capacity
- Can peel in humid environments
Professional Tip: Use different patterns or colors for different zones: bright color for daily essentials at eye level, calm color for less-used items above and below.
Cost: $8-15
Locker Organization by Type
Different locker types require adjusted strategies:
School Lockers
Priorities: Book storage, supply organization, outerwear hanging, quick access between classes
Best Ideas:
- Stackable shelves (#1) for books and binders
- Magnetic hooks (#2) for backpack and coat
- Hanging organizer (#3) for small supplies
- Door storage (#5) for notebooks and schedules
- Labeled folders (#13) by subject
Common Challenges:
- Limited time between classes
- Heavy textbooks
- Changing needs throughout the day
- Sharing lockers (half-lockers or assigned partners)
Gym Lockers
Priorities: Keeping clean clothes separate from dirty clothes, managing moisture, securing valuables
Best Ideas:
- Clear bins (#4) for clean clothes vs. dirty clothes
- Shoe organizer (#12) for athletic footwear
- Magnetic hooks (#2) for towels
- Deodorizers (#14) for odor control
- Door storage (#5) for locks and small valuables
Common Challenges:
- Moisture and odor management
- Frequent turnover (daily use vs. storage)
- Security concerns
- Limited space in horizontal lockers
Workplace Lockers
Priorities: Professional appearance, security for electronics and personal items, lunch storage
Best Ideas:
- Stackable shelves (#1) for uniform storage
- Clear bins (#4) for personal items and supplies
- Cable management (#10) for device chargers
- Mirror (#11) for appearance checks
- Dry-erase board (#9) for schedules and codes
Common Challenges:
- Professional standards (avoid decorations)
- Storing work-specific equipment (hard hats, safety gear, uniforms)
- Food storage considerations
- Long-term storage vs. daily use
Measuring Your Locker Correctly
Accurate measurements prevent buying organizers that don’t fit:
Step 1: Measure height from the inside floor to the inside top (not the exterior dimensions)
Step 2: Measure width from inside left wall to inside right wall
Step 3: Measure depth from the inside back wall to where the door closes
Step 4: Note obstacles like built-in hooks, coat rods, ventilation grates, or locks that reduce usable space
Step 5: Write down measurements and keep them on your phone when shopping
Critical Tip: Subtract 1-2 inches from each dimension when selecting organizers to ensure they fit comfortably without forcing.
Common Locker Organization Mistakes
Mistake 1: Buying Organizers Before Measuring
Why It Fails: Products don’t fit, wasting money and creating frustration
Solution: Always measure first, then shop based on exact dimensions
Mistake 2: Overloading the Locker Door
Why It Fails: Heavy loads damage hinges and cause items to fall when the door opens
Solution: Limit door storage to items under 3-5 pounds total
Mistake 3: Storing Everything “Just in Case”
Why It Fails: Clutter accumulates from items you never actually use
Solution: Evaluate each item monthly—if you haven’t used it in 4 weeks, take it home
Mistake 4: Ignoring Vertical Space
Why It Fails: Items pile horizontally, creating unstable stacks and wasted upper space
Solution: Install shelves or hanging organizers to capture vertical storage potential
Mistake 5: No Maintenance Schedule
Why It Fails: Organization systems decay quickly without regular attention
Solution: Spend 5 minutes every Friday decluttering and reorganizing
Mistake 6: Using Identical Containers for Different Items
Why It Fails: Can’t identify contents quickly, defeating the organization purpose
Solution: Use color-coding, labels, or clear containers to distinguish categories
Mistake 7: Prioritizing Aesthetics Over Function
Why It Fails: Pretty organization that doesn’t match actual use patterns fails quickly
Solution: Organize based on how you actually use your locker, not Pinterest photos
Maintenance Schedule for Long-Term Success
Consistent maintenance keeps organization systems functional:
Daily (30 seconds):
- Return items to designated spots
- Hang coat/bag on hooks instead of dropping on floor
- Remove trash immediately
Weekly (5 minutes):
- Remove papers you no longer need
- Wipe down surfaces with disinfectant wipe
- Reorganize items that shifted during the week
- Check deodorizers
Monthly (15 minutes):
- Deep clean all surfaces
- Remove items you haven’t used
- Adjust organization system for changing needs
- Replace deodorizers
- Check for damage to organizers
Quarterly (30 minutes):
- Complete locker clean-out
- Evaluate what’s working and what isn’t
- Reorganize for new season (winter coats vs. light jackets)
- Repair or replace damaged organizers
End of Year/Semester:
- Remove all items and organizers
- Clean locker completely
- Take organizers home for next year
- Photograph your system for reference next time
Budget Breakdown: DIY vs. Purchased Solutions
You can organize effectively at any budget level:
Under $20 Total (Ultra-Budget):
- 4 binder clips for cables: $2
- 3 magnetic hooks: $4
- 2 shoeboxes (repurposed) as bins: Free
- Folder system with school-provided folders: Free
- Baking soda box as deodorizer: $1
- Total: $7
$20-50 (Standard Setup):
- Stackable locker shelf: $15
- 6-pack magnetic hooks: $8
- Hanging organizer: $12
- 2 clear bins: $10
- Magnetic mirror: $8
- Total: $53 (slightly over but comprehensive)
$50-100 (Premium Setup):
- Premium stackable shelves with ventilation: $25
- Heavy-duty magnetic hook set: $15
- Large hanging organizer with multiple pockets: $20
- 4 clear stackable bins with handles: $24
- Magnetic dry-erase board: $10
- Shelf dividers: $12
- Magnetic pencil holder: $8
- Boot tray: $10
- Deodorizers: $8
- Total: $132 (adjust by removing non-essentials)
Cost-Saving Tips:
- Shop end-of-summer sales (July-August) for best deals
- Use repurposed containers from home
- Buy multi-packs and split costs with friends
- Check dollar stores for basic organizers
- Look for back-to-school bundles
Accessibility Modifications
Students and professionals with disabilities may need adapted organization:
For Wheelchair Users:
- Request lower locker assignment
- Place all frequently used items in bottom two-thirds of locker
- Use pull-down hanging organizers instead of reaching to top
- Install large handles on bins for easier gripping
For Visual Impairments:
- Use tactile markers to identify different zones
- Implement consistent organization system (same spot every time)
- Choose high-contrast colors for bins and labels
- Use large-print or Braille labels
For Limited Hand Dexterity:
- Choose magnetic hooks instead of clips that require pinching
- Use bins with large handles
- Avoid small containers with lids
- Install hook-and-loop (Velcro) closures instead of zippers
For Sensory Sensitivities:
- Avoid strong-scented deodorizers
- Choose soft fabric organizers instead of hard plastic
- Create visual calm with neutral colors
- Minimize visual clutter with closed bins
Many schools and workplaces are required to provide reasonable accommodations under the Americans with Disabilities Act. Contact your facility coordinator if you need modifications.
FAQs
1. What is the best way to organize a school locker?
The best way to organize a school locker is to use vertical space with stackable shelves, hang your backpack and coat on magnetic hooks, store books upright with shelf dividers, and place a hanging organizer for small supplies. Keep daily-use items at eye level, store rarely used items on the top shelf, and reserve the floor for your bag or shoes. This system maximizes space while keeping everything accessible between classes.
2. How can I maximize space in a small locker?
Maximize small locker space by installing stackable shelves to create multiple storage levels, using magnetic hooks on walls and doors instead of floor space, and choosing hanging organizers that suspend vertically. Store items in clear stackable bins to utilize height, keep only essential items in your locker, and use the door interior for flat lightweight items like notebooks. Removing unnecessary items makes the biggest difference in small spaces.
3. What should I keep in my gym locker?
Keep these essentials in your gym locker: one change of workout clothes, athletic shoes, a towel, deodorant, basic toiletries (soap, shampoo), a lock, and a water bottle. Optional items include a phone charger, hair ties, flip-flops for showers, and a small first-aid kit. Avoid storing dirty clothes long-term—take them home after each workout to prevent odor buildup.
4. How do I keep my locker from smelling bad?
Prevent locker odors by removing dirty gym clothes and wet towels immediately after use, not storing food long-term, placing activated charcoal bags or baking soda in corners, ensuring proper ventilation, and wiping down surfaces weekly with disinfectant. Use shoe deodorizer inserts in athletic shoes and wash reusable containers regularly. Address the odor source rather than just covering smells with air fresheners.
5. Can I use Command strips instead of magnetic hooks in my locker?
Command strips work in non-magnetic lockers (aluminum, plastic, wood), but check school or facility policies first since they leave adhesive residue and may be prohibited. Magnetic hooks are preferred because they install instantly, reposition easily, hold more weight, and remove without damage. If you must use Command strips, choose the removable variety designed for temporary use and remove them properly to minimize damage.
6. How often should I clean out my locker?
Clean your locker weekly with a quick 5-minute declutter (removing trash and reorganizing), do a deeper monthly cleaning (wiping surfaces and removing unused items), and complete a thorough quarterly reorganization (adjusting for seasonal needs). Daily maintenance—returning items to designated spots and removing trash—prevents major cleanups from becoming overwhelming. Friday afternoons work well for weekly maintenance.
7. What’s the best way to organize locker shelves?
Organize locker shelves by frequency of use: place items you need multiple times daily at eye level (middle shelf), store items used weekly on the top shelf, and reserve the bottom shelf or floor for bags and shoes. Use shelf dividers to keep books upright, group similar items together in bins, and keep heavier items on lower shelves for stability. Label each section so you can find items quickly.
8. Are locker organizers worth the money?
Basic locker organizers (stackable shelves, magnetic hooks, hanging organizers) are worth the investment because they increase usable space by 200-300% and save time searching for items. A minimal setup costs $20-30 and lasts multiple years. However, avoid expensive decorative items that don’t add functional value. Prioritize organizers that create additional storage surfaces or utilize vertical space.
9. How do I organize a locker I share with someone else?
When sharing a locker, divide the space vertically (you take the top half, they take the bottom) or use a color-coding system where each person’s items are in designated colored bins. Install a middle shelf to create a clear physical boundary, communicate about shared items like hooks or mirrors, and establish a joint cleaning schedule. Respect each other’s space and avoid letting your items spill into their designated area.
10. What items should I never keep in my locker?
Never keep these items in your locker: valuable electronics or jewelry (theft risk), important medications (temperature fluctuations), irreplaceable items (family photos, important documents), perishable food, aerosol cans in hot environments, anything prohibited by school or facility rules (weapons, drugs, vaping devices), or wet clothes for extended periods (mold growth). Keep your locker contents replaceable and appropriate for the environment.
13) COMPARISON TABLES
Locker Organization Products Comparison
| Product Type | Best For | Typical Cost | Space Saved | Installation | Durability |
|---|---|---|---|---|---|
| Stackable Shelves | Books, bins, supplies | $10-25 | 100-200% | None (place and use) | High |
| Magnetic Hooks | Coats, bags, towels | $5-15 | 50-75% | Instant (magnetic) | Medium-High |
| Hanging Organizer | Small supplies, accessories | $8-20 | 75-100% | Hangs from hook | Medium |
| Clear Bins | Categorizing small items | $3-8 each | 25-50% | None (place and use) | High |
| Shelf Dividers | Books, folders, binders | $8-15 | 15-30% | Place on shelf | Medium |
| Door Organizers | Flat lightweight items | $5-15 | 40-60% | Instant (magnetic) | Medium |
Locker Types and Optimal Strategies
| Locker Type | Typical Dimensions | Best Organization Ideas | Common Challenges | Priority Focus |
|---|---|---|---|---|
| School (Full) | 12″W × 15″D × 72″H | Stackable shelves, hanging organizers, magnetic hooks | Heavy textbooks, limited time access | Vertical space maximization |
| School (Half) | 12″W × 15″D × 36″H | Door storage, single shelf, minimal hooks | Very limited height | Ruthless item selection |
| Gym (Vertical) | 12″W × 18″D × 72″H | Shoe organizers, separate clean/dirty bins | Moisture and odor | Ventilation and separation |
| Gym (Horizontal) | 24″W × 18″D × 12″H | Small bins, cable management | Very limited height | Flat storage solutions |
| Workplace | 15″W × 20″D × 72″H | Professional organizers, uniform storage | Long-term storage needs | Security and professionalism |
14) CHECKLISTS
Initial Locker Setup Checklist
Before You Start:
- Measure locker height, width, and depth
- Check locker material (magnetic metal vs. non-magnetic)
- Identify built-in features (hooks, coat rods, shelves)
- Review school/facility rules on locker modifications
- Set organization budget
Essential Purchases:
- Stackable shelf or hanging organizer
- 4-6 magnetic hooks (various strengths)
- 2-3 clear storage bins
- Shelf dividers or bookends
- Deodorizer or freshener
- Small cleaning supplies (wipes, paper towels)
Setup Steps:
- Clean locker completely before organizing
- Install largest organizer first (shelf or hanging system)
- Place magnetic hooks at strategic heights
- Organize items by frequency of use
- Label bins and folders
- Create “home” for each category of items
- Take photo of organized system for reference
Weekly Maintenance Checklist (5 Minutes)
- Remove all trash and food waste
- Return misplaced items to designated spots
- Wipe down one surface (rotate: top shelf, middle, floor)
- Check for items that need to go home
- Straighten books and folders
- Ensure coat/bag is hung, not on floor
- Verify lock is working properly
Monthly Deep-Clean Checklist (15 Minutes)
- Remove everything from locker
- Wipe all surfaces with disinfectant
- Vacuum or sweep locker floor
- Check organizers for damage or wear
- Replace or refresh deodorizers
- Remove items not used in past month
- Reorganize based on current needs
- Clean reusable containers and bins
- Test magnetic hooks for secure attachment
- Assess if organization system needs adjustment
End-of-Year Transition Checklist
- Remove all personal items
- Take out all organizers (keep for next year)
- Scrub locker thoroughly
- Remove any adhesive, tape, or decorations
- Return locker in original condition
- Report any damage to facility manager
- Store organizers in labeled box for next semester/year
- Photograph organization system that worked best
- Make notes on what to improve next time
15) DECISION FRAMEWORKS
“Should I Buy This Locker Organizer?” Decision Tree
Question 1: Does it solve a specific problem I currently have?
- No → Don’t buy it
- Yes → Continue to Question 2
Question 2: Will it fit in my locker dimensions?
- Not sure → Measure first before buying
- No → Don’t buy it
- Yes → Continue to Question 3
Question 3: Does it create additional storage space or just look nice?
- Just looks nice → Don’t buy it
- Creates storage → Continue to Question 4
Question 4: Is there a free/DIY alternative that works equally well?
- Yes → Try DIY first
- No → Continue to Question 5
Question 5: Does it fit my budget?
- No → Save for it or choose alternative
- Yes → Buy it
Prioritizing What to Keep in Your Locker
Tier 1 – Must Store (Daily Use):
Items you need multiple times per day
- Coat/jacket
- Backpack or daily bag
- Current textbooks and notebooks
- Essential supplies (pens, calculator)
- Lunch box or water bottle
- Phone charger
Tier 2 – Should Store (Weekly Use):
Items you need regularly but not daily
- Gym clothes and shoes (if PE that day)
- Project materials (while project is active)
- Extra supplies (backup pens, tissues)
- Reference materials for current units
Tier 3 – Could Store (Occasional Use):
Items that are convenient but not essential
- Extra jacket (weather backup)
- Hygiene products
- Mirror and grooming items
- Decorations or photos
Tier 4 – Should NOT Store:
Items that waste space or create problems
- Completed assignments (take home)
- Finished textbooks (return to class)
- Old food containers
- Broken supplies
- Items you haven’t used in a month
- Valuable or irreplaceable items
Choosing Between DIY and Purchased Solutions
Choose DIY When:
- You’re on a very tight budget (under $10)
- You have suitable materials at home
- You enjoy crafting and customization
- Your locker has non-standard dimensions
- You want to test an idea before investing
Choose Purchased When:
- You need a solution immediately
- DIY options won’t be sturdy enough (heavy books)
- You lack time for crafting
- Purchased options are only slightly more expensive
- You need professional appearance (workplace locker)
- Magnetic attachment is required (hard to DIY magnets)





Leave a Reply