

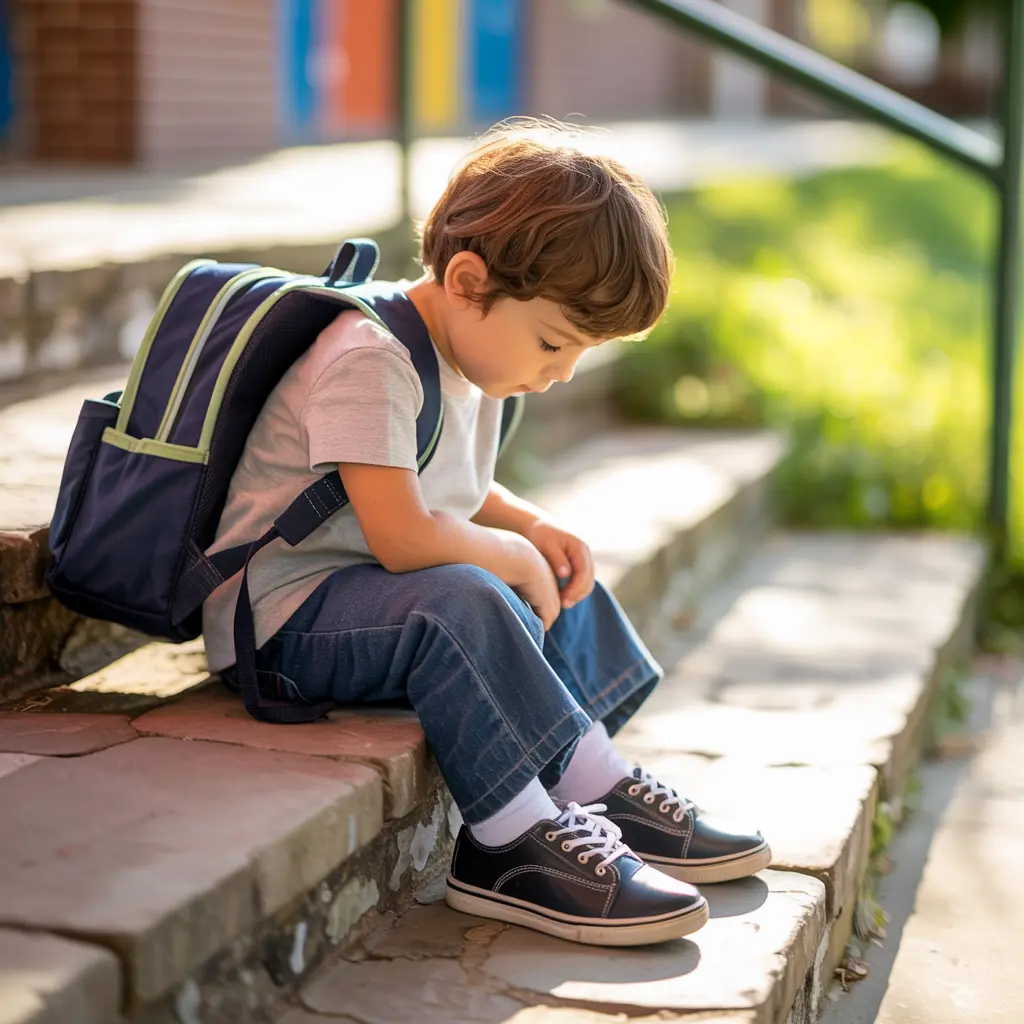
Choosing school shoes for kids that survive playground battles, growth spurts, and daily wear requires more than picking the first pair that fits. The right school shoes protect developing feet, last through the semester, and keep children comfortable during long school days.
This guide helps parents identify quality features, find proper fit, and select durable options that deliver real value. You’ll learn which materials last longest, how to measure for accurate sizing, and what separates shoes that fall apart in weeks from pairs that endure months of active use.
Whether your child needs shoes for elementary school or middle school, runs through playgrounds or walks hallways, this comprehensive resource provides the practical information you need to make confident purchasing decisions.
What Makes Quality School Shoes for Kids
Quality school shoes share specific characteristics that determine how long they last and how well they support growing feet.
Construction Quality: The way shoes are assembled determines durability. Look for double or triple stitching at stress points, soles that are stitched rather than only glued, and reinforced areas at the toe cap and heel counter.
Material Selection: Upper materials should resist scuffs and tears. Outsoles need sufficient thickness to withstand abrasion without becoming slippery. Interior linings should manage moisture without breaking down.
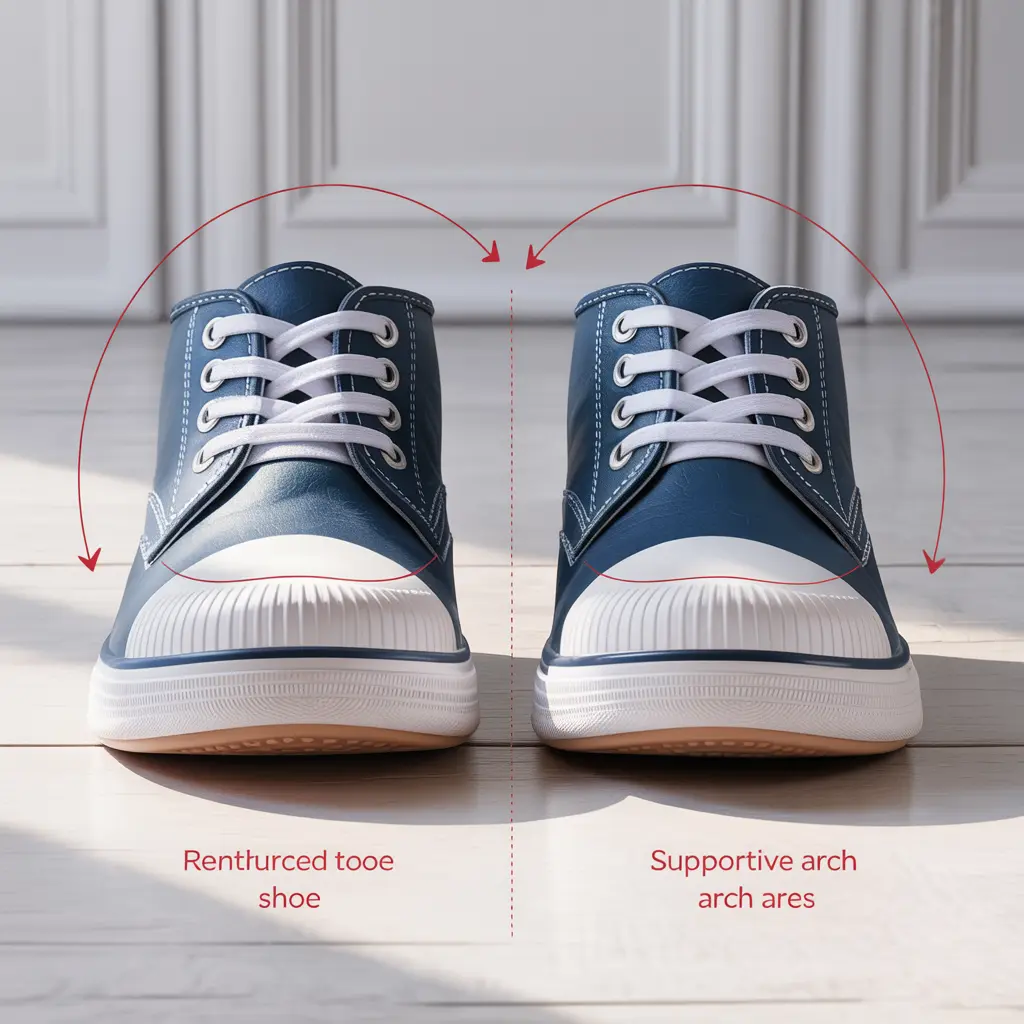
Proper Support: School shoes must support natural foot movement while providing stability. This includes a heel counter firm enough to prevent excessive ankle rolling but flexible enough for comfortable walking.
Breathability: Children’s feet perspire significantly during active school days. Quality shoes incorporate breathable materials or ventilation to reduce moisture buildup that causes odor and material breakdown.
Appropriate Flexibility: Good school shoes bend at the ball of the foot (where toes naturally flex) but resist twisting through the midfoot. Test this by holding the heel and toe and attempting to twist the shoe.
Grade-Appropriate Design: Elementary students need more durable toe protection due to playground activity. Middle school students may prioritize style while still needing practical durability.
The investment in quality construction pays back through extended wear time and fewer mid-year replacements.
Key Features of Durable School Shoes
Upper Material Comparison
The upper portion of school shoes faces constant scuffing, flexing, and stress.
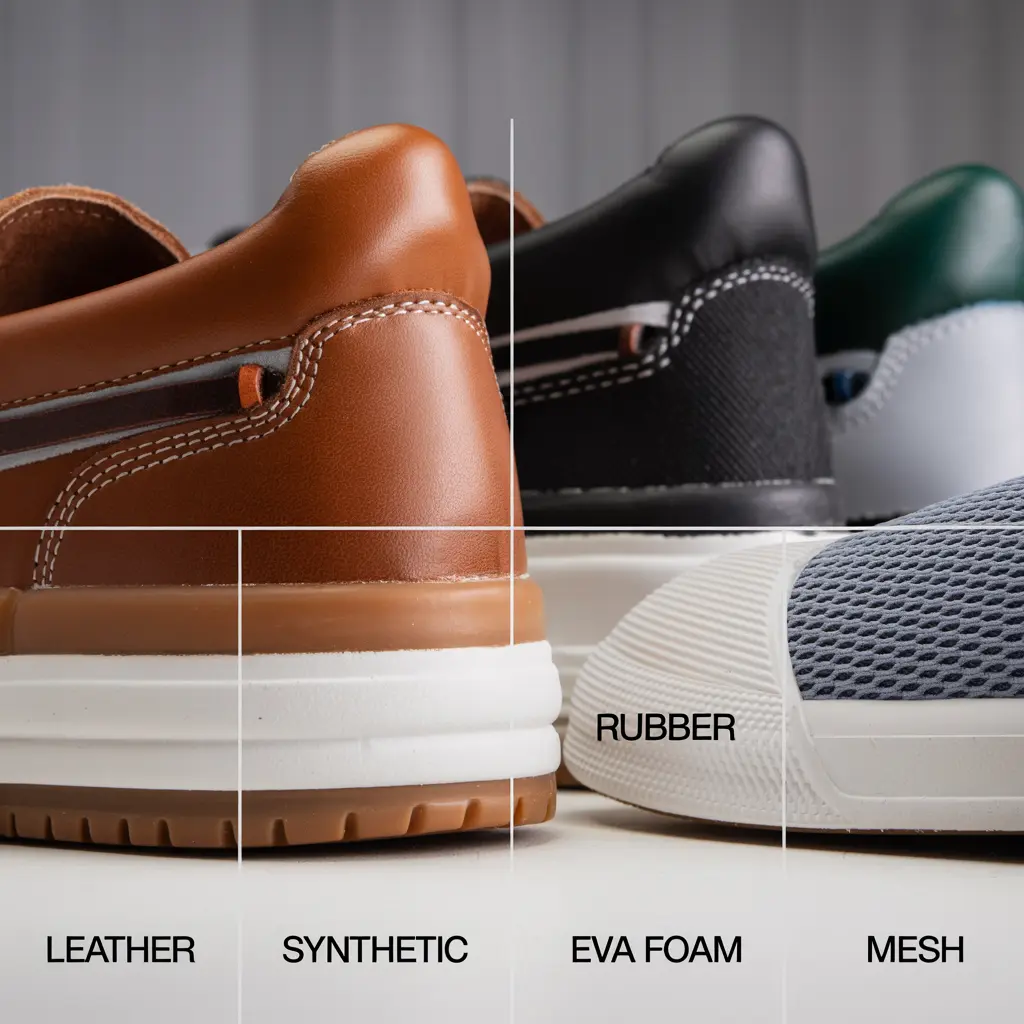
Leather Uppers: Full-grain leather provides excellent durability and develops character rather than looking worn as it ages. It resists punctures and abrasions better than most alternatives. Leather breathes naturally and molds to foot shape over time. The main drawbacks include higher initial cost and longer break-in periods.
Synthetic Leather (PU/PVC): These materials mimic leather’s appearance at lower cost. Quality synthetic leathers can be quite durable and require minimal break-in. They typically resist water better than genuine leather. However, they may crack after extended flexing and generally offer less breathability.
Canvas: Canvas uppers work well for warmer climates and casual school environments. They’re lightweight and breathable but offer limited durability against rough surfaces. Canvas shoes typically cost less but may need more frequent replacement.
Mesh Panels: Many athletic-style school shoes incorporate mesh for ventilation. Look for reinforced mesh rather than basic fabric mesh. Positioning matters—mesh away from high-wear areas like toe boxes performs better.
Combination Construction: Many durable school shoes use leather or synthetic leather in high-wear zones (toe, sides) with mesh or fabric panels in less-stressed areas for breathability.
For most school environments, leather or quality synthetic leather uppers deliver the best balance of durability and comfort.
Sole Construction and Durability
The outsole determines traction and wear resistance, while the midsole affects comfort and support.
Rubber Outsoles: Natural or synthetic rubber provides excellent durability and traction. Look for outsoles at least 4-5mm thick in the forefoot area. Harder rubber compounds last longer but may feel less cushioned. Softer rubber grips better but wears faster on pavement.
EVA Foam Soles: Ethylene-vinyl acetate offers lightweight cushioning but wears down more quickly than rubber. Some school shoes use EVA midsoles with rubber outsole caps for balanced performance.
Sole Attachment Method: Stitched soles (Goodyear welt, stitchdown construction) outlast glued soles significantly. At minimum, look for soles that combine stitching with adhesive rather than glue alone.
Tread Pattern: Deep lugs provide traction but collect debris. Moderate tread depth (2-3mm) works well for most school environments. The pattern should extend across the entire sole, especially at the toe where children often drag their feet.
Flex Grooves: Horizontal grooves at the ball of the foot allow natural bending. Shoes without proper flex grooves cause fatigue and may encourage awkward walking patterns.
Check outsole wear every 2-3 weeks. Once tread becomes smooth or wears through to midsole material, traction and cushioning decline rapidly.
Reinforcement Points That Matter
Strategic reinforcement extends shoe life where children’s shoes typically fail first.
Toe Caps: The toe area faces constant impact from kicking, running, and playground activities. Rubber toe caps, additional stitching layers, or protective overlays prevent premature holes.
Heel Counters: The heel cup should be firm enough to provide stability without causing pressure points. Internal heel counters (not visible) often work better than external plastic cups that can crack.
Lace Eyelets: Metal eyelets outlast fabric-only holes. Reinforced fabric around eyelets prevents tearing, especially important for children who pull laces too tight.
Stitching at High-Flex Points: Where the upper meets the sole at the ball of the foot, triple stitching prevents separation. This area flexes thousands of times daily.
Side Panel Reinforcement: Additional layers or overlay pieces on inner and outer sides resist the lateral forces from running and quick direction changes.
Examine these areas before purchasing. Shoes with visible reinforcement typically last 2-3 times longer than basic construction.
How to Choose Comfortable School Shoes
Proper Fit Fundamentals
Correct fit prevents blisters, supports healthy foot development, and ensures children don’t avoid wearing their shoes.
Length Considerations: With the child standing (weight-bearing), check space at the toe. There should be approximately 1-1.5 cm (about a thumb’s width) between the longest toe and the shoe end. This allows for foot expansion during walking and provides growth room without excessive movement.
Heel Security: The heel should stay in place when walking. If the heel slides up and down more than 5mm, the shoe is too large or the wrong shape for your child’s foot. A secure heel prevents blisters and provides proper support.
Topline Comfort: The area where the shoe opening meets the ankle shouldn’t create pressure points. Check for adequate padding around this edge, especially at the Achilles tendon area.
Toe Box Space: Children should be able to wiggle their toes freely. Press gently on the toe box—you should feel slight movement beneath. A cramped toe box can lead to ingrown toenails, hammer toes, and discomfort.
Midfoot Fit: The widest part of the foot should align with the widest part of the shoe. The shoe should feel snug here without pinching or excessive looseness that allows the foot to slide.
Arch Contact: The shoe’s arch should roughly align with the child’s arch, but perfect matching isn’t necessary for healthy feet. The shoe shouldn’t create a large gap under the arch or press uncomfortably.
Always fit shoes later in the day when feet are slightly swollen from activity—this represents the largest foot size your child experiences.
Width and Arch Considerations
Standard width shoes don’t fit all children properly. Width significantly impacts comfort and foot health.
Width Indicators: If the sides of the shoe bulge outward when standing, or if the widest part of the foot hangs over the insole edges, the shoe is too narrow. Conversely, if you can pinch excess material at the sides, width is too generous.
Wide Feet Solutions: Many mainstream brands offer wide (W) or extra-wide (XW) options. For very wide feet, look for brands that naturally run wider rather than just buying larger lengths, which creates too much toe room.
Narrow Feet Challenges: Narrow feet often slip in standard-width shoes. Look for adjustable closures (laces rather than slip-ons) and brands that offer narrow sizing. Additional insole thickness can sometimes help, though this is a limited solution.
High Arches: Children with high arches may experience pressure on the top of the foot from standard-height shoe constructions. Look for shoes with deeper toe boxes and consider removable insoles that allow custom orthotics if recommended by a healthcare provider.
Flat Feet: Most children have naturally flat feet until ages 6-8 as arches develop. Unless a healthcare provider recommends otherwise, supportive but flexible shoes work better than rigid “arch support” shoes, which can interfere with natural development.
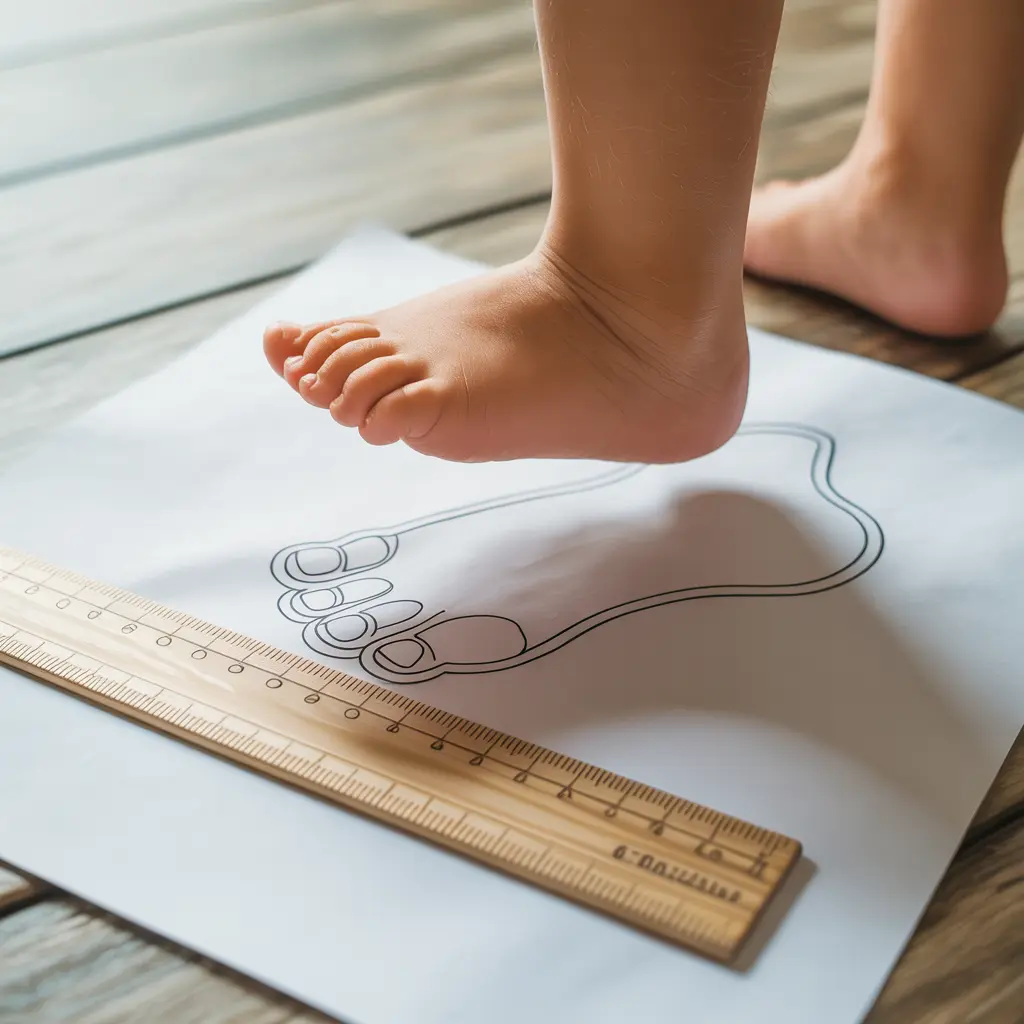
Measuring Width: Place your child’s foot on paper and trace around it. Measure the widest point. Compare this to the shoe’s widest interior point to gauge fit. Width matters as much as length for comfort.
Don’t assume the same width works for both feet—children sometimes have slight differences between left and right feet.
Testing Comfort Before Purchase
Several simple tests reveal comfort issues before committing to purchase.
Walking Test: Have your child walk at least 20-30 steps in the shoes. Watch for limping, altered gait, or obvious discomfort. They should move naturally, not tentatively.
Jumping Test: If school activities include gym class or recess, have your child do a few small jumps. This tests cushioning and reveals whether feet slide forward excessively on landing.
Stair Test: If available, have your child walk up and down a few stairs. This reveals whether the heel stays secure during angled walking and whether the toe box provides adequate clearance.
Sitting-to-Standing: After sitting for 2-3 minutes in the shoes, have your child stand and walk. Sometimes pressure points only become apparent after brief static periods.
Toe Wiggle Check: Ask your child to wiggle their toes while standing. They should be able to spread and move them without restriction.
Pressure Point Scan: Run your finger inside the shoe around the entire opening, checking for rough seams, hard spots, or anything that rubs against skin.
Child’s Feedback: Ask specific questions: “Do you feel any pinching?” “Does this area feel tight?” “Can you feel anything poking or rubbing?” Children often say shoes “feel fine” without noticing minor discomfort that becomes major after hours of wear.
Never dismiss a child’s complaint of discomfort, even if you can’t see an obvious cause. They’re feeling something real.
School Shoe Materials: What Lasts Longest
Leather vs. Synthetic Uppers
Both materials have distinct performance characteristics that affect durability and comfort.
Full-Grain Leather: This is the outer layer of the hide with natural grain intact. It’s the most durable leather type, developing a patina rather than looking worn as it ages. Full-grain leather typically lasts 6-12 months with daily school wear. It breathes better than synthetics and molds to foot shape. The main drawbacks include higher cost and 1-2 week break-in periods. Leather also requires more maintenance (occasional cleaning and conditioning).
Corrected-Grain Leather: The surface is sanded and embossed with an artificial grain. While less expensive than full-grain, it’s also less durable and breathable. Corrected-grain leather can still outlast synthetics but represents mid-tier performance.
Nubuck and Suede: These have been buffed to create a soft surface. They offer comfort and flexibility but scuff easily and stain more readily. Not ideal for most school environments unless your child is particularly careful.
Polyurethane (PU) Leather: Quality PU leather provides good durability at moderate cost. It resists water better than genuine leather and requires no break-in period. However, it may crack after 4-6 months of heavy flexing at stress points. PU doesn’t breathe as well as genuine leather, potentially causing more foot perspiration.
Polyvinyl Chloride (PVC) Leather: Less expensive than PU but also less durable and breathable. PVC tends to crack sooner and feels stiffer. It works for budget-conscious situations where frequent replacement is expected.
Performance Comparison: For maximum durability, full-grain leather edges out synthetics. For water resistance and low maintenance, quality synthetics perform better. For budget-conscious families expecting rapid growth, mid-grade synthetics offer reasonable value.
Consider climate—leather works better in moderate temperatures, while synthetics handle wet conditions more effectively.
Rubber vs. EVA Soles
The sole material dramatically impacts both durability and comfort.
Natural Rubber: Provides excellent durability and traction. Natural rubber soles can last the entire school year even with rough playground use. They grip well on wet surfaces and resist abrasion. Disadvantages include slightly more weight and less cushioning than foam alternatives.
Synthetic Rubber: Performance similar to natural rubber but often more consistent in quality. Many durable school shoes use synthetic rubber compounds designed specifically for abrasion resistance.
EVA (Ethylene-Vinyl Acetate) Foam: This lightweight material offers superior cushioning and shock absorption. It’s common in athletic shoes. However, EVA compresses permanently over time, losing cushioning. It also abrades faster than rubber, especially on rough surfaces like concrete and asphalt. EVA soles typically show significant wear after 2-4 months of daily use.
Dual-Density Soles: Many quality school shoes combine materials—EVA midsole for cushioning with a rubber outsole for durability. This design delivers comfort without sacrificing longevity.
Polyurethane (PU) Soles: PU foam offers better durability than EVA with good cushioning. It’s heavier than EVA but lasts longer. PU works well for school shoes that need to balance comfort and durability.
Thermoplastic Rubber (TPR): This hybrid material combines rubber and plastic properties. It’s lighter than pure rubber and more durable than pure plastic, making it a popular choice for children’s shoes.
Wear Indicators: Check the forefoot and heel areas every few weeks. Once outsole thickness decreases noticeably or smooth spots develop, traction and cushioning diminish rapidly.
For playground-active children, prioritize rubber outsoles. For primarily indoor/hallway use, EVA or dual-density soles may provide adequate durability with better cushioning.
Mesh and Breathable Options
Breathability affects comfort during full school days but must balance with durability needs.
Mesh Panels: Lightweight mesh allows air circulation, reducing heat and moisture buildup. Look for reinforced or double-layer mesh rather than single-layer fabric mesh that tears easily. Strategic placement matters—mesh works well on upper sides and tongue areas but fails quickly on toe boxes.
Perforated Leather: Leather with punched holes provides breathability while maintaining material strength. This option balances durability and ventilation effectively for school use.
Moisture-Wicking Linings: Internal fabric linings treated with moisture-management technology pull perspiration away from skin. These linings help prevent blisters and odor. Check that linings are replaceable or durable—cheap linings deteriorate within months.
Ventilation Ports: Some shoes incorporate small vent holes in less-stressed areas. These improve air circulation without compromising structure.
Breathability Trade-offs: Highly breathable shoes typically sacrifice some weather resistance. Mesh panels let air in but also water. For rainy climates, consider balance rather than maximum ventilation.
Climate Considerations: In hot, dry climates, prioritize breathability to prevent excessive sweating and discomfort. In wet or cold climates, water resistance may outweigh breathability benefits.
Children’s feet perspire more than adults’ proportionally, so some level of breathability benefits most school shoes.
Getting the Right Fit: Sizing Guide
Measuring Your Child’s Feet at Home
Accurate measurements prevent sizing mistakes when shopping online or in stores.
Measurement Steps:
- Timing: Measure feet in the afternoon or evening when they’re at largest size after daily activity.
- Standing Position: Have your child stand with weight evenly distributed on both feet. Feet expand significantly when bearing weight.
- Materials Needed: Blank paper larger than foot, pencil, and ruler or measuring tape.
- Tracing: Place paper on hard floor (not carpet). Have child step on paper. Hold pencil vertical and trace around entire foot, keeping pencil against skin.
- Length Measurement: Measure from heel’s back edge to longest toe’s tip. This may be the big toe or second toe depending on foot shape.
- Width Measurement: Measure across the widest part of the foot (usually across the ball, where toes meet the foot).
- Both Feet: Repeat for the other foot. Many children have one foot slightly larger. Purchase size for the larger foot.
- Add Growth Room: Add 1-1.5 cm to length measurement. This provides appropriate space for toe movement and some growth.
- Size Conversion: Use the total measurement (foot length + growth room) with manufacturer size charts. Sizes vary between brands.
Measurement Frequency: Remeasure every 2-3 months for children ages 5-8, and every 3-4 months for ages 9-14. Growth spurts can occur rapidly.
Common Errors to Avoid: Don’t measure while child is sitting. Don’t rely solely on age-based sizing. Don’t assume the same size works across all brands.
Growth Room Guidelines
Proper growth room balances current fit with allowance for development.
Standard Growth Allowance: 1-1.5 cm beyond the longest toe provides 4-8 weeks of growth room for most children. This represents about a thumb’s width when pressing at the toe box.
Excessive Room Problems: More than 1.5 cm creates too much movement. Feet sliding forward cause blisters, stumbling, and unnatural gait. The shoe also flexes incorrectly when there’s excessive length.
Insufficient Room Issues: Less than 1 cm provides inadequate space for foot expansion during walking and minimal growth buffer. Shoes may become too tight within weeks.
Age-Based Considerations:
- Ages 5-6: Feet may grow 1-1.5 sizes per year; check fit monthly
- Ages 7-10: Growth rate typically 1 size per year; check every 6-8 weeks
- Ages 11-14: Growth varies widely; some children reach adult size, others continue growing; check every 8-12 weeks
Seasonal Factors: Feet often grow more rapidly during summer months. Shoes purchased in August may fit differently by October.
Signs of Outgrown Shoes: Red marks on toes or sides after wear, complaints of numbness or tingling, toes touching the shoe end, child reluctant to wear shoes, blisters at new locations.
Purchase timing matters—buying too early means shoes may not fit when needed; buying too late means wearing outgrown shoes that damage developing feet.
Common Sizing Mistakes to Avoid
Several frequent errors cause poor fit and wasted purchases.
Buying Too Large for Extended Use: Purchasing shoes 2-3 sizes large expecting them to “last longer” creates immediate problems. Children can’t walk properly in oversized shoes, increasing fall risk and causing blisters.
Relying on Past Sizes: “They wore size 2 last year, so size 3 now” ignores actual foot measurements. Growth isn’t always linear, and different brands size differently.
Ignoring Width: Focusing only on length while ignoring width causes discomfort. A longer size doesn’t fix a too-narrow shoe—it just creates extra toe room while maintaining inadequate width.
Skipping the Standing Test: Shoes that fit while sitting may be too small when standing. Always verify fit with the child standing and weight-bearing.
Assuming Both Feet Match: Many children have 1/4 to 1/2 size difference between feet. Always fit to the larger foot and accommodate the smaller foot if needed (with thicker socks or minor insole adjustments).
Prioritizing Style Over Fit: Allowing children to choose poorly fitting shoes because they like the appearance creates problems. Find acceptable styles that fit properly rather than compromising on fit.
Shopping When Rushed: Proper fitting requires time for testing and evaluation. Shopping under time pressure often results in suboptimal choices.
Ignoring Child’s Comfort Feedback: “They’ll break in” doesn’t apply if the shoe is fundamentally wrong for the foot shape. Shoes should be comfortable immediately, with only materials softening during break-in, not fit changing.
Not Accounting for Sock Thickness: If your child typically wears thick socks, bring them to fittings or account for them when measuring.
Take time with sizing. Ill-fitting shoes affect more than comfort—they can impact foot development, posture, and even participation in activities.
Age-Specific School Shoe Recommendations
Elementary School (Ages 5-10)
Younger students have distinct needs based on activity patterns and developmental stages.
Durability Priorities: Elementary students spend significant time on playgrounds, running, climbing, and playing. Toe reinforcement becomes critical. Look for rubber toe caps or multi-layer toe construction. Playground use causes rapid outsole wear—prioritize thick rubber outsoles over foam.
Closure Systems: Velcro closures work well for children still mastering shoelaces (typically through age 6-7). However, Velcro can collect debris and lose grip over time. For children who can manage laces, traditional lacing offers better adjustability and longevity. Elastic laces provide a middle ground.
Support Needs: Feet are still developing through elementary years. Shoes should support natural movement rather than provide rigid structure. Flexible soles that bend at the ball of the foot work better than stiff constructions.
Common Activities: Consider gym class requirements. Some schools specify athletic shoes for physical education. Verify whether one pair can serve all purposes or if separate gym shoes are needed.
Size Changes: Feet grow rapidly at this age. Budget for replacements based on growth in addition to wear-out. Many children need new shoes every 4-6 months due to size changes rather than damage.
Playground Surface Impact: Asphalt and concrete playgrounds wear soles faster than rubber surfaces or grass. If your school has hard surfaces, increase durability expectations.
Weather Considerations: Elementary students may stand in line outside, play in wet areas, and generally expose shoes to weather more than older students. Water-resistant materials become more valuable.
Features That Work Well:
- Reinforced toe caps (rubber or multi-layer)
- Thick rubber outsoles (at least 5mm at forefoot)
- Velcro or secure lace systems
- Easy-clean materials (playground dirt is inevitable)
- Moderate flexibility through the sole
- Cushioned insoles for all-day comfort
Middle School (Ages 11-14)
Older students face different demands and social considerations.
Style Awareness: Middle school students often care significantly about appearance. Finding durable options that meet style preferences becomes important for ensuring consistent wear. Many brand-name athletic shoes combine acceptable styling with durability.
Activity Levels: Playground time typically decreases, but students may walk more between classes, especially in larger schools. Comfort during extended walking becomes more important than extreme durability for some students.
Growth Patterns: Growth spurts vary tremendously at these ages. Some children reach near-adult foot size by 11, others continue growing into late teens. Don’t over-invest in expensive shoes if rapid growth continues.
Dress Code Considerations: Middle schools sometimes enforce stricter dress codes than elementary schools. Verify color requirements (often black or brown), logo restrictions, and style specifications before purchasing.
Sports and Activities: Many middle school students participate in sports. Separate athletic shoes for sports and general school shoes often makes sense to extend the life of each pair.
Locker Room Concerns: Theft occasionally becomes a concern. Extremely expensive shoes may create unnecessary risk or social pressure. Balance quality with practicality.
Developing Preferences: Students this age can articulate comfort issues more clearly. Involve them in fit testing and listen to specific feedback about pressure points, support needs, and comfort.
Features That Work Well:
- Style-appropriate designs that meet dress codes
- Durable but not necessarily maximum-duty construction
- Comfortable cushioning for hallway walking
- Breathable materials (foot odor becomes more significant)
- Color options that match dress code requirements
- Easy on/off features if frequent changes are needed
Special Considerations for Different Feet
Wide Feet and Narrow Feet Solutions
Standard widths don’t accommodate all foot shapes adequately.
Wide Feet Indicators: Bulging at shoe sides, red marks along foot edges, complaints of pinching, visible foot overhang when looking at the shoe from below, or preference for removing shoes immediately when home.
Wide Feet Solutions:
- Seek brands offering W (wide) or XW (extra wide) options
- Some brands naturally run wider (this varies by specific model)
- Avoid pointed toe boxes that crowd wide forefeet
- Look for adjustable closures that accommodate width
- Leather uppers stretch more than synthetics to accommodate width
- Consider removable insoles that provide more internal volume
Narrow Feet Indicators: Heel slippage despite proper length, ability to pinch excess material at shoe sides, foot sliding forward during walking, or laces tightened to last holes with remaining gaps.
Narrow Feet Solutions:
- Look for brands offering N (narrow) sizing
- Laced shoes adjust better than slip-ons or velcro
- Padded heel collars help secure narrow heels
- Insoles can reduce internal volume slightly
- Some brands naturally run narrower
- Avoid slip-on styles that depend on side tension
Width Measurement Importance: Width affects comfort as much as length. Measure the ball width (widest part) and compare to manufacturer specifications when available.
Growth Considerations: Feet don’t just grow longer—they also grow wider. A child with narrow feet at age 6 may have average width by age 10.
High Arches and Flat Feet
Arch shape affects shoe requirements, though extreme measures are rarely needed for healthy feet.
High Arches: Children with high arches may experience pressure on the top of the foot from standard shoe construction. The arch doesn’t contact the ground much, placing more pressure on heel and ball.
High Arch Accommodations:
- Look for deeper toe boxes that don’t press on top of foot
- Cushioning becomes more important since less foot surface contacts ground
- Removable insoles allow custom orthotics if recommended
- Avoid shoes with prominent built-in arch support that creates pressure points
- Laced shoes allow adjustable pressure across the top of foot
Flat Feet in Children: Most children under age 6 have flat feet naturally. Arches typically develop between ages 6-8. True flat feet persist after this developmental period.
Flat Feet Considerations:
- Flexible, supportive shoes work better than rigid “support” shoes for most children
- Arch supports are rarely necessary unless specifically recommended by a healthcare provider
- Focus on proper heel support and moderate flexibility
- Avoid extremely flat, unsupportive shoes (like ballet flats or very thin sneakers)
- Allow natural foot strengthening rather than relying on external support
When to Seek Professional Guidance: If your child experiences pain, develops unusual wear patterns (extreme inward or outward sole wear), walks with unusual gait, or shows reluctance to participate in normal activities, consult a pediatrician or podiatrist before making shoe decisions based on arch shape alone.
Most children’s feet function well in properly fitting, moderately supportive shoes regardless of arch height.
Sensory Sensitivities
Some children have sensory processing differences that affect shoe tolerance.
Common Sensory Issues with Shoes:
- Sensitivity to seams, especially at toe area
- Discomfort from texture changes (different materials touching foot)
- Intolerance of snugness around foot opening
- Extreme sensitivity to shoe break-in periods
- Preference for very tight or very loose fit
- Issues with specific closure types
Accommodations for Sensory Sensitivities:
- Seamless or flat-seam construction reduces irritation
- Consistent interior textures minimize texture sensitivity
- Soft, padded collars prevent ankle/top-of-foot discomfort
- Minimal break-in shoes (many synthetics) avoid the adaptation period
- Adjustable closures allow child to control pressure
- Trying shoes with socks that will be worn helps predict actual wear experience
Successful Strategies:
- Once you find a shoe that works, buy multiple pairs or the same model repeatedly
- Introduce new shoes gradually (start with short wear periods)
- Turn socks inside-out to place seams away from skin
- Allow children to participate in selection and articulate specific concerns
- Consider consulting an occupational therapist for significant sensory challenges
Sensory issues aren’t about being “picky”—they represent real neurological differences in processing sensations. Accommodating these needs prevents daily discomfort and battles.
How Long Should School Shoes Last
Realistic lifespan expectations help with budget planning and quality assessment.
Average Lifespan by Quality Tier:
Budget Shoes ($20-40): Typically last 2-3 months with daily wear. Materials and construction prioritize low cost over durability. May be appropriate if rapid growth is expected or for backup pairs.
Mid-Range Shoes ($40-70): Usually last 4-6 months with regular school use. Represent best value for most families, balancing adequate durability with reasonable cost.
Premium Shoes ($70-100+): Often last 6-9 months or full school year. Worth the investment if child’s feet aren’t growing rapidly and activity levels are high.
Factors Affecting Lifespan:
Activity Level: Children who are very active at recess, play sports, or participate in running games wear out shoes 30-50% faster than primarily sedentary students.
School Surfaces: Schools with asphalt playgrounds cause faster outsole wear than rubber or grass surfaces. Rough concrete hallways accelerate wear versus smooth floors.
Gait Patterns: Some children naturally drag their toes or have heavy heel strikes that create faster wear in specific areas.
Care and Maintenance: Shoes that are cleaned regularly, allowed to dry between wears, and stored properly last longer.
Rotation: Alternating between two pairs extends total lifespan of both pairs beyond what one pair worn continuously would provide.
Growth Rate: Rapidly growing feet may outgrow shoes before they wear out. Ages 5-8 typically see the fastest growth.
Climate: Wet climates that keep shoes damp accelerate material breakdown. Very hot climates can degrade certain glues and materials faster.
Realistic Expectations: If “quality” shoes fall apart within 4-6 weeks, that indicates poor construction. If mid-range shoes make it 3-4 months with active daily use, that’s reasonable performance. Premium shoes should survive at least one semester of regular wear.
Budget accordingly—most school-age children need 2-3 pairs per year accounting for both wear and growth.
Maintaining School Shoes for Maximum Lifespan
Simple maintenance extends the working life of school shoes significantly.
Daily Care:
- Remove dirt and debris when your child comes home
- Loosen laces or unfasten closures completely before removal (pulling shoes off while fastened stresses materials)
- Allow shoes to air dry if damp—stuff with newspaper to absorb moisture and maintain shape
- Alternate between two pairs if possible, allowing 24 hours between wears for complete drying
Weekly Maintenance:
- Wipe down with damp cloth to remove accumulated dirt
- Check laces for fraying and replace if worn (weak laces break at inconvenient times)
- Inspect soles for embedded rocks or debris that can damage materials
- Look for early signs of wear (loose stitching, sole separation, torn materials)
Cleaning by Material:
Leather: Wipe with damp cloth, allow to dry, apply leather conditioner monthly. Address scuffs with appropriate leather cleaner or polish.
Synthetic Leather: Wipe with damp cloth and mild soap. Dry thoroughly. No conditioning needed.
Canvas/Fabric: Many canvas shoes can be machine-washed on gentle cycle in cold water, then air dried. Remove insoles first. Don’t machine dry—heat damages glues.
Mesh: Spot clean with mild soap and soft brush. Avoid excessive water saturation.
Preventive Measures:
- Apply water-repellent spray to appropriate materials (follow product instructions)
- Use shoe trees or stuff with paper to maintain shape when not worn for extended periods
- Address minor damage immediately (loose stitching can be hand-repaired before it worsens)
- Replace insoles if they compress significantly (maintains cushioning without replacing entire shoe)
Storage:
- Store in dry, ventilated area (not plastic bags or enclosed spaces where moisture can’t escape)
- Keep out of direct sunlight (UV degrades many materials)
- Don’t store near heat sources (damages glues and some materials)
What Not to Do:
- Don’t put leather shoes in washing machine (destroys material)
- Don’t use high heat for drying (damages glues)
- Don’t ignore minor damage until it becomes major
- Don’t store damp shoes (promotes mold and material breakdown)
Proper maintenance adds 20-40% to shoe lifespan—the equivalent of getting 5-6 months instead of 4 months from the same pair.
Budget-Friendly Strategies Without Sacrificing Quality
Managing school shoe costs while maintaining adequate quality requires planning.
Timing Purchases Strategically:
- Major sales typically occur in January-February (winter clearance) and July-August (back-to-school promotions)
- Previous season’s colors often sell at 30-50% discount despite identical construction
- End-of-season sales provide opportunities for next year’s purchases if you can predict sizing
Quality Assessment for Value:
- Construction matters more than brand names—examine stitching, materials, and reinforcement
- Mid-range brands often provide 80% of premium performance at 50% of cost
- Store brands from major retailers sometimes match name-brand quality at lower prices
Cost-Per-Wear Calculation:
- A $60 pair lasting 6 months = $10/month
- A $35 pair lasting 2 months = $17.50/month
- A $80 pair lasting 8 months = $10/month
- Cheaper isn’t always more economical if replacement frequency increases
Smart Shopping Practices:
- Buy one quality pair instead of two cheap pairs—total cost is often similar with less hassle
- Consider previous-generation models of popular shoes (last year’s version at clearance)
- Warehouse clubs sometimes offer quality brands at reduced prices
- Outlet stores provide name brands at discount, though check for “outlet-specific” lower-quality versions
When Budget Shoes Make Sense:
- Growth spurts are occurring rapidly
- Backup pair for rotation (reduces per-pair wear)
- Child is particularly gentle on footwear
- Dress code may change next year
When to Invest in Quality:
- Child is very active (sports, playground-heavy)
- Foot size has stabilized
- School surfaces are particularly abrasive
- Previous budget purchases failed quickly
Alternative Approaches:
- Buy slightly used quality shoes from consignment or online resale if comfortable with pre-owned (children often outgrow before significant wear)
- Trade with friends whose children wear different sizes
- Some community organizations provide assistance with school needs
Hidden Costs to Consider:
- Replacement time and effort has value
- Shipping costs for returns when online purchases don’t fit
- Premium for rush shipping if shoes wear out unexpectedly
- Child’s discomfort or fit issues from compromising quality
Budget for school shoes as part of overall school costs—adequate footwear is as important as supplies for your child’s daily comfort and wellbeing.
Common School Shoe Mistakes Parents Make
Avoiding these frequent errors saves money and prevents discomfort.
Mistake 1: Buying Too Far in Advance
Purchasing shoes in June for September seems efficient, but feet may grow significantly over summer. Buy within 2-3 weeks of when shoes will be worn.
Mistake 2: Hand-Me-Downs Without Assessment
Shoes conform to the original wearer’s foot shape and gait pattern. Worn-in shoes may not support the new wearer properly. Interior cushioning may be compressed. Only pass down shoes with minimal wear.
Mistake 3: Ignoring Dress Codes
Assuming “any closed-toe shoe” meets requirements without checking specific rules leads to having to re-purchase. Verify color, style, and logo restrictions before buying.
Mistake 4: Shopping Without the Child
Ordering online without the child trying shoes creates high return rates. Feet vary enough that sizing charts provide estimates, not guarantees. If shopping online is necessary, verify return policies.
Mistake 5: Believing Break-In Fixes Fit Issues
Break-in softens materials but doesn’t change fundamental fit. If shoes feel too narrow, too short, or create pressure points when new, these problems persist or worsen.
Mistake 6: Prioritizing Price Over Value
The cheapest option often costs more over time through frequent replacement. Balance initial cost with expected durability.
Mistake 7: Assuming the Same Size Across Brands
Size 2 in Brand A may fit differently than size 2 in Brand B. Always verify fit rather than ordering based on past sizes in different brands.
Mistake 8: Buying Only One Pair
A single pair worn daily doesn’t dry completely between wears, accelerating material breakdown. Two pairs rotated often outlast one pair by more than 2:1.
Mistake 9: Ignoring Early Wear Signs
Waiting until shoes have holes or completely smooth soles before replacement means your child has been uncomfortable for weeks. Replace when wear becomes significant, not catastrophic.
Mistake 10: Not Involving the Child Appropriately
Very young children can’t articulate fit issues, but school-age children can. Asking specific questions about comfort reveals problems visual inspection might miss.
Learn from these common mistakes to make better purchasing decisions.
When to Replace School Shoes
Knowing when shoes have reached the end of useful life prevents problems.
Definite Replacement Indicators:
- Holes in uppers that expose socks or skin
- Sole separation (visible gap between upper and sole)
- Outsole worn through to reveal midsole foam
- Heel counter collapsed or broken (heel area no longer firm)
- Toe area worn through or torn
- Ripped or separated stitching at structural seams
Strong Replacement Indicators:
- Smooth outsoles with no remaining tread pattern (slip hazard)
- Insole cushioning completely compressed (you can feel the ground)
- Child complains of discomfort after previously finding shoes comfortable
- Visible foot overhang at sides (width now too narrow)
- Less than 0.5 cm growth room remaining (too tight)
- Persistent odor even after cleaning and airing (bacteria embedded in materials)
Moderate Replacement Indicators:
- Noticeable creasing and material breakdown
- Laces frayed but replaceable
- Scuff marks and cosmetic wear (may still function fine)
- Insoles removable and replaceable
- Minor sole wear but adequate tread remains
Fit-Related Replacement Timing:
- Toes touching the end of the shoe
- Red marks on feet after wear
- Child reluctance to wear shoes
- Complaints of numbness or pins-and-needles sensation
- Blisters in new locations (indicating changed fit)
Seasonal Considerations:
Replace before shoes fail completely. Running out of functional shoes mid-week creates stress and rush purchases. When shoes show strong replacement indicators, begin shopping process rather than waiting for complete failure.
Growth Check Schedule:
- Ages 5-7: Check fit every 4-6 weeks
- Ages 8-10: Check fit every 6-8 weeks
- Ages 11-14: Check fit every 8-12 weeks
Keep replacement shoes on hand if possible. Having a backup pair prevents emergencies when shoes fail suddenly.
Comparison Tables
School Shoe Materials Durability Comparison
| Material | Durability Rating | Typical Lifespan | Breathability | Water Resistance | Break-In Time | Best For |
|---|---|---|---|---|---|---|
| Full-Grain Leather | Excellent | 6-12 months | Good | Moderate | 1-2 weeks | Maximum durability, formal requirements |
| Synthetic Leather (PU) | Good | 4-6 months | Fair | Good | Minimal | Water exposure, quick comfort |
| Canvas | Fair | 2-4 months | Excellent | Poor | Minimal | Warm climates, casual dress codes |
| Mesh Panels | Fair | 3-5 months | Excellent | Poor | None | Hot weather, high breathability needs |
| Rubber Outsole | Excellent | 6-10 months | N/A | Excellent | N/A | All purposes, maximum traction |
| EVA Foam Sole | Fair | 2-4 months | N/A | Fair | N/A | Cushioning priority, indoor use |
Age-Appropriate Feature Priorities
| Age Group | Top Priority | Second Priority | Third Priority | Acceptable Trade-offs |
|---|---|---|---|---|
| Ages 5-6 | Easy on/off (velcro) | Toe reinforcement | Durability | Style, precise fit (growing rapidly) |
| Ages 7-8 | Durability | Comfort | Proper fit | Style preferences |
| Ages 9-10 | Proper fit | Durability | Style options | Ease of use |
| Ages 11-12 | Style compliance | Proper fit | Comfort | Maximum durability (may outgrow) |
| Ages 13-14 | Style | Comfort | Fit | Extreme durability (if near adult size) |
Cost vs. Lifespan Value Analysis
| Price Range | Typical Lifespan | Cost Per Month | Best Use Case | Value Rating |
|---|---|---|---|---|
| $20-35 | 2-3 months | $10-17.50 | Rapid growth periods, backup pairs | Fair |
| $35-50 | 3-5 months | $7-16.60 | Average use, moderate activity | Good |
| $50-70 | 4-6 months | $8.30-17.50 | Active children, stable sizing | Excellent |
| $70-100 | 6-9 months | $7.70-16.60 | High activity, stable foot size | Excellent |
| $100+ | 8-12 months | $8.30-12.50 | Adult-size feet, very active, full year coverage | Good (if sizing stable) |
Checklists
Pre-Purchase School Shoe Checklist
Before Shopping:
- Measure both feet with child standing
- Check current shoes for wear patterns
- Review school dress code requirements
- Note any comfort issues with current shoes
- Determine budget range
- Check for upcoming sales or promotions
- Identify what worked/didn’t work with previous shoes
At the Store or When Ordering:
- Verify correct size with growth room (1-1.5 cm)
- Check that both feet fit properly (use larger foot measurement)
- Examine construction quality (stitching, sole attachment)
- Verify reinforcement at toe and heel
- Check material quality (uppers and sole)
- Test closure system (laces, velcro function properly)
- Confirm shoe bends at ball of foot
- Verify heel stays secure when walking
Fit Testing:
- Child walks 20-30 steps
- Child does small jumps
- Check toe wiggle room
- Press toe box for movement space
- Check for pressure points around opening
- Verify no slipping at heel
- Ask child specific comfort questions
- Check fit with typical socks
Final Verification:
- Meets dress code requirements
- Appropriate for activity level
- Fits current budget
- Return policy understood (if buying online)
- Care requirements acceptable
Monthly Shoe Maintenance Checklist
Inspect:
- Check outsole for wear, smooth spots, or damage
- Examine stitching for loose threads or separation
- Look for holes or tears in upper materials
- Check laces for fraying
- Verify closures still function properly (velcro grip, buckles)
- Assess insole condition (compression, odor)
Clean:
- Remove dirt and debris from uppers
- Clean soles and remove embedded rocks
- Wipe interior if accessible
- Apply appropriate cleaner for material type
- Allow complete drying before next wear
Assess Fit:
- Check growth room (should maintain 1-1.5 cm)
- Look for red marks on child’s feet after wear
- Ask about any new discomfort
- Verify heel still fits securely
Maintenance Tasks:
- Apply leather conditioner (if leather)
- Replace laces if worn
- Address minor repairs (loose stitching)
- Consider insole replacement if compressed
Plan Ahead:
- Estimate remaining useful lifespan
- Begin shopping if replacement needed within 4-6 weeks
- Note what works well for next purchase
Decision Frameworks
School Shoe Selection Decision Tree
Start Here: What is your child’s primary school environment?
→ Mostly outdoor (playground-heavy elementary):
- Prioritize: Reinforced toe caps, thick rubber outsoles, durable uppers
- Materials: Leather or quality synthetic uppers, rubber outsoles
- Construction: Double-stitched, toe/heel reinforcement
- Budget allocation: Mid to premium range for durability
→ Mixed indoor/outdoor (typical elementary to middle school):
- Prioritize: Balance of durability and comfort, moderate reinforcement
- Materials: Synthetic leather or mid-grade leather, dual-density soles
- Construction: Standard quality stitching, basic reinforcement
- Budget allocation: Mid-range provides best value
→ Primarily indoor (hallway-focused middle school):
- Prioritize: Comfort, style compliance, moderate durability
- Materials: Breathable synthetics, cushioned soles acceptable
- Construction: Standard construction adequate
- Budget allocation: Budget to mid-range works well
Next: What is your child’s activity level?
→ Very active (sports, running, high-energy):
- Add durability tier: +1 level from environment baseline
- Verify: Extra toe reinforcement, thicker outsoles
- Consider: Two pairs for rotation
→ Average activity:
- Match durability to environment needs
- Standard construction adequate
→ Lower activity:
- Durability less critical
- Comfort and fit become primary concerns
- Budget options may work if quality construction present
Then: What is your child’s growth pattern?
→ Rapid growth (sizing up every 2-3 months):
- Budget allocation: Mid-range maximum (will outgrow before wearing out)
- Don’t over-invest in premium durability
- Buy closer to when needed
→ Moderate growth (sizing up every 4-6 months):
- Budget allocation: Mid to premium based on activity level
- Balance investment with expected use period
→ Stable sizing (adult size or slow growth):
- Budget allocation: Premium if high activity (will use full lifespan)
- Investment in durability pays off
Finally: Special considerations?
→ Dress code restrictions:
- Verify color/style compliance before other factors
- Ensure chosen options meet requirements
→ Fit challenges (wide, narrow, high arch):
- Prioritize fit over other features
- May need to increase budget for specialty sizing
- Specific brands may be necessary
→ Sensory sensitivities:
- Prioritize seamless construction, familiar materials
- May override other decision factors
- Once successful model found, repeat purchase
Your Optimal School Shoe Profile:
[Environment needs] + [Activity level] + [Growth considerations] + [Special factors] = Recommended tier and features
1. How much room should be in the toe of school shoes?
School shoes should have approximately 1-1.5 cm (about a thumb’s width) of space between your child’s longest toe and the end of the shoe when standing. This provides room for feet to expand during walking and allows for 4-8 weeks of growth. Press gently on the toe box while your child stands—you should feel slight movement beneath your thumb. More than 1.5 cm creates excessive movement that causes blisters and affects natural walking patterns. Less than 1 cm provides insufficient space for foot expansion and minimal growth buffer.
To verify properly, have your child stand with weight evenly distributed on both feet. The extra space should be present but the shoe shouldn’t feel loose overall. The heel should stay secure without slipping more than 5mm when walking.
2. How often should you replace school shoes for growing kids?
Replacement timing depends on both wear and growth. Most school shoes last 4-6 months with daily wear before showing significant damage (worn soles, structural breakdown, or reduced cushioning).
However, children’s feet grow at different rates:
Ages 5-7: Often need new sizes every 3-4 months due to rapid growth
Ages 8-10: Typically need new sizes every 4-6 months
Ages 11-14: Growth varies widely; some stabilize at adult sizes, others continue growing every 4-6 months
Check fit monthly by measuring the space at the toe. When less than 0.5 cm remains, or when red marks appear on feet after wear, replacement is needed regardless of shoe condition. Budget for 2-3 pairs per school year for most elementary-age children, accounting for both wear and growth.
3. Are expensive school shoes worth it for kids who grow quickly?
For children experiencing rapid growth spurts (outgrowing shoes every 2-3 months), premium-priced shoes often don’t provide sufficient value. Mid-range shoes ($40-70) typically offer the best balance—adequate quality to last 4-6 months without overinvesting in shoes that may be outgrown before wearing out.
However, premium shoes become worthwhile when:
Child’s foot size has stabilized
Previous budget shoes failed within 6-8 weeks from damage (not outgrowing)
Child is extremely active, causing rapid wear
You can pass shoes to younger siblings
Calculate cost-per-wear: a $60 pair lasting 5 months provides better value than a $30 pair lasting 2 months. Focus on construction quality (stitching, materials, reinforcement) rather than brand names when evaluating value.
4. What’s the difference between school shoes and regular sneakers?
School shoes and regular athletic sneakers share many features, but school shoes typically emphasize:
Dress code compliance: School shoes often come in required colors (black, brown, navy) and conservative designs without prominent logos or bright colors that violate dress codes.
All-day durability: School shoes prioritize construction that withstands 6-8 hours of continuous wear across varied surfaces, while some athletic sneakers focus more on specific sport performance.
Formal appearance: Many schools require shoes that look more dressy than athletic, even if construction is similar.
That said, many athletic sneakers function perfectly as school shoes if they meet dress code requirements. The key factors—proper fit, durable construction, adequate support—matter more than whether shoes are labeled “school shoes” or “sneakers.” Always verify your school’s specific requirements before purchasing.
5. Should school shoes be leather or can synthetic materials work well?
Both leather and quality synthetic materials work well for school shoes, each with distinct advantages:
Leather advantages: Full-grain leather typically lasts 6-12 months with proper care, develops character rather than looking worn, breathes better, and molds to foot shape over time. Best for maximum durability and formal requirements.
Leather disadvantages: Higher initial cost, requires 1-2 week break-in period, needs maintenance (conditioning), doesn’t handle wet conditions as well.
Quality synthetic advantages: Lower cost, minimal or no break-in, better water resistance, easier maintenance, consistent sizing (leather can stretch).
Synthetic disadvantages: May crack after 4-6 months of heavy flexing, generally less breathable, doesn’t develop patina like leather.
For most families, quality synthetic materials provide adequate durability at better value, especially for rapidly growing feet. Choose leather when maximum durability is needed and foot size has stabilized.
6. How can I tell if school shoes are high quality before buying?
Assess quality by examining specific construction elements:
Stitching: Look for double or triple stitching at stress points, especially where upper meets sole. Thread should be tight and even without loose ends.
Sole attachment: Stitched soles outlast glued-only soles significantly. At minimum, look for combination stitching and adhesive.
Materials: Press the upper material—it should feel substantial, not thin or papery. Bend the sole—it should flex at the ball but resist twisting through the midfoot.
Reinforcement: Check for rubber toe caps or multi-layer construction at toe and heel areas where children’s shoes typically fail first.
Interior finishing: Quality shoes have smooth interior seams, attached linings (not loose), and formed insoles that won’t slide around.
Hardware: Metal eyelets outlast fabric-only holes. Velcro should feel strong, not weak or already separating.
Brand consistency: Research whether the specific model has quality control issues. Some “quality” brands produce budget lines with reduced construction standards.
Price doesn’t always indicate quality—examine actual construction rather than relying solely on cost or brand names.
7. Can kids wear the same school shoes for gym class?
Whether one pair works for both classroom and gym depends on school requirements and the shoes selected.
Many schools allow athletic-style shoes that meet dress codes to serve both purposes. This works well with:
Quality athletic shoes in approved colors
Durable construction suitable for both uses
Adequate cushioning for physical activity
Proper traction for gym floors
However, some schools specifically require:
Separate indoor gym shoes to protect gym floor surfaces
Non-marking soles for gymnasiums
Different color schemes for gym vs. classroom
Advantages of separate shoes: Each pair lasts longer since wear is distributed, gym shoes can be optimized for activity, classroom shoes stay cleaner.
Disadvantages of separate shoes: Additional cost, children must remember to bring gym shoes, storage space needed.
If your child is very active during recess and gym, two pairs (rotating even if the same style) significantly extends total shoe lifespan beyond what one pair provides.
8. What should I do if school shoes cause blisters?
Blisters indicate friction from movement between foot and shoe, signaling fit or break-in issues.
Immediate steps:
Verify proper size—shoes too large or too small both cause blisters
Check that socks don’t have bunching or thick seams
Apply adhesive padding (moleskin or gel protectors) at blister locations
Allow blisters to heal before wearing shoes for full days
Common causes and solutions:
Heel blisters: Usually indicate loose heel fit. Try tighter lacing, heel grip pads, or thicker socks. If blisters persist, the shoe shape doesn’t match your child’s heel.
Toe blisters: Often from shoes too small (toes cramped) or too large (foot slides forward). Remeasure and adjust size.
Side blisters: Typically indicate width issues. Shoes may be too narrow (causing pressure) or too wide (causing excessive movement).
New shoe break-in: Some materials require break-in. Wear new shoes for short periods initially (1-2 hours) before committing to full days.
When to replace: If blisters continue after addressing fit issues and allowing reasonable break-in time (1 week), the shoes don’t suit your child’s foot shape. Continuing to wear ill-fitting shoes risks more serious problems.
9. Do children really need arch support in school shoes?
Most healthy children don’t need specialized arch support in school shoes. Children’s feet develop naturally through ages 6-8 as arches form.
For healthy feet: Shoes should provide moderate support—flexible enough to allow natural foot strengthening but structured enough to prevent excessive pronation (inward rolling). Look for:
Firm heel counter for stability
Sole that flexes at ball of foot
Moderate cushioning
Proper fit that doesn’t allow excessive foot movement
Avoid: Extremely rigid arch supports that prevent natural foot movement and muscle development.
When specialized support may be needed:
Healthcare provider specifically recommends orthotics
Child experiences foot pain during normal activities
Extreme flat feet persist beyond age 8 with functional issues
Diagnosed conditions requiring support (rare)
Flat feet in children: Most children under age 6 have flat feet naturally. This is normal development, not a problem requiring correction. Unless a healthcare provider identifies specific concerns, regular supportive shoes without specialized arch supports work well.
If you have concerns about your child’s foot development or gait patterns, consult a pediatrician or podiatrist before purchasing shoes with significant arch support features.
10. How do I measure my child’s feet accurately at home for online shoe shopping?
Accurate home measurement reduces returns when ordering school shoes online.
Materials needed: Blank paper larger than foot, pencil, ruler or measuring tape, hard floor surface (not carpet).
Measurement steps:
Timing: Measure in afternoon or evening when feet are largest after daily activity.
Preparation: Have child wear socks they’ll wear with shoes (thickness affects fit).
Positioning: Place paper on hard floor. Have child stand on paper with weight evenly distributed on both feet.
Tracing: Hold pencil vertically and trace around entire foot, keeping pencil against skin throughout. Accuracy matters—don’t angle the pencil.
Measure length: Use ruler to measure from heel’s back edge to longest toe tip (may be big toe or second toe).
Measure width: Measure across the widest part of foot (usually at the ball where toes meet foot).
Both feet: Repeat entire process for other foot. Many children have slight size differences.
Add growth room: Add 1-1.5 cm to the longest measurement.
Compare to size charts: Use total measurement (foot length + growth room) with brand’s specific size chart. Sizing varies between manufacturers.
Verify return policies: Before ordering, confirm you can return or exchange if fit isn’t correct.
Pro tips: Take photos of tracing with measurements visible for reference. If between sizes, order the larger size. If reviews consistently mention sizing runs large or small, adjust accordingly.




Leave a Reply